作者:Not-Only-For曾广超 | 来源:互联网 | 2023-05-19 06:59
最近一段时间一直在研究高可用高并发负载均衡分布式集群等技术,先前发布了lvs基于网络第四次协议搭建的小集群,现在用空刚好搭建了一个基于nginx搭建的小集群。我准备了四台机器,情况
最近一段时间一直在研究高可用高并发负载均衡分布式集群等技术,先前发布了lvs基于网络第四次协议搭建的小集群,现在用空刚好搭建了一个基于nginx搭建的小集群。
我准备了四台机器,情况如下
|
机器名称
|
机器IP
|
安装软件
|
角色
|
虚拟ip
|
描述
|
|
vmm01
|
192.168.252.11
|
Nginx、keepalived
|
Nginx主机
|
192.168.252.200
|
反向代理到tomcat1和tomcat2
|
|
vmm04
|
192.168.252.14
|
Nginx、keepalived
|
Nginx备机
|
主机挂了切换虚拟ip 192.168.252.200
|
反向代理到tomcat1和tomcat2
|
|
vmm02
|
192.168.252.12
|
Tomcat
|
Tomcat1
|
无
|
|
|
vmm03
|
192.168.252.13
|
Tomcat
|
Tomcat2
|
无
|
|
分别修改2太子服务器tomcat目录下的webapps/ROOT/index.jsp修改启动的web服务器
vmm02 index.jsp页面修改如下:
<html>
<body>
vmm02  SESSIONID <%=session.getId()%>
<br>
<%
 Integer num=(Integer)session.getAttribute("num");
 if(num==null){
   session.setAttribute("num",1);
 }else{
   session.setAttribute("num",num+1);
 }
%>

<%=session.getAttribute("num")%>
body>
html>
vmm03 index.jsp页面修改如下:
<html>
<body>
vmm03  SESSIONID <%=session.getId()%>
<br>
<%
 Integer num=(Integer)session.getAttribute("num");
 if(num==null){
   session.setAttribute("num",1);
 }else{
   session.setAttribute("num",num+1);
 }
%>

<%=session.getAttribute("num")%>
body>
html>
配置完成后可以分别启动tomcat后查看网页效果。
二.分别在vmm01和vmm04上安装配置nginx(注意2台机器都要配置)
1 安装GCC编译器等工具并编译nginx(我安装的是基于nginx淘宝开发的tengine)
a)yum install gcc openssl-devel pcre-devel zlib-devel
b)wget https://github.com/openresty/echo-nginx-module/archive/v0.60.tar.gz
c)wget http://tengine.taobao.org/download/tengine-2.1.2.tar.gz
d)tar zxf v0.60.tar.gz
e)tar zxf tengine-2.1.2.tar.gz
f)./configure --add-module=/root/echo-nginx-module-0.60
make && make install
2 配置为系统服务
在 /etc/init.d文件夹下添加nginx文件,文件内容脚本如下
****按i键为输入状态后!!!!****
#!/bin/sh
#
# nginx - this script starts and stops the nginx daemon
#
# chkconfig:   - 85 15
# description:  Nginx is an HTTP(S) server, HTTP(S) reverse \
#               proxy and IMAP/POP3 proxy server
# processname: nginx
# config:      /etc/nginx/nginx.conf
# config:      /etc/sysconfig/nginx
# pidfile:     /var/run/nginx.pid

# Source function library.
. /etc/rc.d/init.d/functions

# Source networking configuration.
. /etc/sysconfig/network

# Check that networking is up.
[ "$NETWORKING" = "no" ] && exit 0

#####################################
nginx="/usr/local/nginx/sbin/nginx"
#####################################
prog=$(basename $nginx)

#####################################
NGINX_CONF_FILE="/usr/local/nginx/conf/nginx.conf"
#####################################

[ -f /etc/sysconfig/nginx ] && . /etc/sysconfig/nginx

lockfile=/var/lock/subsys/nginx

make_dirs() {
   # make required directories
   user=`nginx -V 2>&1 | grep "configure arguments:" | sed 's/[^*]*--user=\([^ ]*\).*/\1/g' -`
   options=`$nginx -V 2>&1 | grep 'configure arguments:'`
   for opt in $options; do
       if [ `echo $opt | grep '.*-temp-path'` ]; then
           value=`echo $opt | cut -d "=" -f 2`
           if [ ! -d "$value" ]; then
               # echo "creating" $value
               mkdir -p $value && chown -R $user $value
           fi
       fi
   done
}

start() {
    [ -x $nginx ] || exit 5
    [ -f $NGINX_CONF_FILE ] || exit 6
    make_dirs
    echo -n $"Starting $prog: "
    daemon $nginx -c $NGINX_CONF_FILE
    retval=$?
    echo
    [ $retval -eq 0 ] && touch $lockfile
    return $retval
}

stop() {
    echo -n $"Stopping $prog: "
    killproc $prog -QUIT
    retval=$?
    echo
    [ $retval -eq 0 ] && rm -f $lockfile
    return $retval
}

restart() {
    configtest || return $?
    stop
    sleep 1
    start
}

reload() {
    configtest || return $?
    echo -n $"Reloading $prog: "
    killproc $nginx -HUP
    RETVAL=$?
    echo
}

force_reload() {
    restart
}

configtest() {
  $nginx -t -c $NGINX_CONF_FILE
}

rh_status() {
    status $prog
}

rh_status_q() {
    rh_status >/dev/null 2>&1
}

case "$1" in
    start)
        rh_status_q && exit 0
        $1
        ;;
    stop)
        rh_status_q || exit 0
        $1
        ;;
    restart|configtest)
        $1
        ;;
    reload)
        rh_status_q || exit 7
        $1
        ;;
    force-reload)
        force_reload
        ;;
    status)
        rh_status
        ;;
    condrestart|try-restart)
        rh_status_q || exit 0
            ;;
    *)
        echo $"Usage: $0 {start|stop|status|restart|condrestart|try-restart|reload|force-reload|configtest}"
        exit 2
esac
添加该内容后可以通过如下命令启动nginx:
service nginx start|stop|reload
如果想配置开机启动可以如下配置
chmod +x nginx
chkconfig –add nginx
chkconfig nginx on
chkconfig –list nginx
3 修改配置文件,默认安装在/usr/local目录下
在/usr/local/nginx/conf目录下修改nginx.conf文件如下:
#user  nobody;
worker_processes  2;

#error_log  logs/error.log;
#error_log  logs/error.log  notice;
#error_log  logs/error.log  info;

#pid        logs/nginx.pid;


events {
    worker_connections  1024;
}

http {
    include       mime.types;
    default_type  application/octet-stream;

    #log_format  main  '$remote_addr - $remote_user [$time_local] "$request" '
    #                  '$status $body_bytes_sent "$http_referer" '
    #                  '"$http_user_agent" "$http_x_forwarded_for"';

    #access_log  logs/access.log  main;

    sendfile        on;
    #tcp_nopush     on;

    #keepalive_timeout  0;
    keepalive_timeout  65;

    #gzip  on;

    upstream tomcat{
      server 192.168.252.12:8080;
      server 192.168.252.13:8080;
      check interval=3000 rise=2 fall=5 timeout=1000 type=http;
      check_http_send "HEAD / HTTP/1.0\r\n\r\n";
      check_http_expect_alive http_2xx http_3xx;
    }

    server {
        listen       80;
        server_name  192.168.252.200;

        #charset koi8-r;

        #access_log  logs/host.access.log  main;

        location / {
         proxy_pass http://tomcat;
    }

        location /status {
            check_status;
        }

    }

}
三.vmm01和vmm02安装及配置keepalived
直接通过yum安装keepalived
yum -y install keepalived
默认配置文件在/etc/keepalived/keepalived.conf
vmm01文件keepalived.conf修改如下:
! Configuration File for keepalived

global_defs {
   router_id LVS_MASTER
}

vrrp_instance VI_1 {
    state MASTER
    interface eth0
    virtual_router_id 51
    priority 100
    advert_int 1
    authentication {
        auth_type PASS
        auth_pass 1111
    }
    virtual_ipaddress {
        192.168.252.200
    }
}
vmm02下文件keepalived.conf修改如下:
! Configuration File for keepalived

global_defs {
   router_id LVS_BACKUP
}

vrrp_instance VI_1 {
    state BACKUP
    interface eth0
    virtual_router_id 51
    priority 50
    advert_int 1
    authentication {
        auth_type PASS
        auth_pass 1111
    }
    virtual_ipaddress {
        192.168.252.200
    }
}
四.测试开始
在vmm02和vmm03下分别开启tomcat服务
在vmm01和vmm04下分别开启nginx和keepalived服务
分别关闭vmm01和vmm04上的nginx和keepalived服务可以看到访问虚拟ip依然可以轮询访问tomcat
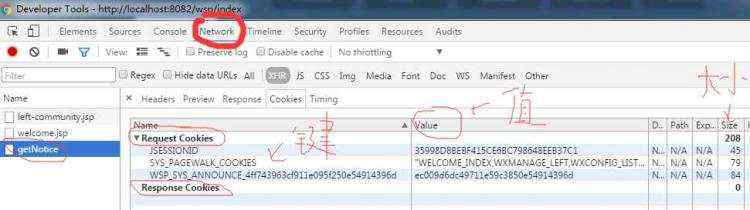
效果如下:由于我配置了memcache的session同步所以sessionid相同,你们没有配置sessionid会不通的,下次讲哈tomcat
基于memcahe的session同步!!!!


 京公网安备 11010802041100号