一、InfluxDB的安装与部署
InfluxDB 是一个开源分布式时序、事件和指标数据库。使用 Go 语言编写,无需外部依赖。其设计目标是实现分布式和水平伸缩扩展。
1、官网下载文件并安装(以2.1.1为例,influxdb_v1请自行搜索)
wget https://dl.influxdata.com/influxdb/releases/influxdb2-2.1.1-linux-amd64.tar.gz
tar xzvf influxdb2-2.1.1-linux-amd64.tar.gz
vi /etc/influxdb/influxdb.conf
[data]
# The directory where the TSM storage engine stores TSM files.
dir = "/var/lib/influxdb/data"
# The directory where the TSM storage engine stores WAL files.
wal-dir = "/var/lib/influxdb/wal"
[http]
# Determines whether HTTP endpoint is enabled.
# enabled = true
# Determines whether the Flux query endpoint is enabled.
# flux-enabled = false
# Determines whether the Flux query logging is enabled.
# flux-log-enabled = false
# The bind address used by the HTTP service.
# bind-address = ":8086"
cd influxdb2-2.1.1-linux-amd64
mv influxd /usr/sbin/
vi /etc/systemd/system/influxd.service
# If you modify this, please also make sure to edit init.sh
[Unit]
Description=InfluxDB is an open-source, distributed, time series database
Documentation=https://docs.influxdata.com/influxdb/
After=network-online.target
[Service]
User=influxdb
Group=influxdb
LimitNOFILE=65536
EnvirOnmentFile=-/etc/default/influxdb
ExecStart=/usr/sbin/influxd -config /etc/influxdb/influxdb.conf
KillMode=control-group
Restart=on-failure
Type=forking
PIDFile=/var/lib/influxdb/influxd.pid
[Install]
WantedBy=multi-user.target
Alias=influxd.service
systemctl daemon-reload
systemctl start influxd
2.数据配置
启动后在windows下访问http://host:8086,第一次登录会提示添加用户配置密码
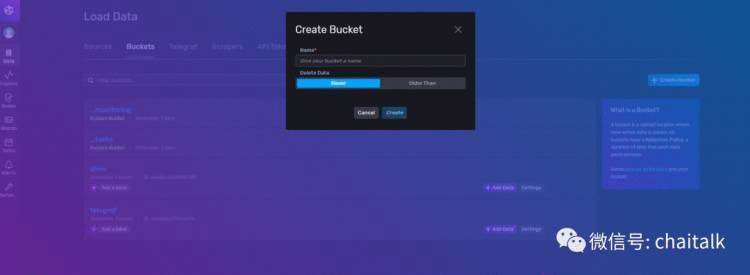
配置后添加buckets和org
1)点击左侧菜单data,在右侧点buckets->create bucket
2)点击头像,create organization,输入要创建的org name和刚才创建的bucket name

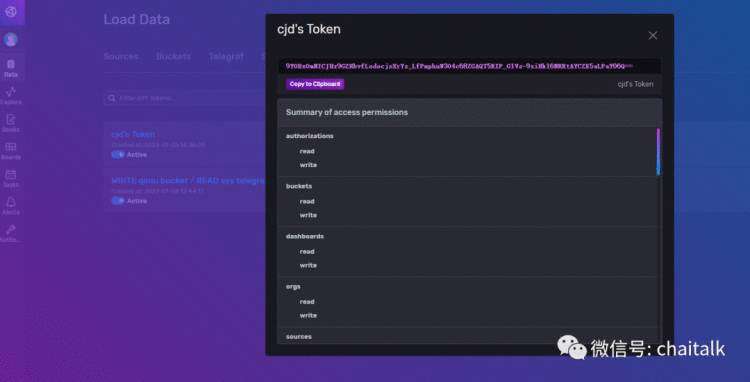
3)点击左侧菜单data,在右侧点api tokens,点击要使用的bucket,记录下token备用
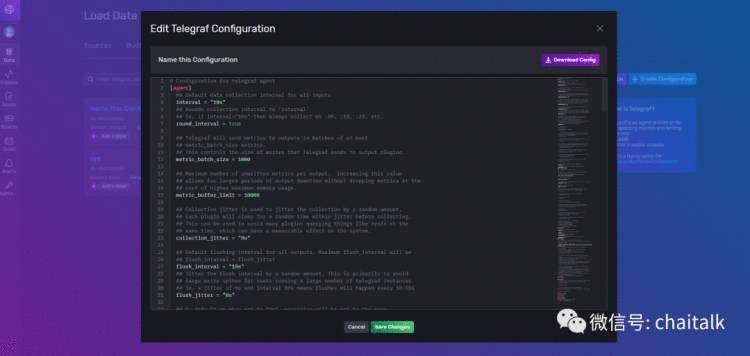
4)点击左侧菜单data,在右侧点telegraf,create configuration生成telegraf配置文件
5)点击左侧菜单board,create dashboard-->import dashboard->paste json,生成influxdb2自带的telegraf面板
https://github.com/influxdata/community-templates/blob/master/linux_system/linux_system.yml

更多模板请参考:
https://www.influxdata.com/products/influxdb-templates/gallery/?_templates_resources=dashboard
3.下载telegraf ,客户端并安装 (input配置请参考telegraf配置文档,本文仅介绍outputs.influxdb_v2 )
使用Telegraf做夜莺5.1的数据采集
telegraf 监控配置
wget https://dl.influxdata.com/influxdb/releases/influxdb2-client-2.2.1-linux-amd64.tar.gz
tar xvfz influxdb2-client-2.2.1-linux-amd64.tar.gz
cd influxdb2-client-2.2.1-linux-amd64
配置telegraf output(可以使用上面生成的配置文件,下边仅供参考)
##influxdb配置简单,如果要使用grafana,建议用influxdb,这个简单(需要根据实际情况配置,telegraf支持同时将采集到的数据输出到多个目标数据库)
[[outputs.influxdb]]
urls = ["http://127.0.0.1:8286"]
database = "telegraf"
database_tag = ""
##influxdb_v2配置,请根据实际情况配置
[[outputs.influxdb_v2]]
urls = ["http://192.168.10.70:8086"]
token = "9YOBzOmNICJHx9GZHbvfLodocjsXrYz_LfPmphuW3O4c68ZGAQT5RIP_G1Vs-9ziHk16NRRtAYCZE5aLPaY06Q=="
bucket = "telegraf"
influxdb_v2增加了面板和告警功能,直接配合telegraf就可以实现常用的监控告警功能,不过数据操作使用的是flux,这个相对v1的sql不是太容易入门
如果不习惯用influxdb的面板功能,可以参考下面文章使用grafana
使用grafana监控clickhouse


 京公网安备 11010802041100号