作者:有海的地方最美_171 | 来源:互联网 | 2023-10-17 04:19
安装oracle11g服务端64位WIN10oracle11gplsql安装1、下载Oracle11gR2forWindows的版本下载地址:https:www
安装oracle11g服务端
64位WIN10+oracle11g+plsql安装
1、下载Oracle 11g R2 for Windows的版本
下载地址:https://www.oracle.com/technetwork/database/enterpriseedition/downloads/index.html
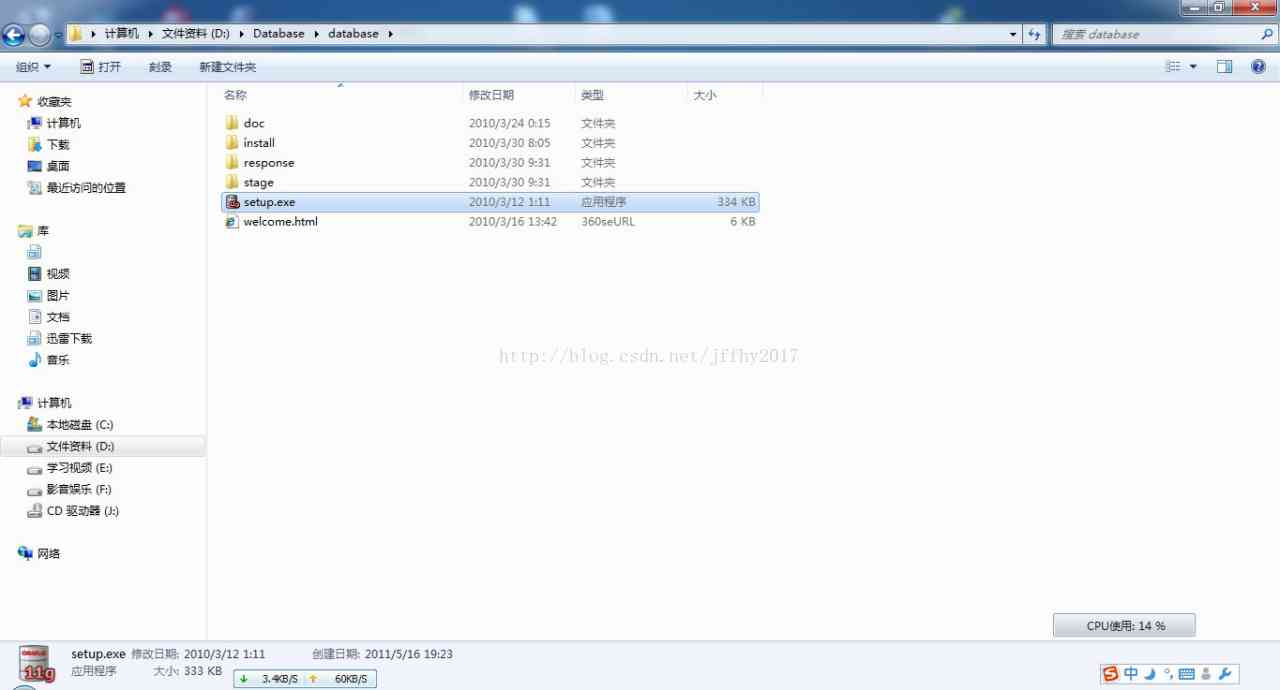
其中包括两个压缩包:win64_11gR2_database_1of2.zip,win64_11gR2_database_2of2.zip
2、将两个压缩包解压到同一个目录下,即“database”,然后单击解压目录下的“setup.exe”文件:
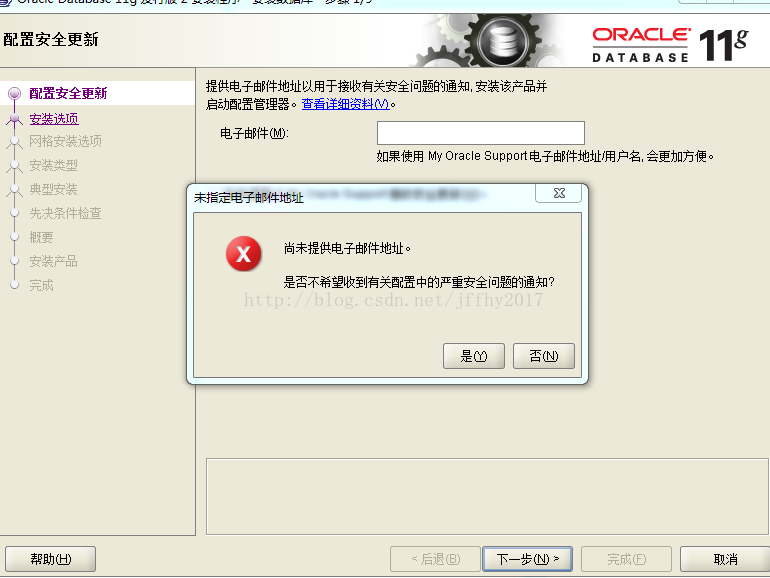
3、在出现的“配置安全更新”窗口中,取消“我希望通过My Oracle Support接受安全更新”,单击“下一步”:

出现下面的界面,点击“是”
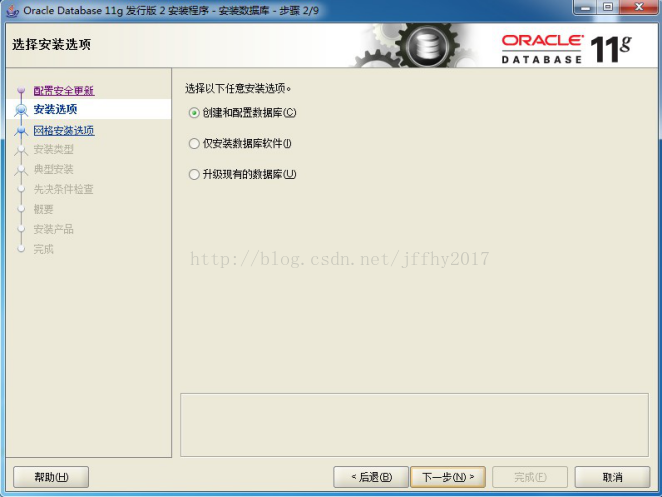
4、在“安装选项”窗口中,选择“创建和配置数据库”,单击“下一步”:
5、在“系统类”窗口中,选择“桌面类”,单击“下一步”:

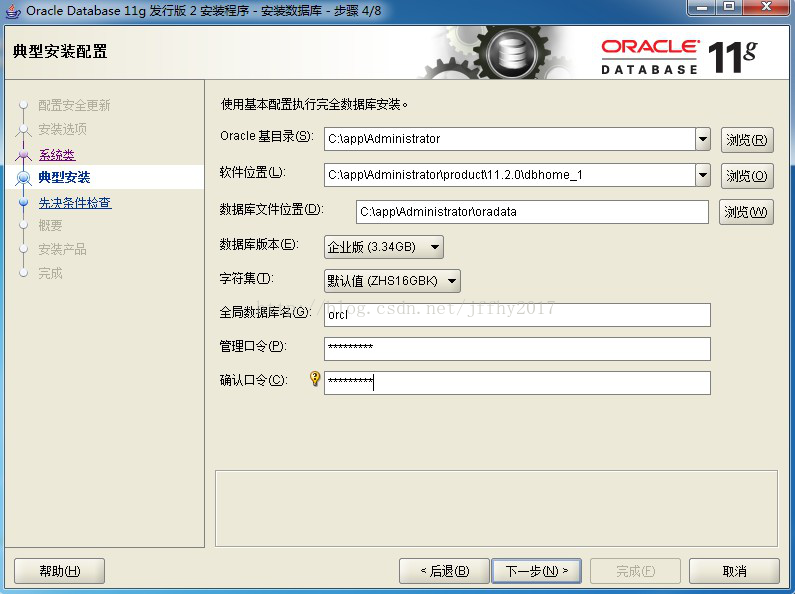
6、在“典型安装”窗口中,选择Oracle的基目录,选择“企业版”和“默认值”并输入统一的密码为:orcl,单击“下一步”:
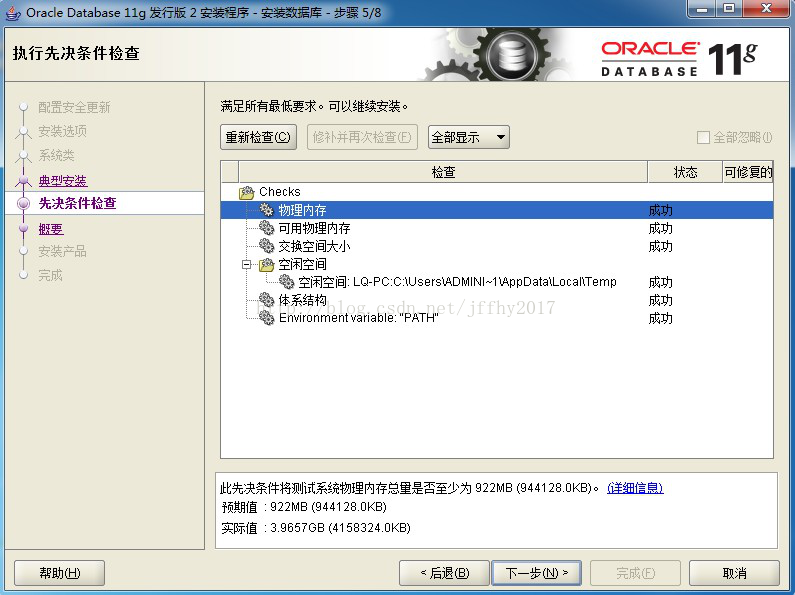
7、在“先决条件检查”窗口中,单击“下一步”:
8、在“概要”窗口中,单击“完成”,即可进行安装:

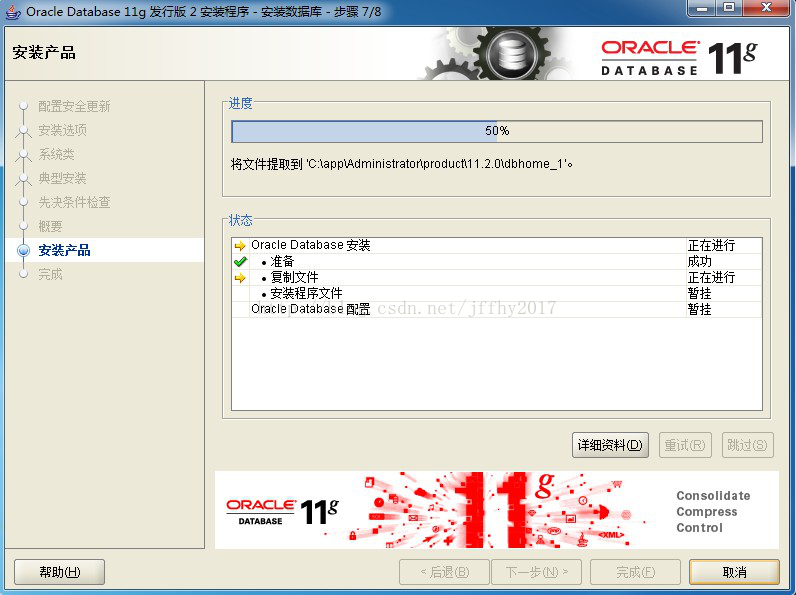
9、出现的安装过程如下:
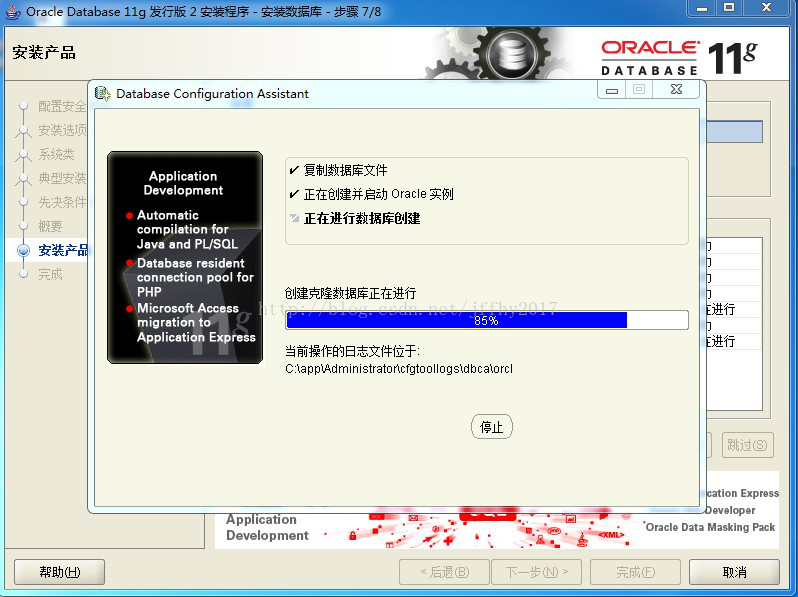
数据库创建完成后,会出现如下“Database Configuration Assistant”界面:
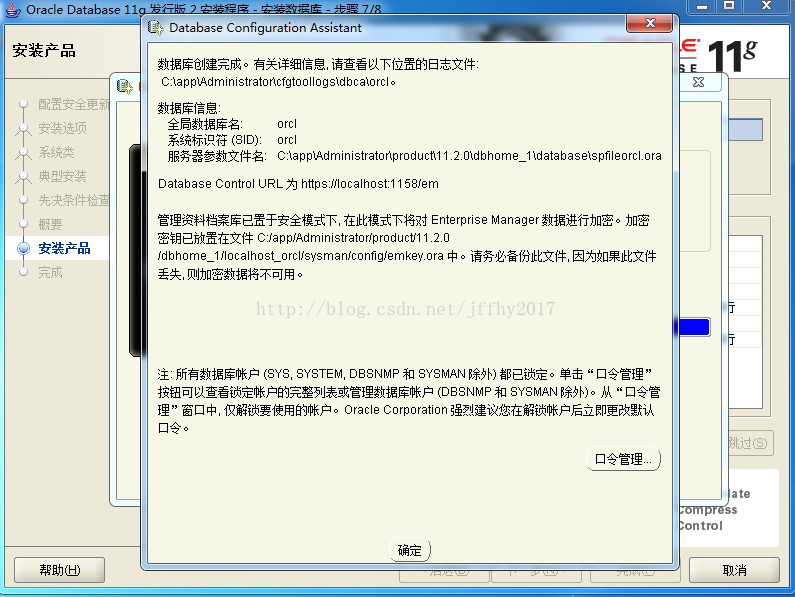
选择“口令管理”,解锁并修改以下用户:
(1)普通用户:SCOTT(密码:tiger)
修改完成后,单击“确定”。
10、在“完成”窗口中,单击“关闭”即可。
安装完成界面中的内容:
Enterprise Manager Database Control URL - (orcl) :
https://localhost:1158/em
数据库配置文件已经安装到 C:\app\Administrator,同时其他选定的安装组件也已经安装到 C:\app\Administrator\product\11.2.0\dbhome_1。
Oracle完成安装后,会在系统中进行服务的注册,在注册的这些服务中有以下两个服务必须启动,否则Oracle将无法正常使用:

(1)OracleOraDb11g_home1TNSListener:表示监听服务,如果客户端要想连接到数据库,此服务必须打开。在程序开发中该服务也要起作用。
(2)OracleServiceORCL:表示数据库的主服务,命名规则:OracleService+数据库名称。此服务必须打开,否则Oracle根本无法使用。
验证安装是否成功
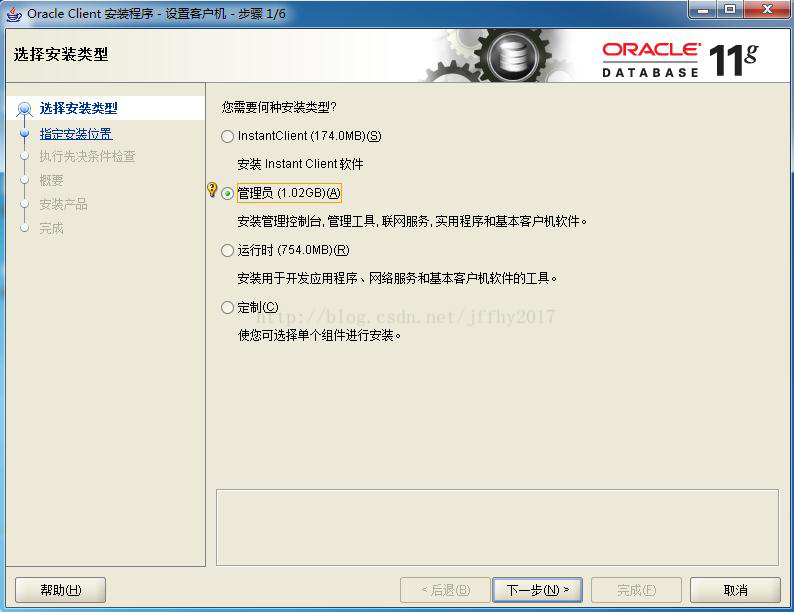
Oracle11g客户端安装
A、32位Oracle 11g Client(win32_11gR2_client.zip)的安装注意点(客户端安装):
在选择安装类型时,选择“管理员”,如下图:
其他的步骤和安装服务器端类似。
完全卸载oracle11g
步骤:
- 停用oracle服务:进入计算机管理,在服务中,找到oracle开头的所有服务,右击选择停止
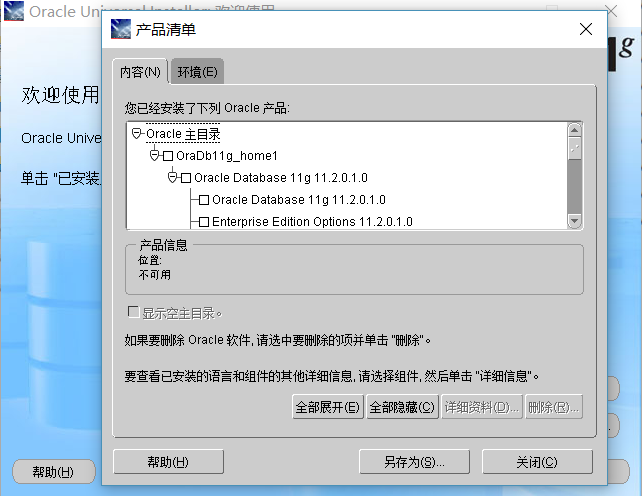
- 在开始菜单中,找到Universal Installer,运行Oracle Universal Installer,单击卸载产品
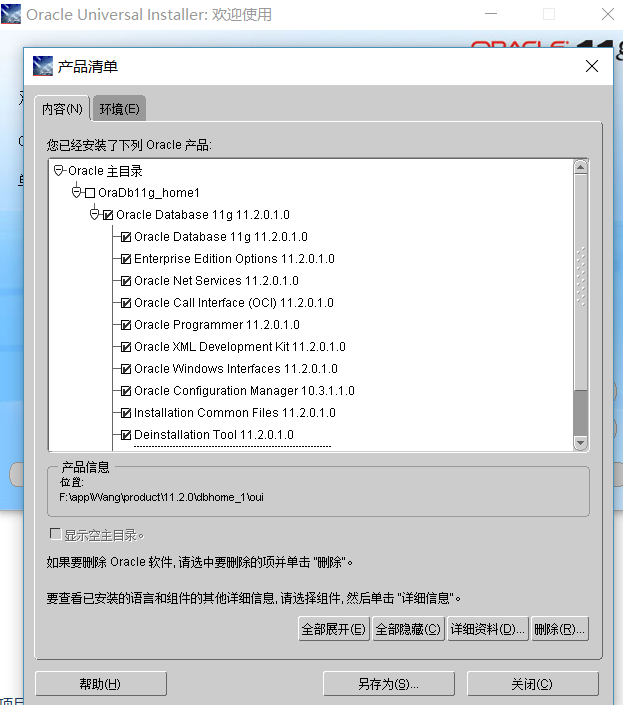
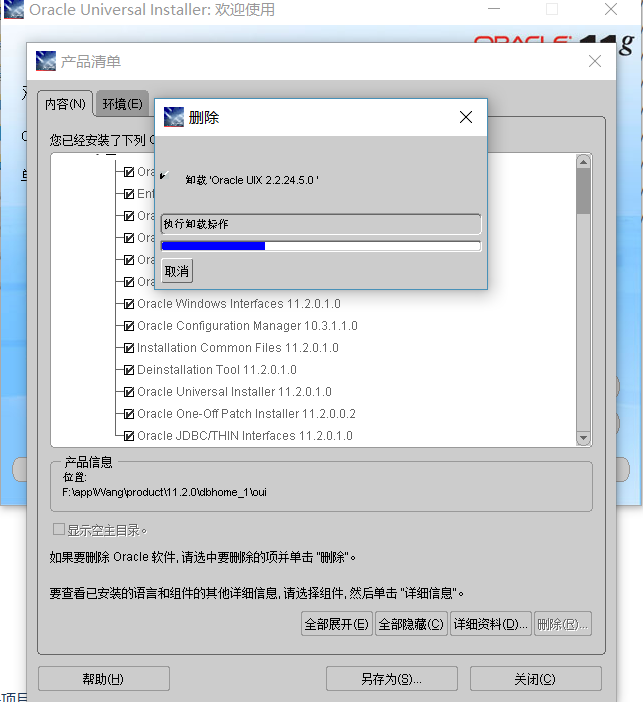
- 在产品清单窗口中,单击全部展开,除了OraDb11g_home1外,勾选其他项目,单击删除
- 按Windows徽标键和R键,打开运行窗口,输入regedit,打开注册表,依次展开HKEY_LOCAL_MACHINE\SOFTWARE,找到oracle,删除之
- 依次展开HKEY_LOCAL_MACHINE\SYSTEM\CurrentControlSet\Service中,删除所有oracle开头的项
- 依次展HKEY_LOCAL_MACHINE\SYSTEM\CurrentControlSet\Services\
Eventlog\Application,删除所有oracle开头的项;
- 在HKEY_CLASSES_ROOT,删除以ora开头的项
- 重启电脑,删除oracle目录,删除Oracle的安装目录app等
- 客户端卸载类似


 京公网安备 11010802041100号