说明:原文:Mac 下 Nginx、PHP、MySQL 和 PHP-fpm 的安装和配置个人博客永久地址。杂七杂八的杂
博客中做了更新,可参考后面的更新记录。
Mac下搭建MNPM环境是每个使用者mac的phper必备的技能。一般都是找到新工作入职的第一天做的事情--配置环境。
如上,今天入职的,配置开发环境。公司配备的硬件设备很屌,15年产macbook pro笔记本一台(13寸),配置了8GB DDR3内存,2.7GHz core i5处理器,120GB的闪存。当然了,没我自己买的配置高,哈哈~~
安装 Mac 的包管理器 - homebrewhome-brew是什么?先这样说吧,home-brew与OS X就像nodes与npm,java与maven(或者gradle),php与composer,apt-get与Ubutun,yum与centos,还有其他等等吧,都是宿主的开发工具或包的依赖管理。
安装Homebrew之前,先安装xcode命令行工具,安装成功后,打开xcode的应用,查看Xcode是否为最新,如果不是最新的请在App Store中升级Xcode。
安装xcode命令行工具的命令:
xcode-select --installNote【NEW】:如果是Mac 10.x的版本,请下载Mac命令行工具安装包。Mac新版本不支持使用xcode-select --install安装。下载传送门,选择适合自己操作系统版本的CommondLineTools下载且安装。
安装完后,请使用brew doctor命令检查当前环境是否最新符合brew运行,如果xcode的版本太低,则会有相应的提示信息。
home-brew的安装很容易,只要你的客户终端安装了ruby即可,其实,你一点都不用担心此事,OS X系统已经预装了ruby。
ruby -e "$(curl -fsSL https://raw.githubusercontent.com/Homebrew/install/master/install)"网上很多关于安装homebrew的文章相较时间早,所以很多文章依然提供下面这种安装,其实测试发现改地址已经返回404,并不能提供资源服务。
ruby -e "$(curl -fsSL https://raw.github.com/Homebrew/homebrew/go/install)"
关于Homebrew的更多知识,请参见下面几个站点的链接。
安装好了Homebrew之后,便可以使用brew命令来安装相应的包了。接下来,安装nginx服务器。
brew install nginx如果需要安装nginx的其他版本,可以使用brew edit nginx来修改其内容:
 class Nginx  :hg

 bottle do
 sha256 "69839647f12306f8756eb7934eed946e55ffb47c1a2813f126523d824cd53a9d" =>
 :el_capitan
 sha256 "af4b2cad55c8414c2c29db340c94da9270ec66044f8a52f1d0e0efe1f11adb9b" =>
 :yosemite
 sha256 "8bc5364108c213b062427a98b361d3caf91e8f5a8ef518f23954bdb41e10b9df" =>
 :mavericks   end

 #Before submitting more options to this formula please check they
 aren\'t   # already in Homebrew/homebrew-nginx/nginx-full:   #
 https://github.com/Homebrew/homebrew-nginx/blob/master/Formula/nginx-full.rb
 option "with-passenger", "Compile with support for Phusion Passenger module"   option "with-webdav", "Compile with support for WebDAV module"   option "with-debug", "Compile with support for debug log"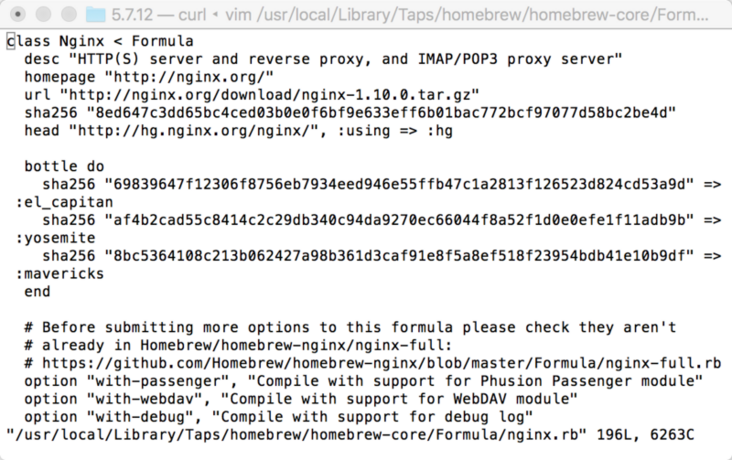
从上面信息可以看出nginx的下载地址等信息,可以根据自己的需求修改。
brew执行完之后,nginx服务器就算安装好了,运行下面几条命了测试一下:
# 启动 nginx服务
sudo nginx

# 重新加载配置|重启|停止|退出 nginx
nginx -s reload|reopen|stop|quit

#测试配置是否有语法错误
nginx -tnginx启动后,在浏览器中输入http://localhost:8080/,回车即可看到运行结果,显示的是/usr/local/Cellar/nginx/1.10.0/html/index.html文件的内容。
相关参数可自行修改,具体怎么配置nginx,请参看nginx的配置。
实际上,nginx服务的启动可以用-c nginx的配置文件参数制定其配置文件,默认加载/usr/local/etc/nginx/nginx.conf文件,当然nginx的操作不止这些命令,还有一些信号操作,关于nginx的信号操作等知识,留在它章详细的说一下。
# 启动 nginx
sudo ngixn -c /usr/local/etc/nginx/nginx.conf

#测试配置是否有语法错误
nginx -t -c /usr/local/etc/nginx/nginx.conf开机自启动nginx服务设置:
mkdir -p ~/Library/LaunchAgents
cp /usr/local/Cellar/nginx/1.10.0/homebrew.mxcl.nginx.plist ~/Library/LaunchAgents/
launchctl load -w ~/Library/LaunchAgents/homebrew.mxcl.nginx.plist
配置非管理员开机nginx自动启动的权限和分组:
sudo chown root:wheel /usr/local/Cellar/nginx/1.10.0/sbin/nginx
sudo chmod u+s /usr/local/Cellar/nginx/1.10.0/sbin/nginx说明:{尊重知识,尊重别人的劳动成果}安装和配置 MySQL 服务器
参考文章:Mac下Nginx、MySQL、PHP-FPM的安装配置
安装mysql同nginx一样简单,执行brew命令:
brew install mysql执行完brew命令,如果没有出错,mysql算是安装到本机或者服务器了,当然,此过程会看到很多信息打印到shell窗口。
接下来,我们执行一些简单的配置命令。
mysql_install_db --verbose --user=`whoami` --basedir="$(brew --prefix mysql)" --datadir=/usr/local/var/mysql这里需要说明一下,网上很多资料显示需要tmpdir参数,如下:
mysql_install_db --verbose --user=`whoami` --basedir="$(brew --prefix mysql)" --datadir=/usr/local/var/mysql --tmpdir=/tmp这个会出错,具体原因暂时不知道,在segmentfault上有人提问过了,目前没有完美的答案。
mysqld命令启动。ps -ef | grep mysql如果没有启动,使用安装的mysql目录下的mysqld命令启动mysql:
/usr/local/Cellar/mysql/5.7.12/bin/mysqld当然,你可直接使用/usr/local/bin/mysqld就可以启动mysql服务。
which mysqld结果发现:
 MacBook-Pro:joyven $ which mysql
 /usr/local/bin/mysqld
此时的数据库没有密码,即使是root用户,也无需密码就可登录到数据库服务。因此,需要设置数据库密码:
/usr/local/bin/mysqladmin -u root password 'new-password'现在访问 mysql 还是不用密码就可以连接,如果要设置一些登陆密码的安全访问限制,则需执行下面的 mysql安全安装指令:
/usr/local//bin/mysql_secure_installation主要是设置修改root密码(设置过了可以不用设置,略过)、删除匿名访问、删除root网络访问、删除test数据库。指令执行完后,登陆mysql就需要密码验证了:
mysql -u root -p开机启动 mysql
mkdir -p ~/Library/LaunchAgents/
cp /usr/local/Cellar/mysql/5.7.12/homebrew.mxcl.mysql.plist ~/Library/LaunchAgents/
launchctl load -w ~/Library/LaunchAgents/homebrew.mxcl.mysql.plist
如果要停止 mysql 服务则:
launchctl unload ~/Library/LaunchAgents/homebrew.mxcl.mysql.plistphp的安装很简单,php-fpm目前已经集成到php的内核,可以当作内核来安装了。很久以前不是哦,请注意,我不记得是什么时候加入到内核的,如果你乐意查,查了请在评论区告诉我一下。
至于他为什么是内核的原因,参考《搞不清FastCgi与PHP-FPM之间是个什么样的关系》的提问,主要看看下面各位大神@的回答。
这是2018年3月份之前的安装方式:安装php之前,请先用brew tap命令引入第三方的php库,brew仓库中没有php的安装包。
brew tap homebrew/dupes brew tap josegonzalez/homebrew-phpNote:【NEW】由于Homebrew/php自来水在2018年3月底被弃用,并将所有PHP公式转移到
Homebrew/core,旧的brew tap homebrew/dupes、brew tap homebrew/versions、brew tap homebrew/homebrew-php都会报以下错误。
Warning: homebrew/dupes was deprecated. This tap is now empty as all its formulae were migrated.解决方法:安装brew是homebrew/core作为核心已加入到brew仓库。如果你已经手动执行过
brew tap homebrew/dupes或者brew tap josegonzalez/homebrew-php,则需要删除已经加过的仓库,对应的命令为:brew untap homebrew/dupes或者brew untap josegonzalez/homebrew-php。
万事俱备,只欠东风,不,只欠一条命令。
brew install php56 --with-imap --with-tidy --with-debug --with-pgsql --with-mysql --with-fpm下面是输出的信息:
brew install php56 --with-imap --with-tidy --with-debug --with-pgsql --with-mysql --with-fpm --with-curl=/usr/local/Cellar/curl/
==> Installing php56 from josegonzalez/php
==> Installing dependencies for josegonzalez/php/php56: readline, postgre
==> Installing josegonzalez/php/php56 dependency: readline
==> Downloading https://homebrew.bintray.com/...
####################################################################### 100.0%
==> Pouring readline-6.3.8.el_capitan.bottle.tar.gz
==> Caveats
This formula is keg-only, which means it was not symlinked into /usr/local.OS X provides the BSD libedit library, which shadows libreadline.
In order to prevent conflicts when programs look for libreadline we are defaulting this GNU Readline installation to keg-only.Generally there are no consequences of this for you. If you build your own software and it requires this formula, you'll need to add to your build variables:
LDFLAGS:  -L/usr/local/opt/readline/lib
CPPFLAGS: -I/usr/local/opt/readline/include
==> Summary
? /usr/local/Cellar/readline/6.3.8: 46 files, 2.0M
==> Installing josegonzalez/php/php56 dependency: postgresql
==> Downloading https://homebrew.bintray.com/...
######################################################################## 100.0%
==> Pouring postgresql-9.5.2.el_capitan.bottle.1.tar.gz
==> /usr/local/Cellar/postgresql/9.5.2/bin/initdb /usr/local/var/postgres
==> Caveats
If builds of PostgreSQL 9 are failing and you have version 8.x installed,you may need to remove the previous version first. See:
https://github.com/Homebrew/h...To migrate existing data from a previous major version (pre-9.0) of PostgreSQL, see:
https://www.postgresql.org/do...To migrate existing data from a previous minor version (9.0-9.4) of PosgresSQL, see:
https://www.postgresql.org/do...You will need your previous PostgreSQL installation from brew to perform
pg_upgrade.
Do not runbrew cleanup postgresqluntil you have performed the migration.To have launchd start postgresql now and restart at login:
brew services start postgresql
Or, if you don't want/need a background service you can just run:
postgres -D /usr/local/var/postgres
==> Summary
? /usr/local/Cellar/postgresql/9.5.2: 3,135 files, 34.9M
==> Installing josegonzalez/php/php56 dependency: libpng
==> Downloading https://homebrew.bintray.com/...
######################################################################## 100.0%
==> Pouring libpng-1.6.21.el_capitan.bottle.tar.gz
? /usr/local/Cellar/libpng/1.6.21: 25 files, 1.2M
==> Installing josegonzalez/php/php56 dependency: freetype
==> Downloading https://homebrew.bintray.com/...
######################################################################## 100.0%
==> Pouring freetype-2.6.3.el_capitan.bottle.tar.gz
? /usr/local/Cellar/freetype/2.6.3: 61 files, 2.5M
==> Installing josegonzalez/php/php56 dependency: gettext
==> Downloading https://homebrew.bintray.com/...
######################################################################## 100.0%
==> Pouring gettext-0.19.7.el_capitan.bottle.tar.gz
==> Caveats
This formula is keg-only, which means it was not symlinked into /usr/local.OS X provides the BSD gettext library and some software gets confused if both are in the library path.
Generally there are no consequences of this for you. If you build your own software and it requires this formula, you'll need to add to your build variables:
LDFLAGS:  -L/usr/local/opt/gettext/lib
CPPFLAGS: -I/usr/local/opt/gettext/include
==> Summary
? /usr/local/Cellar/gettext/0.19.7: 1,934 files, 16.7M
==> Installing josegonzalez/php/php56 dependency: icu4c
==> Downloading https://homebrew.bintray.com/...
######################################################################## 100.0%
==> Pouring icu4c-57.1.el_capitan.bottle.tar.gz
==> Caveats
This formula is keg-only, which means it was not symlinked into /usr/local.OS X provides libicucore.dylib (but nothing else).
Generally there are no consequences of this for you. If you build your own software and it requires this formula, you'll need to add to your build variables:
LDFLAGS:  -L/usr/local/opt/icu4c/lib
CPPFLAGS: -I/usr/local/opt/icu4c/include
==> Summary
? /usr/local/Cellar/icu4c/57.1: 265 files, 65.0M
==> Installing josegonzalez/php/php56 dependency: imap-uw
==> Downloading https://homebrew.bintray.com/...
######################################################################## 100.0%
==> Pouring imap-uw-2007f.el_capitan.bottle.tar.gz
? /usr/local/Cellar/imap-uw/2007f: 151 files, 9.0M
==> Installing josegonzalez/php/php56 dependency: jpeg
==> Downloading https://homebrew.bintray.com/...
######################################################################## 100.0%
==> Pouring jpeg-8d.el_capitan.bottle.2.tar.gz
? /usr/local/Cellar/jpeg/8d: 19 files, 713.7K
==> Installing josegonzalez/php/php56 dependency: libxml2
==> Downloading https://homebrew.bintray.com/...
######################################################################## 100.0%
==> Pouring libxml2-2.9.3.el_capitan.bottle.tar.gz
==> Caveats
This formula is keg-only, which means it was not symlinked into /usr/local.OS X already provides this software and installing another version in parallel can cause all kinds of trouble.
Generally there are no consequences of this for you. If you build your own software and it requires this formula, you'll need to add to your build variables:
LDFLAGS:  -L/usr/local/opt/libxml2/lib
CPPFLAGS: -I/usr/local/opt/libxml2/include
==> Summary
? /usr/local/Cellar/libxml2/2.9.3: 276 files, 9.8M
==> Installing josegonzalez/php/php56 dependency: unixodbc
==> Downloading https://homebrew.bintray.com/...
######################################################################## 100.0%
==> Pouring unixodbc-2.3.4.el_capitan.bottle.tar.gz
? /usr/local/Cellar/unixodbc/2.3.4: 39 files, 952.3K
Warning: josegonzalez/php/php56: --with-pgsql was deprecated; using --with-postgresql instead!
==> Installing josegonzalez/php/php56
==> Downloading https://php.net/get/php-5.6.2...
==> Downloading from https://secure.php.net/distri...
######################################################################## 100.0%
==> ./configure --prefix=/usr/local/Cellar/php56/5.6.21 --localstatedir=/usr/loc
==> make
==> make install
==> Caveats
To enable PHP in Apache add the following to httpd.conf and restart Apache:LoadModule php5_module/usr/local/opt/php56/libexec/apache2/libphp5.so
The php.ini file can be found in:
/usr/local/etc/php/5.6/php.ini✩✩✩✩ Extensions ✩✩✩✩
If you are having issues with custom extension compiling, ensure that you are using the brew version, by placing /usr/local/bin before /usr/sbin in your PATH:
PATH="/usr/local/bin:$PATH"PHP56 Extensions will always be compiled against this PHP. Please install them using --without-homebrew-php to enable compiling against system PHP.
✩✩✩✩ PHP CLI ✩✩✩✩
If you wish to swap the PHP you use on the command line, you should add the following to ~/.bashrc, ~/.zshrc, ~/.profile or your shell's equivalent configuration file:
export PATH="$(brew --prefix homebrew/php/php56)/bin:$PATH"✩✩✩✩ FPM ✩✩✩✩
To launch php-fpm on startup:
mkdir -p ~/Library/LaunchAgents
cp /usr/local/opt/php56/homebrew.mxcl.php56.plist ~/Library/LaunchAgents/
launchctl load -w ~/Library/LaunchAgents/homebrew.mxcl.php56.plist
The control script is located at /usr/local/opt/php56/sbin/php56-fpm
OS X 10.8 and newer come with php-fpm pre-installed, to ensure you are using the brew version you need to make sure /usr/local/sbin is before /usr/sbin in your PATH:
PATH="/usr/local/sbin:$PATH"
You may also need to edit the plist to use the correct "UserName".
Please note that the plist was called 'homebrew-php.josegonzalez.php56.plist' in old versions of this formula.
To have launchd start josegonzalez/php/php56 now and restart at login:
brew services start josegonzalez/php/php56
==> Summary
? /usr/local/Cellar/php56/5.6.21: 331 files, 56.2M, built in 8 minutes 14 seconds
我我什么要把这些信息贴出来,原因很简单,这些信息给我给出了我们安装是否成功,安装在那个路径下了,接下来我们还需要手动做些什么(比如开机启动等)。
由于Mac系统预装了php以及php-fpm,所以,为了启动的时候能直接启动安装的最新的php,请把php安装的二进制文件所在的路径加入到系统路径中,这个地方需要注意了。如果我们设置了开机的时候自动启动,我们不会发现有什么问题,可是当我重新配置了扩展,需要重新启动php-fpm的时候,我们如果直接使用php-fpm -c /usr/local/etc/php/5.6/php.ini -y /usr/local/ext/php/5.6/php-fpm.conf的时候,我们发现我们的扩展安装没有起作用,原因是我们使用了/usr/sbin/php-fpm的命令,可以通过which查看。所以需要注意,使用brew安装的php-fpm是在/usr/local/opt/php56/目录下面。:
export PATH="$(brew --prefix php54)/bin:$PATH"到此,php以及PHP-fpm已经安装成功了。那么我们还是设置php-fpm开机启动,在哪里找这段代码呢,安装过程打印的信息,也就是我为什么要把安装过程信息完完整整贴一遍的原因:
mkdir -p ~/Library/LaunchAgents
cp /usr/local/opt/php56/homebrew.mxcl.php56.plist ~/Library/LaunchAgents/
launchctl load -w ~/Library/LaunchAgents/homebrew.mxcl.php56.plist
顺便说一下或许对你在安装过程很有用的命令:
sudo kill -9 pid #pid替换为你的进程号sudo killall php-fpm
# 或者
sudo killall -HUP php-fpmps -ef | grep php-fpmNginx服务器的配置,这里只作简单的配置部分说明,至于想对较为繁琐的配置,比如ip_hash,upstream,gzip,反向代理等内容放到它章作解。
假如你的网站根目录是在/var/www下面,那么我们只需配置一个简单的站点作为nginx配置的开始。
前面说过了,Mac下nginx的配置文件的默认存放路径--/usr/local/etc/nginx/,改文件下包括如下几个文件(夹):
fastcgi.conf- mime.types
- servers
- fastcgi.conf.default
- mime.types.default
sites-enabledfastcgi_paramsnginx.conf- uwsgi_params
- fastcgi_params.default
- nginx.conf.default
- uwsgi_params.default
- koi-utf
- scgi_params
- win-utf
- koi-win
- scgi_params.default
默认情况下,没有sites-enabled这个文件夹,这个时我们为了方便管理配置的server节点,创建的一个文件夹。创建命令:sudo mkdir sites-enabled。
配置中经常用到一个nginx的参数,提供参数的两个文件时fastcgi.conf和fastcgi_params,这两个文件除了SCRIPT_FILENAME这个参数之外,其他一模一样,为什么要一模一样呢,具体自省Google,这里是说,先有fastcgi_params,后有fastcgi.conf,所以大多数的时候我们看到配置中很多人还是喜欢继续用fastcgi_params。
nginx.conf的基本配置:
#user  nobody;
worker_processes  4;

#error_log  logs/error.log;
#error_log  logs/error.log  notice;
#error_log  logs/error.log  info;

#pid        logs/nginx.pid;


events {
    worker_connections  1024;
}


http {
    include       mime.types;
    default_type  application/octet-stream;

    log_format  main  '$remote_addr - $remote_user [$time_local] "$request" '
                      '$status $body_bytes_sent "$http_referer" '
                      '"$http_user_agent" "$http_x_forwarded_for"';

    access_log  /usr/local/var/log/nginx/access.log  main;

    sendfile        on;
    #tcp_nopush     on;

    #keepalive_timeout  0;
    keepalive_timeout  65;

    #gzip  on;

    server {
        listen       80;
        server_name  localhost;

        charset utf-8;

        access_log  /usr/local/var/log/nginx/localhost.access.log  main;

        root /var/www;
        location / {
            #root   html;
            index  index.html index.htm index.php;
            try_files $uri /$uri index.php?$args;
        }

        #error_page  404              /404.html;

        # redirect server error pages to the static page /50x.html
        #
        error_page   500 502 503 504  /50x.html;
        location = /50x.html {
            root   html;
        }

        # proxy the PHP scripts to Apache listening on 127.0.0.1:80
        #
        #location ~ \.php$ {
        #    proxy_pass   http://127.0.0.1;
        #}

        # pass the PHP scripts to FastCGI server listening on 127.0.0.1:9000
        #
        location ~ \.php$ {
            #root           /var/www;
            fastcgi_pass   127.0.0.1:9000;
            fastcgi_index  index.php;
            fastcgi_param  SCRIPT_FILENAME  /var/www$fastcgi_script_name;
            include        fastcgi_params;
        }

        # deny access to .htaccess files, if Apache's document root
        # concurs with nginx's one
        #
        location ~ /\.ht {
            deny  all;
        }
    }

    include sites-enabled/nginx-*.conf;

    # another virtual host using mix of IP-, name-, and port-based configuration
    #
    #server {
    #    listen       8000;
    #    listen       somename:8080;
    #    server_name  somename  alias  another.alias;

    #    location / {
    #        root   html;
    #        index  index.html index.htm;
    #    }
    #}

    # HTTPS server
    #
    #server {
    #    listen       443 ssl;
    #    server_name  localhost;

    #    ssl_certificate      cert.pem;
    #    ssl_certificate_key  cert.key;

    #    ssl_session_cache    shared:SSL:1m;
    #    ssl_session_timeout  5m;

    #    ssl_ciphers  HIGH:!aNULL:!MD5;
    #    ssl_prefer_server_ciphers  on;

    #    location / {
    #        root   html;
    #        index  index.html index.htm;
    #    }
    #}
    #include servers/*;
}
上面的太乱了,我们简化一下吧:
worker_processes  4;

events {
    worker_connections  1024;
}

http {
    include       mime.types;
    default_type  application/octet-stream;

    log_format  main  '$remote_addr - $remote_user [$time_local] "$request" '
                      '$status $body_bytes_sent "$http_referer" '
                      '"$http_user_agent" "$http_x_forwarded_for"';

    access_log  /usr/local/var/log/nginx/access.log  main;

    sendfile        on;
    keepalive_timeout  65;


    server {
        listen       80;
        server_name  localhost;

        charset utf-8;

        access_log  /usr/local/var/log/nginx/localhost.access.log  main;

        root /var/www; #你的网站根目录
        location / {
            index  index.html index.htm index.php;
        try_files $uri /$rui index.php?$args;
        }

        error_page  404              /404.html;
        error_page   500 502 503 504  /50x.html;
        location = /50x.html {
            root   html;
        }

        location ~ \.php$ {
            fastcgi_pass   127.0.0.1:9000;
            fastcgi_index  index.php;
            fastcgi_param  SCRIPT_FILENAME  /var/www$fastcgi_script_name;
            include        fastcgi_params;
        }

        location ~ /\.ht {
            deny  all;
        }
    }

    include sites-enabled/nginx-*.conf;
}
这是一份相对简单的nginx配置,相对复杂一点的配置会在复杂的场景中使用,一般初步开发这些就可以满足了。
下面给出一份sites-enabled文件夹下的nginx的配置。需要说明的是,上面的配置中的server节点中的内容,包括server,可以单独拿出来,放在一份单独的配置中,由最后一句的include的命令引入。
nginx-test.conf
server {
    listen 80;
    server_name test-local.com;

    charset utf-8;
    access_log /usr/local/var/log/nginx/test-local.com.access.log main;
    error_log /usr/local/var/log/nginx/test-local.com.error.log;

    root /var/www/test-php/backend/web;

    location / {
        try_files $uri $uri/ /index.php?$args;
        index index.html index.htm index.php;
    }

    location ~ \.php$ {
        fastcgi_pass 127.0.0.1:9000;
        fastcgi_index index.php;
        fastcgi_param SCRIPT_FILENAME /var/www/test-php/backend/web$fastcgi_script_name;
        include fastcgi_params;
        try_files $uri =404;
    }
}如上,打开浏览器输入http://localhost/访问第一个server节点配置的服务,输入http://test-local.com/访问第二个server节点。
但是,别太急,请修改hosts的host配置,打开/etc/hosts文件,加入一行:
127.0.0.1 test-local.com大多数时候,我们不得不安装php的扩展,比如 GD,mcrypt,CURL,XML,MEMCACHED 等扩展配置,这些东西在我们的开发中常常用到,对于几个相对较难的扩展,做一些记录吧。
更新:2016-05-10 23:19
brew install php56-apcu php56-intl php56-redis php56-uuid php56-zookeeper \
php56-thrift php56-solr php56-ssh2 php56-gmagick php56-kafka php56-libevent \
php56-imagick php56-msgpack php56-geoip php56-mcrypt php56-swoole \
php56-scrypt php56-xdebug php56-yaf php56-yaml php56-xhprof \
php56-memcache php56-memcached php56-gearman
更新:2019-10-06 20:43:50
xcode-select --install失败的情况,建议下载命令行工具dmg文件安装brew tap homebrew/dupes和brew tap josegonzalez/homebrew-php在2018年3月份被废弃后安装时报错误的解决方法。


 京公网安备 11010802041100号 | 京ICP备19059560号-4 | PHP1.CN 第一PHP社区 版权所有