1.项目背景
大家可能遇到这样的情况(可能只有我遇到)。已经有100个已经标注好的分割数据,也训练好一个模型。但是突然觉得样本数量不够,想增加到500个。但是如果完全手动标注500个,估计会很累。然后现在你已经训练好了一个模型,能不能利用这个训练好的模型对500个数据进行推理,然后对结果进行精调。但是一般推理结果mask都是一个数组或者图片,不好对其进行标注微调。
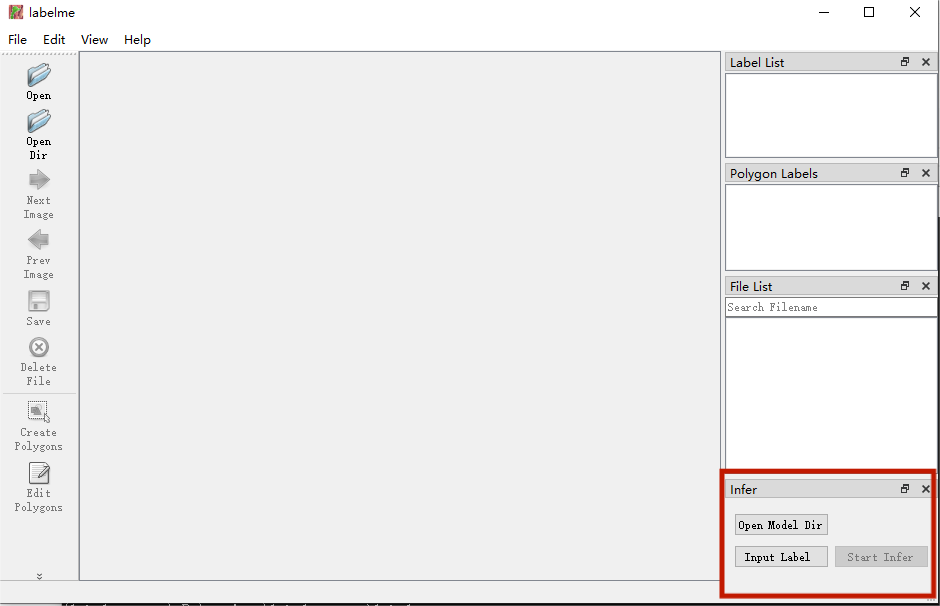
现在想到一个方法就是:使用FastDeploy高效推理工具(在cup下推理都好快),加载训练好的模型,得到预测的mask结果,然后转换成json图片,再用labelme进行读取,进行手动微调。把推理这部分代码写入labelme中,增加一些按钮,就有如下的工具。

魔改的Labelme的Github地址:https://github.com/richarddddd198/Labelme-auto-seg
方法使用如下
2.FastDeploy

FastDeploy是一款全场景、易用灵活、极致高效的AI推理部署工具。提供开箱即用的云边端部署体验, 支持超过150+ Text, Vision, Speech和跨模态模型,并实现端到端的推理性能优化。包括图像分类、物体检测、图像分割、人脸检测、人脸识别、关键点检测、抠图、OCR、NLP、TTS等任务,满足开发者多场景、多硬件、多平台的产业部署需求。
Github仓库地址:https://github.com/PaddlePaddle/FastDeploy
!git clone https://gitee.com/paddlepaddle/PaddleSeg.git
!pip install paddleseg fastdeploy-python -f https://www.paddlepaddle.org.cn/whl/fastdeploy.html
3.数据
任务类型:语义分割
数据格式:2D jpg
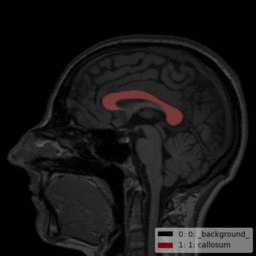
分割目标:头部磁共振的胼胝体,
分割类别:1
样本数量:120张

!unzip -o /home/aistudio/data/data91411/callosum.zip -d /home/aistudio/work
import os
import numpy as np
DATA_ROOT_DIR = '/home/aistudio/work/callosum'def make_list():img_list = [img for img in os.listdir(os.path.join(DATA_ROOT_DIR, 'origin'))]data_path_list = []for image_id in img_list:image_path = os.path.join(DATA_ROOT_DIR, 'origin',image_id)label_path = os.path.join(DATA_ROOT_DIR, 'mask',image_id.split('.')[0]+'.png')data_path_list.append((image_path, label_path))np.random.seed(5)np.random.shuffle(data_path_list)total_len = len(data_path_list)train_data_len = int(total_len*0.8)train_data = data_path_list[0 : train_data_len]val_data = data_path_list[train_data_len : ]with open(os.path.join(DATA_ROOT_DIR, 'train_list.txt'), "w") as f:for image, label in train_data:f.write(f"{image} {label}\n")with open(os.path.join(DATA_ROOT_DIR, 'val_list.txt'), "w") as f:for image, label in val_data:f.write(f"{image} {label}\n")if __name__ == '__main__':make_list()
4.配置训练文件并开始训练
batch_size: 6
iters: 5000train_dataset:type: Datasetdataset_root: /home/aistudio/train_path: /home/aistudio/work/callosum/train_list.txtnum_classes: 2transforms: - type: RandomHorizontalFlip- type: RandomRotationmax_rotation: 15- type: RandomDistortbrightness_range: 0.2contrast_range: 0.2saturation_range: 0.2- type: Normalize- type: Resizetarget_size: [256, 256]mode: trainval_dataset:type: Datasetdataset_root: /home/aistudio/val_path: /home/aistudio/work/callosum/val_list.txtnum_classes: 2transforms:- type: Resizetarget_size: [256, 256]- type: Normalizemode: valoptimizer:type: sgdmomentum: 0.9weight_decay: 4.0e-5lr_scheduler:type: PolynomialDecaylearning_rate: 0.02end_lr: 0power: 0.9loss:types:- type: CrossEntropyLosscoef: [1]model:type: UNetnum_classes: 2use_deconv: Falsepretrained: Null
%cd ~/PaddleSeg/
!python train.py --config /home/aistudio/configcallosum.yml --do_eval --use_vdl --save_interval 48 --save_dir output_callosum
/home/aistudio/PaddleSeg
!python tools/val.py \--config /home/aistudio/configcallosum.yml \--model_path output_callosum/best_model/model.pdparams
"""
2022-12-03 09:44:01 [INFO] [EVAL] #Images: 24 mIoU: 0.9327 Acc: 0.9983 Kappa: 0.9280 Dice: 0.9640
2022-12-03 09:44:01 [INFO] [EVAL] Class IoU:
[0.9983 0.8671]
2022-12-03 09:44:01 [INFO] [EVAL] Class Precision:
[0.9989 0.9462]
2022-12-03 09:44:01 [INFO] [EVAL] Class Recall:
[0.9994 0.9121]
"""
!python tools/export.py --config /home/aistudio/configcallosum.yml \--model_path output_callosum/best_model/model.pdparams \--save_dir output_callosum/inference_model_callosum \--input_shape 1 3 256 256
W1203 09:45:02.714906  6309 gpu_resources.cc:61] Please NOTE: device: 0, GPU Compute Capability: 7.0, Driver API Version: 11.2, Runtime API Version: 11.2
W1203 09:45:02.719321  6309 gpu_resources.cc:91] device: 0, cuDNN Version: 8.2.
2022-12-03 09:45:04 [INFO]	Loaded trained params of model successfully.
2022-12-03 09:45:06 [INFO]	The inference model is saved in output_callosum/inference_model_callosum
5.使用fastdeploy加载模型推理
1.先用vision.segmentation.PaddleSegModel加载刚才Paddleseg导出训练好的模型
2.使用model.predict进行推理。
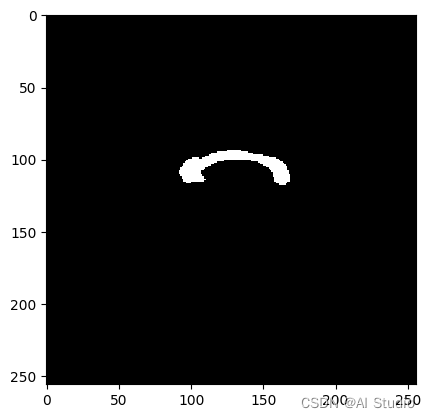
3.result.label_map得到对应的预测值,reshape与输入图片尺寸一致即可得到预测的mask
import numpy as np
import cv2
import fastdeploy.vision as vision
import matplotlib.pyplot as plt
model = vision.segmentation.PaddleSegModel('/home/aistudio/PaddleSeg/output_callosum/inference_model_callosum/model.pdmodel','/home/aistudio/PaddleSeg/output_callosum/inference_model_callosum/model.pdiparams','/home/aistudio/PaddleSeg/output_callosum/inference_model_callosum/deploy.yaml')im = cv2.imread("/home/aistudio/work/callosum/origin/176.jpg")
result = model.predict(im.copy())
mask = np.array(result.label_map).reshape(256,256).astype(np.uint8)
plt.imshow(mask,'gray')
plt.show()
[INFO] fastdeploy/vision/common/processors/transform.cc(93)::FuseNormalizeHWC2CHW	Normalize and HWC2CHW are fused to NormalizeAndPermute  in preprocessing pipeline.
[INFO] fastdeploy/vision/common/processors/transform.cc(159)::FuseNormalizeColorConvert	BGR2RGB and NormalizeAndPermute are fused to NormalizeAndPermute with swap_rb=1
[INFO] fastdeploy/backends/openvino/ov_backend.cc(199)::InitFromPaddle	Compile OpenVINO model on device_name:CPU.
[INFO] fastdeploy/runtime.cc(532)::Init	Runtime initialized with Backend::OPENVINO in Device::CPU.
ce::CPU.

6.把mask图转换成json文件
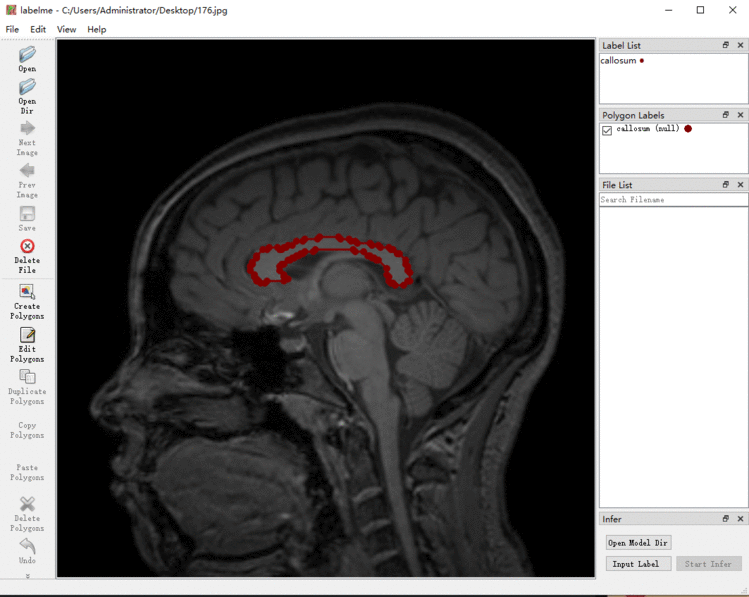
对预测的mask 转换成labelme格式的json文件,让labelme可以识别。
下图是labelme读取重新生成的json文件。

import base64
import os
import json
def image_to_base64(path):with open(path, &#39;rb&#39;) as img:b64encode &#61; base64.b64encode(img.read())s &#61; b64encode.decode()b64_encode &#61; &#39;data:image/jpeg;base64,%s&#39; % sreturn b64_encodedef get_points(contour,isRemoveSamlleTarget&#61;True):"""对轮廓点做适当的处理&#xff0c;例如点太小的目标去掉&#xff0c;或者点太多的&#xff0c;间隔取点"""num &#61; len(contour[:, 0, 0]) if isRemoveSamlleTarget:if num < 10: return contour[:, 0], 0if num > 200: hundred &#61; num // 30 tem &#61; contour[:, 0][::hundred]return tem, 1else:return contour[:, 0], 1def generate_json(name, h, w, shapes,imageData):dict &#61; {}dict["version"] &#61; "5.1.0"dict["flags"] &#61; {}dict["shapes"] &#61; shapesdict["imagePath"] &#61; namedict["imageData"] &#61; imageDatadict["imageHeight"] &#61; hdict["imageWidth"] &#61; wreturn json.dumps(dict, ensure_ascii&#61;False,indent&#61;4)def generateJosn(img_path,mask,label_name):"""对mask找到轮廓&#xff0c;生成坐标点"""img_base &#61; os.path.basename(img_path)shapeslist &#61; list()h, w &#61; mask.shapefor label in label_name.keys():temp &#61; mask.copy()temp[temp &#61;&#61; label] &#61; 255temp[temp!&#61; 255] &#61; 0ret, binary &#61; cv2.threshold(temp, 0, 255, cv2.THRESH_BINARY ) binary &#61; np.uint8(binary)contours, heriachy &#61; cv2.findContours(binary, cv2.RETR_LIST, cv2.CHAIN_APPROX_SIMPLE)for contour in contours:shapesdict &#61; {"label":&#39;&#39;, "points":&#39;&#39;, "group_id":"null", "shape_type":"polygon", "flags":{}}points, flag &#61; get_points(contour)points &#61; points.tolist()if flag &#61;&#61;1:shapesdict[&#39;label&#39;] &#61; label_name[label]shapesdict[&#39;points&#39;] &#61; pointsshapeslist.append(shapesdict)imageData &#61; image_to_base64(img_path).split(&#39;,&#39;)[1]json_content &#61; generate_json(img_base,h,w,shapeslist,imageData)return json_contentim_path&#61;"/home/aistudio/work/callosum/origin/176.jpg"
label_name &#61; {1:"callosum"}
save_jons_path &#61; os.path.join(&#39;/home/aistudio/&#39;,os.path.basename(im_path).split(&#39;.&#39;)[0]&#43;&#39;.json&#39;)
with open(save_jons_path,&#39;w&#39;,encoding&#61;&#39;utf8&#39;) as f:json_content &#61; generateJosn(im_path,mask,label_name)f.write(json_content)
此文章为搬运
原项目链接