msfvenom大家都不陌生,在我们使用MSF进行权限维持,内网渗透的时候都会用到,支持的语言的种类很多。大家都知道我们在使用msfvenom 的时候需要手动输入很多参数,这些参数需要记忆,或记在其它地方,用的时候在查看使用哪个参数,哪条命令,非常的不方便。现在分享一个msfvenom命令自动不全的方法
1,安装oh-my-zsh
官网 https://ohmyz.sh/
官网发的安装命令 
sh -c "$(curl -fsSL https://raw.github.com/ohmyzsh/ohmyzsh/master/tools/install.sh)"

或者 sh -c "$(wget https://raw.github.com/ohmyzsh/ohmyzsh/master/tools/install.sh -O -)"

因为kali虚拟机里无法访问https://raw.github.com/ohmyzsh/ohmyzsh/master/tools/install.sh,所以我把网站里的脚本命令全都复制出来,新建了一个脚本直接执行,也可以安装,以下红色字体为脚本代码,如有需要请复制
#!/bin/sh
#
# This script should be run via curl:
# sh -c "$(curl -fsSL https://raw.githubusercontent.com/ohmyzsh/ohmyzsh/master/tools/install.sh)"
# or wget:
# sh -c "$(wget -qO- https://raw.githubusercontent.com/ohmyzsh/ohmyzsh/master/tools/install.sh)"
#
# As an alternative, you can first download the install script and run it afterwards:
# wget https://raw.githubusercontent.com/ohmyzsh/ohmyzsh/master/tools/install.sh
# sh install.sh
#
# You can tweak the install behavior by setting variables when running the script. For
# example, to change the path to the Oh My Zsh repository:
# ZSH=~/.zsh sh install.sh
#
# Respects the following environment variables:
# ZSH - path to the Oh My Zsh repository folder (default: $HOME/.oh-my-zsh)
# REPO - name of the GitHub repo to install from (default: ohmyzsh/ohmyzsh)
# REMOTE - full remote URL of the git repo to install (default: GitHub via HTTPS)
# BRANCH - branch to check out immediately after install (default: master)
#
# Other options:
# CHSH - 'no' means the installer will not change the default shell (default: yes)
# RUNZSH - 'no' means the installer will not run zsh after the install (default: yes)
#
# You can also pass some arguments to the install script to set some these options:
# --skip-chsh: has the same behavior as setting CHSH to 'no'
# --unattended: sets both CHSH and RUNZSH to 'no'
# For example:
# sh install.sh --unattended
#
set -e
# Default settings
ZSH=${ZSH:-~/.oh-my-zsh}
REPO=${REPO:-ohmyzsh/ohmyzsh}
REMOTE=${REMOTE:-https://github.com/${REPO}.git}
BRANCH=${BRANCH:-master}
# Other options
CHSH=${CHSH:-yes}
RUNZSH=${RUNZSH:-yes}
command_exists() {
command -v "$@" >/dev/null 2>&1
}
error() {
echo ${RED}"Error: $@"${RESET} >&2
}
setup_color() {
# Only use colors if connected to a terminal
if [ -t 1 ]; then
RED=$(printf '\033[31m')
GREEN=$(printf '\033[32m')
YELLOW=$(printf '\033[33m')
BLUE=$(printf '\033[34m')
BOLD=$(printf '\033[1m')
RESET=$(printf '\033[m')
else
RED=""
GREEN=""
YELLOW=""
BLUE=""
BOLD=""
RESET=""
fi
}
setup_ohmyzsh() {
# Prevent the cloned repository from having insecure permissions. Failing to do
# so causes compinit() calls to fail with "command not found: compdef" errors
# for users with insecure umasks (e.g., "002", allowing group writability). Note
# that this will be ignored under Cygwin by default, as Windows ACLs take
# precedence over umasks except for filesystems mounted with option "noacl".
umask g-w,o-w
echo "${BLUE}Cloning Oh My Zsh...${RESET}"
command_exists git || {
error "git is not installed"
exit 1
}
if [ "$OSTYPE" = cygwin ] && git --version | grep -q msysgit; then
error "Windows/MSYS Git is not supported on Cygwin"
error "Make sure the Cygwin git package is installed and is first on the \$PATH"
exit 1
fi
git clone -c core.eol=lf -c core.autocrlf=false \
-c fsck.zeroPaddedFilemode=ignore \
-c fetch.fsck.zeroPaddedFilemode=ignore \
-c receive.fsck.zeroPaddedFilemode=ignore \
--depth=1 --branch "$BRANCH" "$REMOTE" "$ZSH" || {
error "git clone of oh-my-zsh repo failed"
exit 1
}
echo
}
setup_zshrc() {
# Keep most recent old .zshrc at .zshrc.pre-oh-my-zsh, and older ones
# with datestamp of installation that moved them aside, so we never actually
# destroy a user's original zshrc
echo "${BLUE}Looking for an existing zsh config...${RESET}"
# Must use this exact name so uninstall.sh can find it
OLD_ZSHRC=~/.zshrc.pre-oh-my-zsh
if [ -f ~/.zshrc ] || [ -h ~/.zshrc ]; then
if [ -e "$OLD_ZSHRC" ]; then
OLD_OLD_ZSHRC="${OLD_ZSHRC}-$(date +%Y-%m-%d_%H-%M-%S)"
if [ -e "$OLD_OLD_ZSHRC" ]; then
error "$OLD_OLD_ZSHRC exists. Can't back up ${OLD_ZSHRC}"
error "re-run the installer again in a couple of seconds"
exit 1
fi
mv "$OLD_ZSHRC" "${OLD_OLD_ZSHRC}"
echo "${YELLOW}Found old ~/.zshrc.pre-oh-my-zsh." \
"${GREEN}Backing up to ${OLD_OLD_ZSHRC}${RESET}"
fi
echo "${YELLOW}Found ~/.zshrc.${RESET} ${GREEN}Backing up to ${OLD_ZSHRC}${RESET}"
mv ~/.zshrc "$OLD_ZSHRC"
fi
echo "${GREEN}Using the Oh My Zsh template file and adding it to ~/.zshrc.${RESET}"
cp "$ZSH/templates/zshrc.zsh-template" ~/.zshrc
sed "/^export ZSH=/ c\\
export ZSH=\"$ZSH\"
" ~/.zshrc > ~/.zshrc-omztemp
mv -f ~/.zshrc-omztemp ~/.zshrc
echo
}
setup_shell() {
# Skip setup if the user wants or stdin is closed (not running interactively).
if [ $CHSH = no ]; then
return
fi
# If this user's login shell is already "zsh", do not attempt to switch.
if [ "$(basename "$SHELL")" = "zsh" ]; then
return
fi
# If this platform doesn't provide a "chsh" command, bail out.
if ! command_exists chsh; then
cat <<-EOF
I can&#39;t change your shell automatically because this system does not have chsh.
${BLUE}Please manually change your default shell to zsh${RESET}
EOF
return
fi
echo "${BLUE}Time to change your default shell to zsh:${RESET}"
# Prompt for user choice on changing the default login shell
printf "${YELLOW}Do you want to change your default shell to zsh? [Y/n]${RESET} "
read opt
case $opt in
y*|Y*|"") echo "Changing the shell..." ;;
n*|N*) echo "Shell change skipped."; return ;;
*) echo "Invalid choice. Shell change skipped."; return ;;
esac
# Check if we&#39;re running on Termux
case "$PREFIX" in
*com.termux*) termux=true; zsh=zsh ;;
*) termux=false ;;
esac
if [ "$termux" != true ]; then
# Test for the right location of the "shells" file
if [ -f /etc/shells ]; then
shells_file=/etc/shells
elif [ -f /usr/share/defaults/etc/shells ]; then # Solus OS
shells_file=/usr/share/defaults/etc/shells
else
error "could not find /etc/shells file. Change your default shell manually."
return
fi
# Get the path to the right zsh binary
# 1. Use the most preceding one based on $PATH, then check that it&#39;s in the shells file
# 2. If that fails, get a zsh path from the shells file, then check it actually exists
if ! zsh=$(which zsh) || ! grep -qx "$zsh" "$shells_file"; then
if ! zsh=$(grep &#39;^/.*/zsh$&#39; "$shells_file" | tail -1) || [ ! -f "$zsh" ]; then
error "no zsh binary found or not present in &#39;$shells_file&#39;"
error "change your default shell manually."
return
fi
fi
fi
# We&#39;re going to change the default shell, so back up the current one
if [ -n "$SHELL" ]; then
echo $SHELL > ~/.shell.pre-oh-my-zsh
else
grep "^$USER:" /etc/passwd | awk -F: &#39;{print $7}&#39; > ~/.shell.pre-oh-my-zsh
fi
# Actually change the default shell to zsh
if ! chsh -s "$zsh"; then
error "chsh command unsuccessful. Change your default shell manually."
else
export SHELL="$zsh"
echo "${GREEN}Shell successfully changed to &#39;$zsh&#39;.${RESET}"
fi
echo
}
main() {
# Run as unattended if stdin is closed
if [ ! -t 0 ]; then
RUNZSH=no
CHSH=no
fi
# Parse arguments
while [ $# -gt 0 ]; do
case $1 in
--unattended) RUNZSH=no; CHSH=no ;;
--skip-chsh) CHSH=no ;;
esac
shift
done
setup_color
if ! command_exists zsh; then
echo "${YELLOW}Zsh is not installed.${RESET} Please install zsh first."
exit 1
fi
if [ -d "$ZSH" ]; then
cat <<-EOF
${YELLOW}You already have Oh My Zsh installed.${RESET}
You&#39;ll need to remove &#39;$ZSH&#39; if you want to reinstall.
EOF
exit 1
fi
setup_ohmyzsh
setup_zshrc
setup_shell
printf "$GREEN"
cat <<-&#39;EOF&#39;
__ __
____ / /_ ____ ___ __ __ ____ _____/ /_
/ __ \/ __ \ / __ `__ \/ / / / /_ / / ___/ __ \
/ /_/ / / / / / / / / / / /_/ / / /_(__ ) / / /
\____/_/ /_/ /_/ /_/ /_/\__, / /___/____/_/ /_/
/____/ ....is now installed!
Please look over the ~/.zshrc file to select plugins, themes, and options.
p.s. Follow us on https://twitter.com/ohmyzsh
p.p.s. Get stickers, shirts, and coffee mugs at https://shop.planetargon.com/collections/oh-my-zsh
EOF
printf "$RESET"
if [ $RUNZSH = no ]; then
echo "${YELLOW}Run zsh to try it out.${RESET}"
exit
fi
exec zsh -l
}
main "$@"
创建脚本文件vim oh-my-zsh
之后,添加脚本执行权限,chmod a+x&#160;
然后./oh-my-zsh执行脚本
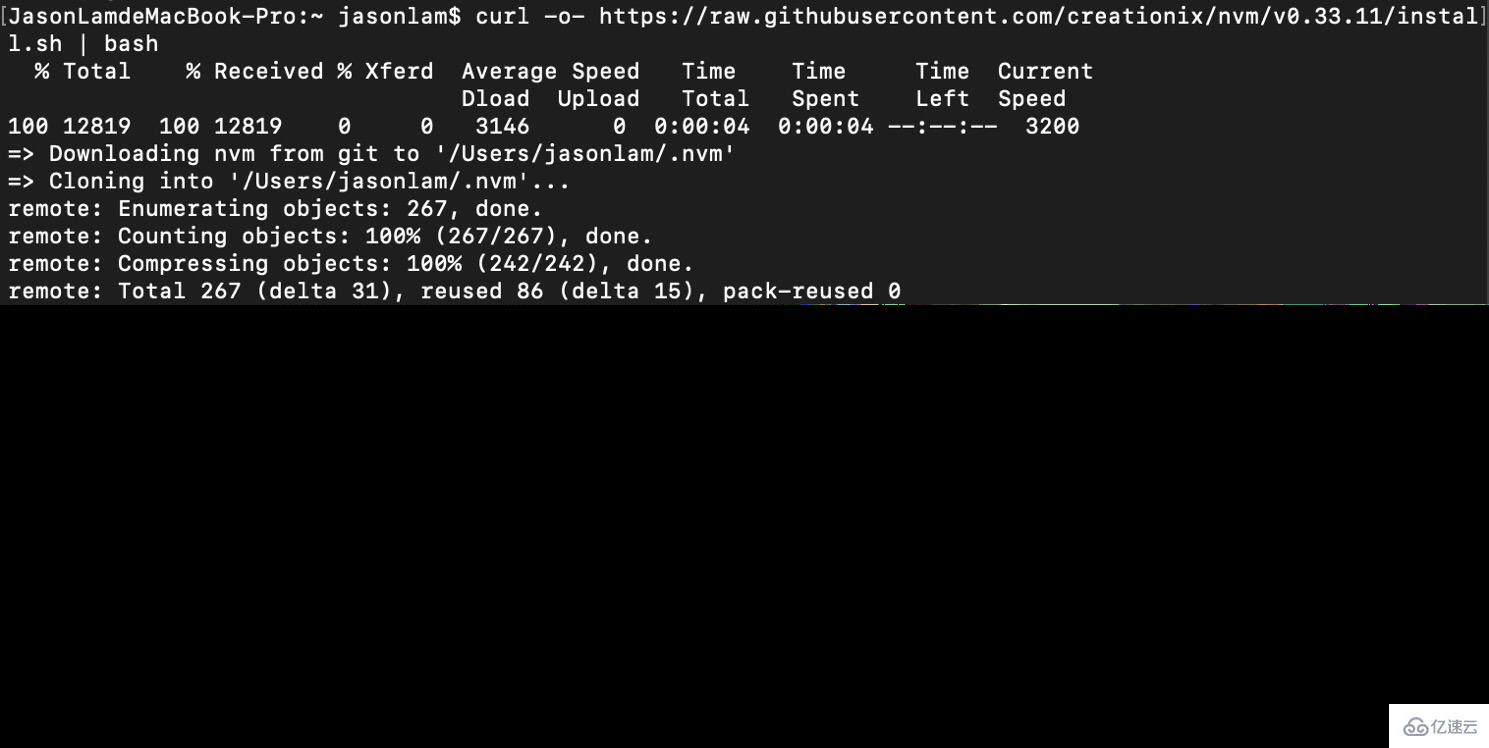
2,脚本执行完成,会出现以下界面,oh-my-zsh需要依赖zsh,所以系统没安装zsh的话,需要安装下依赖

3,oh-my-zsh需要依赖zsh,如果系统下没安装zsh,可以使用apt进行安装,apt-get install zsh,因为kali系统默认安装有所以不需要安装

&#160;4,安装自动不全脚本,运行命令:git clone https://github.com/Green-m/msfvenom-zsh-completion ~/.oh-my-zsh/custom/plugins/msfvenom/

&#160;查看是否已下载好_msfvenom 文件,ls ~/.oh-my-zsh/custom/plugins/msfvenom&#160;

使用随便一种文本编辑器打开 ~/.zshrc 文件,我使用的vim编辑器打开添加
vim ~/.zshrc
找到 plugins=(git) 将 msfvenom 添加到里面 plugins=(gitmsfvenom)

然后在最后添加
fpath=(~/.zsh/completion $fpath)($fpath 通过添加来包含您的目录~/.zshrc)
autoload -Uz compinit && compinit -i (确保 compinit 已加载或通过添加~/.zshrc)

之后保存退出编辑界面
5,实现了msfvenom的自动不全,需要zsh的shell下执行
首先输入zsh进入zsh的shell下
然后输入msfvenom - ,之后按TAB就会出现提示

msfvenom -l

&#160;
&#160;msfvenom -p windows/
&#160;
&#160;
&#160;
&#160;


 京公网安备 11010802041100号 | 京ICP备19059560号-4 | PHP1.CN 第一PHP社区 版权所有