本篇文章给大家带来的内容是关于vue实现自定义按钮的方法介绍(附代码),有一定的参考价值,有需要的朋友可以参考一下,希望对你有所帮助。
在实际开发项目中,有时我们会用到自定义按钮;因为一个项目中,众多的页面,为了统一风格,我们会重复用到很多相同或相似的按钮,这时候,自定义按钮组件就派上了大用场,我们把定义好的按钮组件导出,在全局引用,就可以在其他组件随意使用啦,这样可以大幅度的提高我们的工作效率。
好了,话不多说,上代码:
img-button.vue//这是我们自定义按钮组件
export default {
name: 'ImgButton',
props: {
type: {
type: String,
default: ''
},
name: {
tag: {
}
.img-button {
vertical-align: middle;
display: inline-block;
cursor: pointer;
margin-right: 10px;
.img-btn {
.img-no-repeat;
width:25px;
height:25px;
.img-btn:hover {
transform: scale(1.1);
.refresh-img {
background-image: url('../../assets/images/button/refresh.png');
.add-img {
background-image: url('../../assets/images/button/add.png');
.delete-img {
background-image: url('../../assets/images/button/delete.png');
.check-img {
background-image: url('../../assets/images/button/check.png');
.close-img {
background-image: url('../../assets/images/button/close.png');
.edit-img {
background-image: url('../../assets/images/button/edit.png');
.gear-img {
background-image: url('../../assets/images/button/gear.png')
.plan-img {
background-image: url('../../assets/images/button/plan.png')
.map-img {
background-image: url('../../assets/images/button/map.png')
.normal-img {
background-image: url('../../assets/images/button/normal.png')
.special-img {
background-image: url('../../assets/images/button/special.png')
.line-img {
background-image: url('../../assets/images/button/line_chart.png')
.ibtn {
width: auto;
min-width: 100px;
padding: 0 20px;
font-size: 17px;
height: 30px;
line-height: 30px;
text-align: center;
border-radius:15px;
background-color: #2f5d98;
color:#00cccc;
.ibtn-samll {
.ibtn;
height: 25px;
padding: 0 2px;
font-size: 10px;
line-height: 25px;
border-radius: 0px;
background-color: transparent;
border: 1px solid #00cccc;
.ibtn-samll:hover {
color: white;
border: 1px solid white;
.normal-btn {
.normal-btn:hover {
background-color: #ff9247;
在router.js中配置好路由
在main.js中引入//注册自定义按钮
import imgButton from './components/img-button'
Vue.use(imgButton)
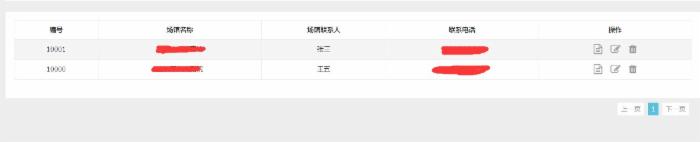
然后就可以在其他组件使用了
//值得注意的是 自定义按钮组件添加点击事件的时候一定要加.native 因为.native 修饰符就是用来注册元素的原生事件而不是组件自定义事件的
本篇文章到这里就已经全部结束了,更多其他精彩内容可以关注PHP中文网的Javascript视频教程栏目!!!


 京公网安备 11010802041100号