作者:梦幻小螳螂 | 来源:互联网 | 2023-09-25 10:34
1、编译protobuf3.4.0从地址https:github.comgoogleprotobufarchivev3.4.0.zip下载protobuf3.4.0
1、编译protobuf3.4.0
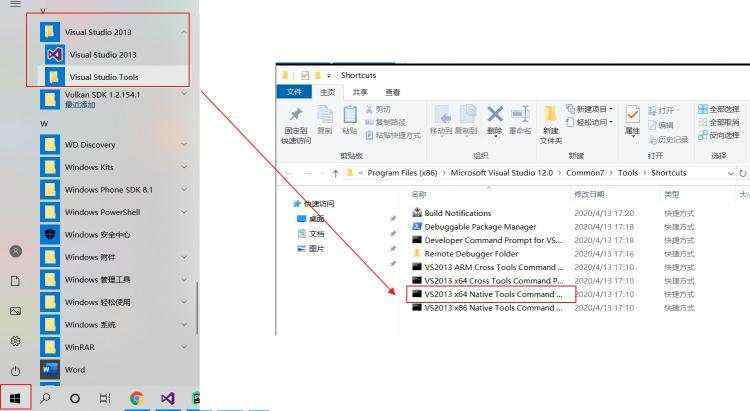
从地址https://github.com/google/protobuf/archive/v3.4.0.zip 下载protobuf3.4.0并解压,打开VS2013 x64 Native Tools Command Prompt (本机工具命令提示符)。
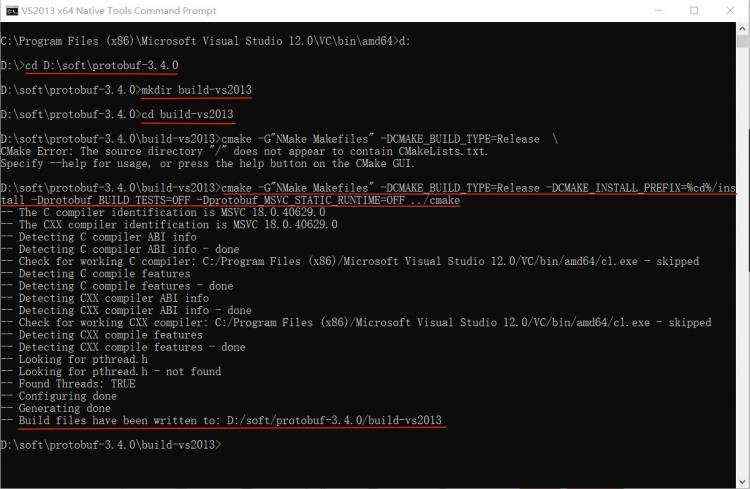
在命令行中移动到解压出来的protobuf-3.4.0目录,然后执行以下命令,出现以下界面安装成功:
> cd
> mkdir build-vs2013
> cd build-vs2013
> cmake -G"NMake Makefiles" -DCMAKE_BUILD_TYPE=Release -DCMAKE_INSTALL_PREFIX=%cd%/install -Dprotobuf_BUILD_TESTS=OFF -Dprotobuf_MSVC_STATIC_RUNTIME=OFF ../cmake
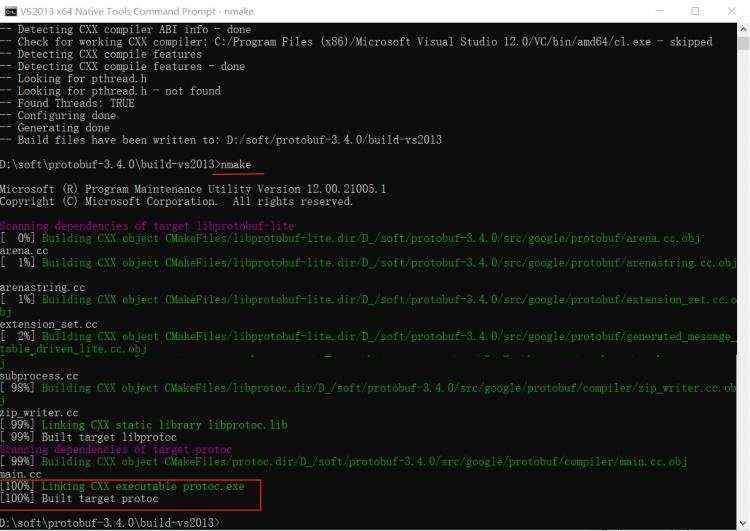
> nmake
> nmake install

2、编译ncnn library
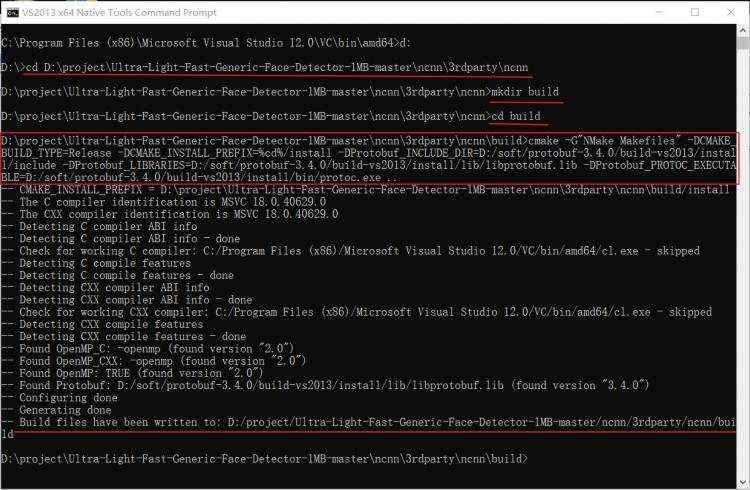
由于主要是针对人脸检测项目ultra face进行的,在链接https://github.com/Tencent/ncnn/tree/22a2be4e6cb9cc6ef596d5bb801923135c82a875中下载ncnn并解压放到对应的项目目录Ultra-Light-Fast-Generic-Face-Detector-1MB/tree/master/ncnn/3rdparty/ncnn中,然后执行以下命令,出现以下界面并在路径ncnn\build\install\lib下出现ncnn.lib编译成功:
> cd
> mkdir build
> cd build
> cmake -G"NMake Makefiles" -DCMAKE_BUILD_TYPE=Release -DCMAKE_INSTALL_PREFIX=%cd%/install -DProtobuf_INCLUDE_DIR=/build/install/include -DProtobuf_LIBRARIES=/build/install/lib/libprotobuf.lib -DProtobuf_PROTOC_EXECUTABLE=/build/install/bin/protoc.exe ..
> nmake
> nmake install
注:上述命令中,ncnn-root-dir 替换成自己项目中对应ncnn存放的目录,我这里是 D:\project\Ultra-Light-Fast-Generic-Face-Detector-1MB-master\ncnn\3rdparty\ncnn;protobuf-root-dir 替换成第一步编译后的protobuf目录,我这里是D:/soft/protobuf-3.4.0。


3、下载Vulkan SDK并安装
地址: https://vulkan.lunarg.com/sdk/home
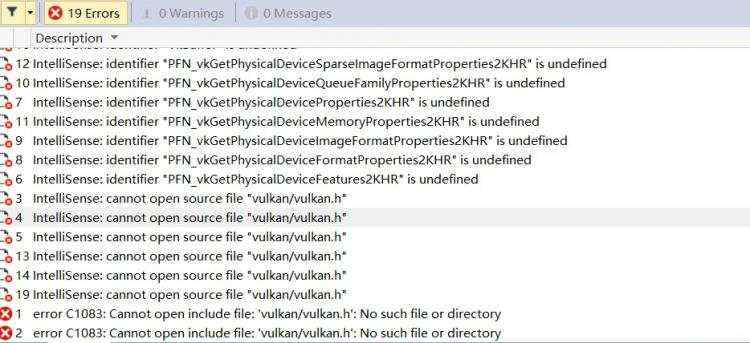
原因:后边调用编译后的lib库的时候需要包含vulkan相关的头文件,否则会编译不过,出现下面的错误:
参考链接:
https://github.com/Tencent/ncnn/wiki/how-to-build#build-for-windows-x64-using-visual-studio-community-2017
https://blog.csdn.net/zhaotun123/article/details/99671286
本文地址:https://blog.csdn.net/loveliuzz/article/details/109246914


 京公网安备 11010802041100号