Channel创建再次回顾一下Channel的流程吧。
doBind
public ChannelFuture bind(int inetPort) {
    return bind(new InetSocketAddress(inetPort));
}
bind2
public ChannelFuture bind(SocketAddress localAddress) {
    validate();
    if (localAddress == null) {
        throw new NullPointerException("localAddress");
    }
    return doBind(localAddress);
}
doBind
private ChannelFuture doBind(final SocketAddress localAddress) {
    final ChannelFuture regFuture = initAndRegister();
    ...
}
initAndRegister
final ChannelFuture initAndRegister() {
    ...
    channel = channelFactory.newChannel();
    ...
}
newChannel
默认采用的是反射进行实例化。
public T newChannel() {
    ...
    return clazz.newInstance();
}
NioServerSocketChannel
使用的就是传入的
NioServerSocketChannel类,反射默认调用的是无参构造。
public NioServerSocketChannel() {
    this(newSocket(DEFAULT_SELECTOR_PROVIDER));
}
newSocketprivate static ServerSocketChannel newSocket(SelectorProvider provider) { .... return provider.openServerSocketChannel(); }次方法返回的,就是原生的
NIO的ServerSocketChannel了
NioServerSocketChannel2
实际调用的构造方法
public NioServerSocketChannel(ServerSocketChannel channel) {
    super(null, channel, SelectionKey.OP_ACCEPT);
    config = new NioServerSocketChannelConfig(this, javaChannel().socket());
}
此时已经传入
OP_ACCEPT事件监听
Channel实例信息NioServerSocketChannel
public NioServerSocketChannel(ServerSocketChannel channel) {
    super(null, channel, SelectionKey.OP_ACCEPT);
    config = new NioServerSocketChannelConfig(this, javaChannel().socket());
}
super
protected AbstractNioMessageChannel(Channel parent, SelectableChannel ch, int readInterestOp) {
    super(parent, ch, readInterestOp);
}
super
protected AbstractNioChannel(Channel parent, SelectableChannel ch, int readInterestOp) {
    super(parent);
    this.ch = ch;
    ...
}
可以看到,
NIO的真实ServerSocketChannel作为内部对象,被封装了。
super
protected AbstractChannel(Channel parent) {
   this.parent = parent;
   id = newId();
   unsafe = newUnsafe();
   pipeline = newChannelPipeline();
}
NioServerSocket的id和pipeline此时被创建和添加,具体的创建办法可以继续跟踪。非主要目的,先到此为止。
Channel配置信息NioServerSocketChannel
public NioServerSocketChannel(ServerSocketChannel channel) {
    super(null, channel, SelectionKey.OP_ACCEPT);
    config = new NioServerSocketChannelConfig(this, javaChannel().socket());
}
config之前,先看看javaChannel().socket()
javaChannelprotected ServerSocketChannel javaChannel() { return (ServerSocketChannel) super.javaChannel(); }
super.javaChannel()protected SelectableChannel javaChannel() { return ch; }之前已经看到了,创建的
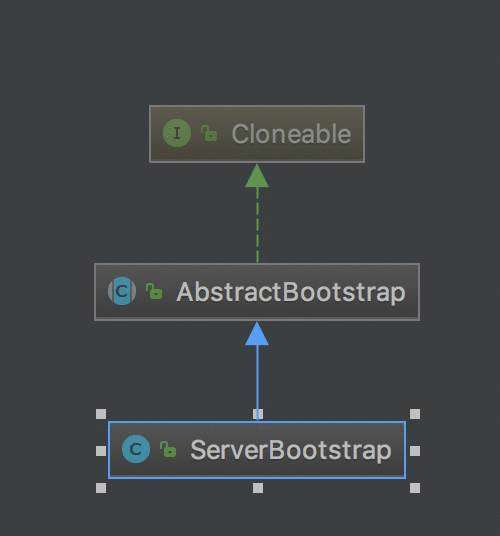
ServerSocketChannel被赋值给了ch,这一步就是获取原来的ch。类型变化?继承关系如下
javaChannel也就是JDK原生的channel了。
javaChannel().socket()就是原生
ServerSocketChannel获取socket对象了,不是新东西。
NioServerSocketChannelConfig
private NioServerSocketChannelConfig(NioServerSocketChannel channel, ServerSocket javaSocket) {
     super(channel, javaSocket);
}
super
public DefaultServerSocketChannelConfig(ServerSocketChannel channel, ServerSocket javaSocket) {
   super(channel);
   if (javaSocket == null) {
       throw new NullPointerException("javaSocket");
   }
   this.javaSocket = javaSocket;
}
super之后把javaSocket带过来,旧东西不管,继续super
super
public DefaultChannelConfig(Channel channel) {
    this(channel, new AdaptiveRecvByteBufAllocator());
}
记住
AdaptiveRecvByteBufAllocator,这是需要详细追查的。为了流程完整性,我们继续深入。
DefaultChannelConfig
protected DefaultChannelConfig(Channel channel, RecvByteBufAllocator allocator) {
    setRecvByteBufAllocator(allocator, channel.metadata());
    this.channel = channel;
}
setRecvByteBufAllocator
private void setRecvByteBufAllocator(RecvByteBufAllocator allocator, ChannelMetadata metadata) {
    if (allocator instanceof MaxMessagesRecvByteBufAllocator) {
        ((MaxMessagesRecvByteBufAllocator) allocator).maxMessagesPerRead(metadata.defaultMaxMessagesPerRead());
    } else if (allocator == null) {
        throw new NullPointerException("allocator");
    }
    setRecvByteBufAllocator(allocator);
}
setRecvByteBufAllocator
public ChannelConfig setRecvByteBufAllocator(RecvByteBufAllocator allocator) {
   rcvBufAllocator = checkNotNull(allocator, "allocator");
   return this;
}
也就是说,我们配置最关键的,就是DefaultChannelConfig新增的额外参数,
allocator。
Allocator
前面已经说了,这个就是重点。
public DefaultChannelConfig(Channel channel) {
    this(channel, new AdaptiveRecvByteBufAllocator());
}
大小适配策略
public AdaptiveRecvByteBufAllocator() {
    this(DEFAULT_MINIMUM, DEFAULT_INITIAL, DEFAULT_MAXIMUM);
}
    public AdaptiveRecvByteBufAllocator(int minimum, int initial, int maximum) {
        if (minimum <= 0) {
            throw new IllegalArgumentException("minimum: " + minimum);
        }
        if (initial < minimum) {
            throw new IllegalArgumentException("initial: " + initial);
        }
        if (maximum < initial) {
            throw new IllegalArgumentException("maximum: " + maximum);
        }
        int minIndex = getSizeTableIndex(minimum);
        if (SIZE_TABLE[minIndex] < minimum) {
            this.minIndex = minIndex + 1;
        } else {
            this.minIndex = minIndex;
        }
        int maxIndex = getSizeTableIndex(maximum);
        if (SIZE_TABLE[maxIndex] > maximum) {
            this.maxIndex = maxIndex - 1;
        } else {
            this.maxIndex = maxIndex;
        }
        this.initial = initial;
    }
static {
    List<Integer> sizeTable = new ArrayList<Integer>();
    for (int i = 16; i < 512; i += 16) {
        sizeTable.add(i);
    }
    for (int i = 512; i > 0; i <<= 1) {
        sizeTable.add(i);
    }
    SIZE_TABLE = new int[sizeTable.size()];
    for (int i = 0; i < SIZE_TABLE.length; i ++) {
        SIZE_TABLE[i] = sizeTable.get(i);
    }
}
可以分析出
sizeTable的值为
- n∗(24),n∈[16,512)
- (28)n,n∈[512,+∞), +∞表示直到溢出.
getSizeTableIndexprivate static int getSizeTableIndex(final int size) { for (int low = 0, high = SIZE_TABLE.length - 1;;) { if (high < low) { return low; } if (high == low) { return high; } int mid = low + high >>> 1; int a = SIZE_TABLE[mid]; int b = SIZE_TABLE[mid + 1]; if (size > b) { low = mid + 1; } else if (size < a) { high = mid - 1; } else if (size == a) { return mid; } else { return mid + 1; } } }此方法,其实通过
size比对,找到一个接近并大于size的在SIZE_TABLE的值得坐标并返回。有参构造调用,就是通过传入的限定字节大小,来确定
SIZE_TABLE的index范围。
static final int DEFAULT_MINIMUM = 64;
static final int DEFAULT_INITIAL = 1024;
static final int DEFAULT_MAXIMUM = 65536;
默认情况下,对最小,最大,初始化的缓冲区大小已经设置了默认值。
可以看到,类是
public的,变量是static,我们可以通过设置静态变量来调整接收缓冲的默认大小。AdaptiveRecvByteBufAllocator.DEFAULT_MINIMUM = 64; AdaptiveRecvByteBufAllocator.DEFAULT_INITIAL = 1024; AdaptiveRecvByteBufAllocator.DEFAULT_MAXIMUM = 65535;
SIZE_TABLE
size锁定范围,返回目标坐标public HandleImpl(int minIndex, int maxIndex, int initial) {
this.minIndex = minIndex;
this.maxIndex = maxIndex;
index = getSizeTableIndex(initial);
nextReceiveBufferSize = SIZE_TABLE[index];
}
public int guess() {
return nextReceiveBufferSize;
}
通过guess就可以获取该分配的大小了。
allocate
private final class HandleImpl extends MaxMessageHandle这个信息得追到
MaxMessageHandle才能看到。public Handle newHandle() { return new HandleImpl(minIndex, maxIndex, initial); }在某个还不知道的时候,就是调用它创建缓冲的。
public ByteBuf allocate(ByteBufAllocator alloc) {
     return alloc.ioBuffer(guess());
}
缓冲大小策略明白了,它怎么创建的呢。
ioBuffre
PreferHeapByteBufAllocatorpublic ByteBuf ioBuffer(int initialCapacity) { return allocator.heapBuffer(initialCapacity); }这个
allocator直接就是heapBuffer,就不管了。
AbstractByteBufAllocator
    public ByteBuf ioBuffer(int initialCapacity) {
        if (PlatformDependent.hasUnsafe()) {
            return directBuffer(initialCapacity);
        }
        return heapBuffer(initialCapacity);
    }
此时,就会有两种buffer的选择创建,基于效率考量,我们肯定优先零拷贝的directBuffer。
PlatformDependent.hasUnsafe()
    public static boolean hasUnsafe() {
        return HAS_UNSAFE;
    }
HAS_UNSAFE
private static final boolean HAS_UNSAFE = hasUnsafe0();
hasUnsafe0
    private static boolean hasUnsafe0() {
        if (isAndroid()) {
            logger.debug("sun.misc.Unsafe: unavailable (Android)");
            return false;
        }
        if (PlatformDependent0.isExplicitNoUnsafe()) {
            return false;
        }
        try {
            boolean hasUnsafe = PlatformDependent0.hasUnsafe();
            logger.debug("sun.misc.Unsafe: {}", hasUnsafe ? "available" : "unavailable");
            return hasUnsafe;
        } catch (Throwable ignored) {
            return false;
        }
    }
追踪过程简单,我就直接到具体步骤了
androidprivate static boolean isAndroid0() { boolean android; try { Class.forName("android.app.Application", false, getSystemClassLoader()); android = true; } catch (Throwable ignored) { android = false; } return android; }通过类名
android.app.Application判断系统
explicitNoUnsafeprivate static boolean explicitNoUnsafe0() { final boolean noUnsafe = SystemPropertyUtil.getBoolean("io.netty.noUnsafe", false); if (noUnsafe) { logger.debug("sun.misc.Unsafe: unavailable (io.netty.noUnsafe)"); return true; } boolean tryUnsafe; if (SystemPropertyUtil.contains("io.netty.tryUnsafe")) { tryUnsafe = SystemPropertyUtil.getBoolean("io.netty.tryUnsafe", true); } else { tryUnsafe = SystemPropertyUtil.getBoolean("org.jboss.netty.tryUnsafe", true); } if (!tryUnsafe) { logger.debug("sun.misc.Unsafe: unavailable (io.netty.tryUnsafe/org.jboss.netty.tryUnsafe)"); return true; } return false; }
- 优先查看系统静态变量
io.netty.noUnsafe,默认false- 不行查看系统静态变量
io.netty.tryUnsafe,默认true- 不包含
io.netty.tryUnsafe则查看io.netty.tryUnsafe,默认true。- 默认
false我们要绕过这一层屏蔽使用
directBuffer,需要这样System.setProperty("io.netty.noUnsafe","false"); System.setProperty("io.netty.tryUnsafe","true");
hasUnsafestatic boolean hasUnsafe() { return UNSAFE != null; }
UNSAFE这个字段呢,静态代码块里面有判断逻辑。总的来说,就是检查控制和支不支持。
有兴趣可以仔细分析一下,我能力有限,嘿嘿。
具体创建呢,就不用追了,类型大概也就是这两种。
Channel过程,封装原生ServerSocketChannel,以及扩展id和pipeline。更多封装信息?更多配置信息?我还不行,慢慢加深呗。


 京公网安备 11010802041100号 | 京ICP备19059560号-4 | PHP1.CN 第一PHP社区 版权所有
