Linux下PPPOE
安装环境:【Centos6.4.x86_64 操作系统】
第一步:先下载最新的pppoe软件安装包,然后使用ftp软件把它拷贝到Linux系统的文件目录下,具体操作如下:
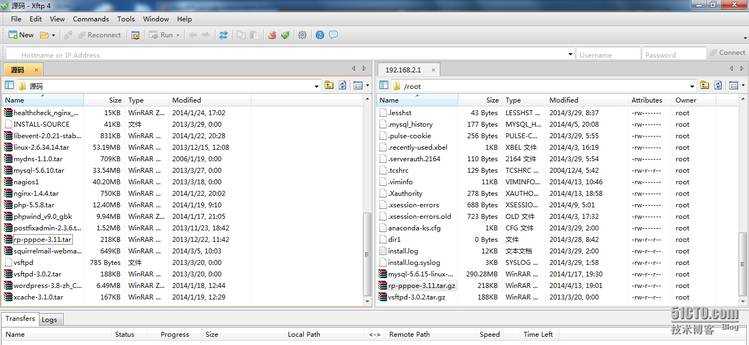
从上图可以看到pppoe软件安装包已经拷贝到了Linux系统目录下,同时还可以通过其他命令来查看,如下:
[root@huangzhong ~]# ll
total 297724
drwx------. 7 root root 4096 Apr 9 08:09 8192
drwxr-xr-x. 2 root root 4096 Mar 29 05:54 Desktop
drwxr-xr-x. 2 root root 4096 Mar 29 05:54 Documents
drwxr-xr-x. 2 root root 4096 Mar 29 05:54 Downloads
drwxr-xr-x. 2 root root 4096 Mar 29 05:54 Music
drwxr-xr-x. 2 root root 4096 Mar 29 05:54 Pictures
-rw-r--r--. 1 root root 304382512 Jan 17 19:30 mysql-5.6.15-linux-glibc2.5-x86_64.tar.gz
-rw-r--r--. 1 root root 223234 Apr 13 19:01 rp-pppoe-3.11.tar.gz
-rw-r--r--. 1 root root 192808 Mar 20 2013 vsftpd-3.0.2.tar.gz
第二步:从上面可以猜测这软件包应该是源码安装包,所以在这把它解压到源码的目录下,具体操作如下:
root@huangzhong ~]# tar -zxvf rp-pppoe-3.11.tar.gz -C /usr/local/src/
rp-pppoe-3.11/
rp-pppoe-3.11/go-gui
rp-pppoe-3.11/README
rp-pppoe-3.11/doc/LICENSE
rp-pppoe-3.11/man/pppoe-setup.8
rp-pppoe-3.11/scripts/pppoe-setup.in
rp-pppoe-3.11/scripts/pppoe-start.in
rp-pppoe-3.11/scripts/pppoe-stop.in
rp-pppoe-3.11/src/
rp-pppoe-3.11/src/plugin/
rp-pppoe-3.11/src/pppoe-sniff.c
rp-pppoe-3.11/src/pppoe-server.c
rp-pppoe-3.11/src/ppp.c
rp-pppoe-3.11/src/relay.h
rp-pppoe-3.11/src/Makefile.in
rp-pppoe-3.11/src/configure.in
rp-pppoe-3.11/src/plugin.c
rp-pppoe-3.11/src/libevent/
rp-pppoe-3.11/src/libevent/event.c
从上面可以看出这确实是个源码安装包,下面就是按照源码的安装步骤进行安装
第三步:进入解压的目录下查看解压问价,并进入解压后的文件目录查看有没有安装说明:
[root@huangzhong ~]# cd /usr/local/src/
[root@huangzhong src]# ll
total 8
drwxr-xr-x. 8 user1 user1 4096 Aug 18 2012 rp-pppoe-3.11
drwxr-x--x. 8 1000 1000 4096 Apr 9 04:56 vsftpd-3.0.2
进入解压后的pppoe目录下查看有没有安装说明:
[root@huangzhong rp-pppoe-3.11]# ll
total 48
-rw-r--r--. 1 user1 user1 1882 Aug 18 2012 README
-rw-r--r--. 1 user1 user1 561 Aug 18 2012 SERVPOET
drwxr-xr-x. 2 user1 user1 4096 Aug 18 2012 configs
drwxr-xr-x. 2 user1 user1 4096 Aug 18 2012 doc
-rwxr-xr-x. 1 user1 user1 845 Aug 18 2012 go
-rwxr-xr-x. 1 user1 user1 1941 Aug 18 2012 go-gui
drwxr-xr-x. 3 user1 user1 4096 Aug 18 2012 gui
drwxr-xr-x. 2 user1 user1 4096 Aug 18 2012 man
-rw-r--r--. 1 user1 user1 4109 Aug 18 2012 rp-pppoe.spec
drwxr-xr-x. 2 user1 user1 4096 Aug 18 2012 scripts
drwxr-xr-x. 4 user1 user1 4096 Aug 18 2012 src
从上面我们看到了README文件
第四步:打开README,查看有没有安装要求或步骤,具体如下:
[root@huangzhong rp-pppoe-3.11]# vim README
打开README文件后我们可以看到以下安装步骤:
Compile and install pppd if you don't already have it. Then:
1) Unpack:
$ tar xzvf rp-pppoe-xxx.tar.gz
2) Change to source directory:
$ cd src
3) Configure:
$ ./configure
4) Compile:
$ make
4) Install (this step must be done as root)
# make install
5) Now read doc/HOW-TO-CONNECT
第五步:按照上面的步骤进行操作,安装步骤1已经完成接下就是完成2和3,进入到src目录下进行执行编译,具体操作如下:
[root@huangzhong rp-pppoe-3.11]# cd src/
[root@huangzhong src]# ./configure
checking for gcc... gcc
checking whether the C compiler works... yes
checking for C compiler default output file name... a.out
checking for suffix of executables...
checking whether we are cross compiling... no
checking for suffix of object files... o
checking whether we are using the GNU C compiler... yes
checking whether gcc accepts -g... yes
checking for gcc option to accept ISO C89... none needed
checking for ranlib... ranlib
checking how to run the C preprocessor... gcc -E
pppoe pppoe-server pppoe-sniff pppoe-relay
Type 'make' to compile the software
从上面可以看出编译已经完成,接下来执行make命令:
root@huangzhong src]# make
gcc -g -O2 -fno-strict-aliasing -Wall -Wstrict-prototypes '-DPPPOE_PATH="/usr/sbin/pppoe"' '-DPPPD_PATH="/usr/sbin/pppd"' '-DPLUGIN_PATH="/etc/ppp/plugins/rp-pppoe.so"' '-DPPPOE_SERVER_OPTIONS="/etc/ppp/pppoe-server-options"' -Ilibevent '-DVERSION="3.11"' -c -o pppoe.o pppoe.c
Type 'make install' as root to install the software.
从上面可以看出make已执行完,接下来操作要执行make install命令:
[root@huangzhong src]# make install
Type 'make install' as root to install the software.
mkdir -p /usr/sbin
/usr/bin/install -c -m 755 pppoe /usr/sbin
/usr/bin/install -c -m 755 pppoe-server /usr/sbin
if test -x licensed-only/pppoe-server-control ; then /usr/bin/install -c -m 755 licensed-only/pppoe-server-control /usr/sbin; fi
Type 'pppoe-setup' to configure the software.
从上面可以看出整个安装已经完成了。
第六步:找到.configs编译后的安装目录,可以使用以下命令找到.config的默认安装目录:
[root@huangzhong src]# ./configure --help
`configure' configures this package to adapt to many kinds of systems.
Usage: ./configure [OPTION]... [VAR=VALUE]...
Installation directories:
--prefix=PREFIX install architecture-independent files in PREFIX
[/usr]
--exec-prefix=EPREFIX install architecture-dependent files in EPREFIX
[PREFIX]
以上可以看到安装默认目录,然后进入默认目录进行查看,看看有没有要找的文件,具体操作如下:
[root@huangzhong src]# ll /usr/sbin/ |grep pppoe
-rwxr-xr-x. 1 root root 96542 Apr 13 19:46pppoe
-rwxr-xr-x. 1 root root 9198 Apr 13 19:46pppoe-connect
-r-xr-xr-x. 1 root root 16160 Aug 23 2010 pppoe-discovery
-rwxr-xr-x. 1 root root 85506 Apr 13 19:46 pppoe-relay
-rwxr-xr-x. 1 root root 146842 Apr 13 19:46 pppoe-server
-rwxr-xr-x. 1 root root 9552 Apr 13 19:46pppoe-setup
-rwxr-xr-x. 1 root root 53795 Apr 13 19:46 pppoe-sniff
-rwxr-xr-x. 1 root root 5552 Apr 13 19:46pppoe-start
-rwxr-xr-x. 1 root root 2116 Apr 13 19:46 pppoe-status
-rwxr-xr-x. 1 root root 2273 Apr 13 19:46pppoe-stop
第七步:按照上面安装完成的步骤执行pppoe-setup
[root@huangzhong src]# pppoe-setup
Welcome to the Roaring Penguin PPPoE client setup. First, I will run
some checks on your system to make sure the PPPoE client is installed
properly...
Looks good! Now, please enter some information:
USER NAME
>>> Enter your PPPoE user name (default bxxxnxnx@sympatico.ca):user1(输入账号)
INTERFACE
>>> Enter the Ethernet interface connected to the DSL modem
For Solaris, this is likely to be something like /dev/hme0.
For Linux, it will be ethn, where 'n' is a number.
(default eth0):(按回车默认eth0)
Do you want the link to come up on demand, or stay up continuously?
If you want it to come up on demand, enter the idle time in seconds
after which the link should be dropped. If you want the link to
stay up permanently, enter 'no' (two letters, lower-case.)
NOTE: Demand-activated links do not interact well with dynamic IP
addresses. You may have some problems with demand-activated links.
>>> Enter the demand value (default no):(按回车表示no默认永久的可以看到蓝色部分的解释)
DNS
Please enter the IP address of your ISP's primary DNS server.
If your ISP claims that 'the server will provide DNS addresses',
enter 'server' (all lower-case) here.
If you just press enter, I will assume you know what you are
doing and not modify your DNS setup.
>>> Enter the DNS information here:server(表示是服务器DNS默认自动分配,具体解释可以上两行蓝色部分)
PASSWORD
>>> Please enter your PPPoE password:(输入密码)
>>> Please re-enter your PPPoE password(确认密码)
The firewall choices are:
0 - NONE: This script will not set any firewall rules. You are responsible
for ensuring the security of your machine. You are STRONGLY
recommended to use some kind of firewall rules.
1 - STANDALONE: Appropriate for a basic stand-alone web-surfing workstation
2 - MASQUERADE: Appropriate for a machine acting as an Internet gateway
for a LAN
>>> Choose a type of firewall (0-2):0(防火墙的配置,具体可以看上面的解释)
** Summary of what you entered ** //总结你的配置
Ethernet Interface: eth0
User name: user1
Activate-on-demand: No
DNS addresses: Supplied by ISP's server
Firewalling: NONE
>>> Accept these settings and adjust configuration files (y/n)?Y(是否同意上面配置)
同上上面的配置后保存生成以下文件:
Adjusting /etc/ppp/pppoe.conf
Adjusting /etc/ppp/pap-secrets and /etc/ppp/chap-secrets
(But first backing it up to /etc/ppp/pap-secrets-bak)
(But first backing it up to /etc/ppp/chap-secrets-bak)
Congratulations, it should be all set up!
Type 'pppoe-start' to bring up your PPPoE link and 'pppoe-stop' to bring
it down. Type 'pppoe-status' to see the link status.
第八步:进行pppoe拨号,具体操作如下:
[root@huangzhong src]# pppoe-start
..........(如果你插网线了会显示拨号成功,然后输入用户名和密码就拨号成功了)
这样整个pppoe安装就完成了


 京公网安备 11010802041100号