实验环境
1、centos7图形化界面安装
2、busybox:busybox-1.30.0.tar.bz2
官网 https://busybox.net
下载地址:https://busybox.net/downloads/busybox-1.30.0.tar.bz2
3、一块新添加的硬盘
Busybox 是一个开源项目,遵循GPL v2协议。Busybox将众多的UNIX命令集合进一个
很小的可执行程序中,其中包括了三百多个最常用 Linux 命令和工具
一、编译安装busybox
[root@centos7 data]# yum install gcc gcc-c++ glibc glibc-devel pcre pcre-devel \
openssl openssl-desystemd-devel zlib-devel glibc-static ncurses-devel wget
[root@centos7 data]# tar xf busybox-1.30.0.tar.bz2
[root@centos7 data]# cd busybox-1.30.0
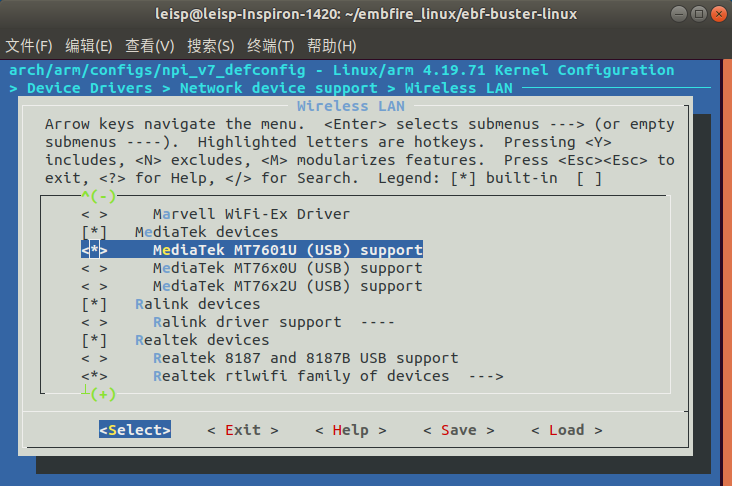
[root@centos7 busybox-1.30.0]make menuconfig
[root@centos7 busybox-1.30.0] make && make install
##按下面选择,把busybox编译为静态二进制、不用共享库
Busybox Settings -->Build Options -->[*] Build BusyBox as a static binary (no shared
libs) 之后保存退出 --> exit --> exit --> yes

安装成功

busybox的使用有三种方式:
busybox后直接跟命令,如 busybox ls
直接将busybox重命名,如 cp busybox tar
创建符号链接,如 ln -s busybox rm
以上方法中,第三种方法最方便,但为busybox中每个命令都创建一个软链接,
相当费事,busybox提供自动方法:busybox编译成功后,执行make install,则会
产生一个_install目录,其中包含了busybox及每个命令的软链接
二、添加新硬盘并分区
新添加的硬盘要保存为单个文件,并记录具体保存路径
添加后扫描到磁盘并分区格式化,至少分2个分区,/dev/sdb1为boot分区,/dev/sdb2为根分区 这里不写详细步骤了


三、安装bootloader和grub、内核文件
[root@centos7 busybox-1.30.0]# grub2-install --root-directory=/mnt /dev/sdb 安装grub1阶段和1.5阶段
[root@centos7 busybox-1.30.0]# hexdump -C -n 512 /dev/sdb 查看bootloader
[root@centos7 busybox-1.30.0]# grub2-mkconfig > /mnt/boot/grub2/grub.cfg grub阶段
[root@centos7 busybox-1.30.0]# cp /boot/vmlinuz-3.10.0-957.el7.x86_64 /mnt/boot/
[root@centos7 busybox-1.30.0]# cp /boot/initramfs-3.10.0-957.el7.x86_64.img /mnt/boot/
[root@centos7 busybox-1.30.0]# cp _install/* /mnt/sysroot/ 将busybox下_install文件复制到/mnt/sysroot

[root@centos7 ~]#vi /etc/default/grub
修改/etc/default/grub在最后一行添加
GRUB_DISABLE_LINUX_UUID=true
[root@centos7 ~]#grub2-mkconfig > /mnt/boot/grub2/grub.cfg
删除之前添加在/etc/default/grub的那一行以免影响现有系统

到此自制系统已经完成下面开始验证
新建一个空白虚拟机,将原有的磁盘删除,不然bios会默认从第一块硬盘寻找系统

添加新硬盘


成功开机,里面的命令来自于busybox


 京公网安备 11010802041100号