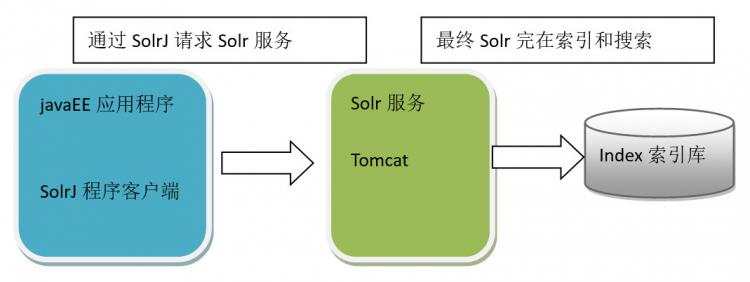
solrj是访问Solr服务的java客户端,提供索引和搜索的请求方法,SolrJ通常嵌入在业务系统中,通过SolrJ的API接口操作Solr服务,如下图:
2.1 添加文档
- 实现步骤:
第一步:创建一个java工程
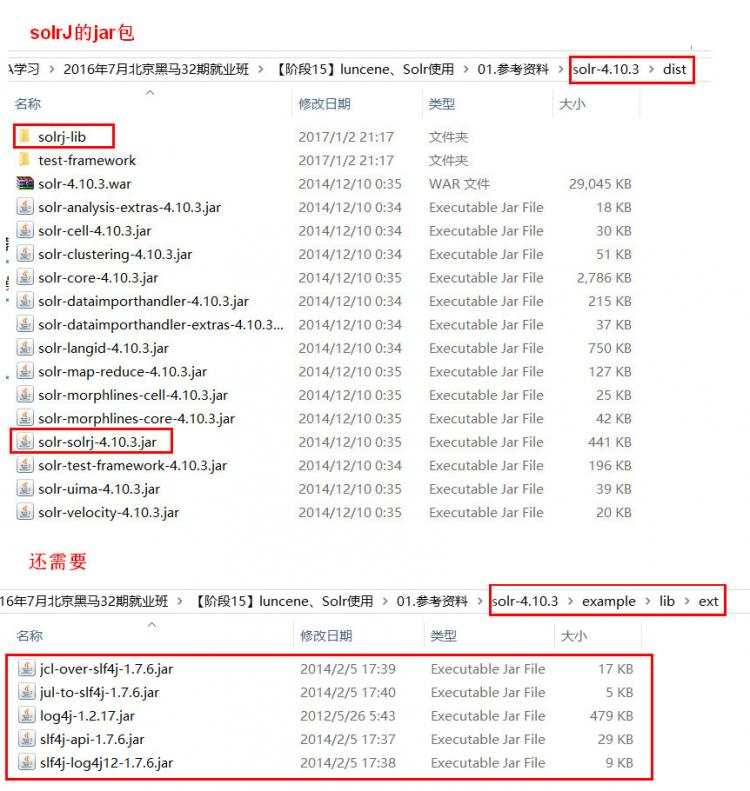
第二步:导入相关jar包
第三步:和Solr服务器建立连接。HttpSolrServer对象建立连接
第四步:创建一个SolrInputDocument对象,然后添加域
第五步:将SolrInputDocument添加到索引库
第六步:提交
- 代码实现
//向索引库中添加索引
@Testpublic void addDocument() throws Exception {//和solr服务器创建连接//参数:solr服务器的地址SolrServer solrServer = new HttpSolrServer("http://localhost:8080/solr");//创建一个文档对象SolrInputDocument document = new SolrInputDocument();//向文档中添加域//第一个参数:域的名称,域的名称必须是在schema.xml中定义的//第二个参数:域的值document.addField("id", "c0001");document.addField("title_ik", "使用solrJ添加的文档");document.addField("content_ik", "文档的内容");document.addField("product_name", "商品名称");//把document对象添加到索引库中
solrServer.add(document);//提交修改
solrServer.commit();}
2.2 删除文档
-
根据id删除
//删除文档,根据id删除
@Testpublic void deleteDocumentByid() throws Exception {//创建连接SolrServer solrServer = new HttpSolrServer("http://localhost:8080/solr");//根据id删除文档solrServer.deleteById("c0001");//提交修改
solrServer.commit();} -
根据查询删除
//根据查询条件删除文档
@Testpublic void deleteDocumentByQuery() throws Exception {//创建连接SolrServer solrServer = new HttpSolrServer("http://localhost:8080/solr");//根据查询条件删除文档solrServer.deleteByQuery("*:*");//提交修改
solrServer.commit();}
2.3 修改文档
在solrJ中修改没有对应的update方法,只有add方法,只需要添加一条新的文档,和被修改的文档id一致就,可以修改了。本质上就是先删除后添加。
2.4 查询文档
- 简单查询
//查询索引
@Testpublic void queryIndex() throws Exception {//创建连接SolrServer solrServer = new HttpSolrServer("http://localhost:8080/solr");//创建一个query对象SolrQuery query = new SolrQuery();//设置查询条件query.setQuery("*:*");//执行查询QueryResponse queryResponse = solrServer.query(query);//取查询结果SolrDocumentList solrDocumentList = queryResponse.getResults();//共查询到商品数量System.out.println("共查询到商品数量:" + solrDocumentList.getNumFound());//遍历查询的结果for (SolrDocument solrDocument : solrDocumentList) {System.out.println(solrDocument.get("id"));System.out.println(solrDocument.get("product_name"));System.out.println(solrDocument.get("product_price"));System.out.println(solrDocument.get("product_catalog_name"));System.out.println(solrDocument.get("product_picture"));}} - 复杂查询(其中包含查询、过滤、分页、排序、高亮显示等处理)
//复杂查询索引
@Testpublic void queryIndex2() throws Exception {//创建连接SolrServer solrServer = new HttpSolrServer("http://localhost:8080/solr");//创建一个query对象SolrQuery query = new SolrQuery();//设置查询条件query.setQuery("钻石");//过滤条件query.setFilterQueries("product_catalog_name:幽默杂货");//排序条件query.setSort("product_price", ORDER.asc);//分页处理query.setStart(0);query.setRows(10);//结果中域的列表query.setFields("id","product_name","product_price","product_catalog_name","product_picture");//设置默认搜索域query.set("df", "product_keywords");//高亮显示query.setHighlight(true);//高亮显示的域query.addHighlightField("product_name");//高亮显示的前缀query.setHighlightSimplePre("");//高亮显示的后缀query.setHighlightSimplePost("");//执行查询QueryResponse queryResponse = solrServer.query(query);//取查询结果SolrDocumentList solrDocumentList = queryResponse.getResults();//共查询到商品数量System.out.println("共查询到商品数量:" + solrDocumentList.getNumFound());//遍历查询的结果for (SolrDocument solrDocument : solrDocumentList) {System.out.println(solrDocument.get("id"));//取高亮显示String productName = "";Maplist = highlighting.get(solrDocument.get("id")).get("product_name");//判断是否有高亮内容if (null != list) {productName = list.get(0);} else {productName = (String) solrDocument.get("product_name");}System.out.println(productName);System.out.println(solrDocument.get("product_price"));System.out.println(solrDocument.get("product_catalog_name"));System.out.println(solrDocument.get("product_picture"));}}
3.1 添加文档
使用步骤:
第一步:把solrJ相关的jar包添加到工程中。
第二步:创建一个SolrServer对象,需要使用CloudSolrServer子类。构造方法的参数是zookeeper的地址列表。
第三步:需要设置DefaultCollection属性。
第四步:创建一SolrInputDocument对象。
第五步:向文档对象中添加域
第六步:把文档对象写入索引库。
第七步:提交。
@Testpublic void testSolrCloudAddDocument() throws Exception {// 第一步:把solrJ相关的jar包添加到工程中。// 第二步:创建一个SolrServer对象,需要使用CloudSolrServer子类。构造方法的参数是zookeeper的地址列表。// 参数是zookeeper的地址列表,使用逗号分隔CloudSolrServer solrServer = new CloudSolrServer("192.168.25.135:2181,192.168.25.135:2182,192.168.25.135:2183");// 第三步:需要设置DefaultCollection属性。solrServer.setDefaultCollection("collection2");// 第四步:创建一SolrInputDocument对象。SolrInputDocument document = new SolrInputDocument();// 第五步:向文档对象中添加域document.addField("id", "test01");document.addField("item_title", "测试商品");document.addField("item_price", "100");// 第六步:把文档对象写入索引库。
solrServer.add(document);// 第七步:提交。
solrServer.commit();}
3.2 查询文档
创建一个CloudSolrServer对象,其他处理和单机版一致。
@Testpublic void testSolrCloudQueryDocument() throws Exception {CloudSolrServer cloudSolrServer = new CloudSolrServer("192.168.25.135:2181,192.168.25.135:2182,192.168.25.135:2183");cloudSolrServer.setDefaultCollection("collection2");// 创建一个query对象SolrQuery query = new SolrQuery();// 设置查询条件query.setQuery("*:*");// 执行查询QueryResponse queryResponse = cloudSolrServer.query(query);// 取查询结果SolrDocumentList solrDocumentList = queryResponse.getResults();// 共查询到商品数量System.out.println("共查询到商品数量:"+solrDocumentList.getNumFound());// 遍历查询结果for (SolrDocument solrDocument : solrDocumentList) {System.out.println(solrDocument.get("id"));System.out.println(solrDocument.get("item_title"));System.out.println(solrDocument.get("item_price"));}}
xml version="1.0" encoding="UTF-8"?>
<beans xmlns&#61;"http://www.springframework.org/schema/beans"xmlns:context&#61;"http://www.springframework.org/schema/context" xmlns:p&#61;"http://www.springframework.org/schema/p"xmlns:aop&#61;"http://www.springframework.org/schema/aop" xmlns:tx&#61;"http://www.springframework.org/schema/tx"xmlns:xsi&#61;"http://www.w3.org/2001/XMLSchema-instance"xsi:schemaLocation&#61;"http://www.springframework.org/schema/beans http://www.springframework.org/schema/beans/spring-beans4.2.xsdhttp://www.springframework.org/schema/context http://www.springframework.org/schema/context/spring-context4.2.xsdhttp://www.springframework.org/schema/aop http://www.springframework.org/schema/aop/spring-aop4.2.xsd http://www.springframework.org/schema/tx http://www.springframework.org/schema/tx/spring-tx4.2.xsdhttp://www.springframework.org/schema/util http://www.springframework.org/schema/util/spring-util4.2.xsd"><bean id&#61;"cloudSolrServer" class&#61;"org.apache.solr.client.solrj.impl.CloudSolrServer"><constructor-arg name&#61;"zkHost" value&#61;"192.168.25.135:2181,192.168.25.135:2182,192.168.25.135:2183">constructor-arg> <property name&#61;"defaultCollection" value&#61;"collection2">property>bean>
beans>


 京公网安备 11010802041100号