本次实验尝试使用命令行、Python脚本编写、交互式界面创建自定义拓扑。
命令行创建拓扑
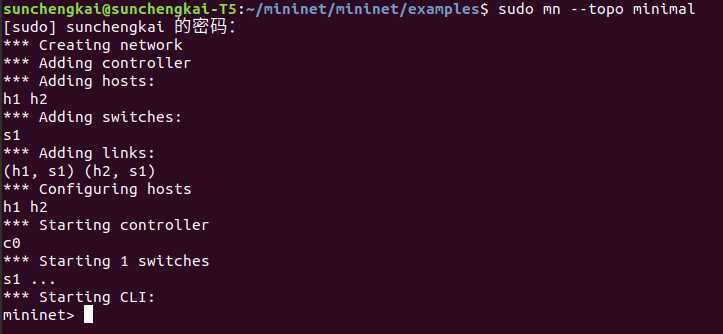
1.最小的网络拓扑,一个交换机下挂两个主机
2.每个交换机连接一个主机,交换机间相连接。本例:4个主机,4个交换机。
1 sudo mn --topo linear,4

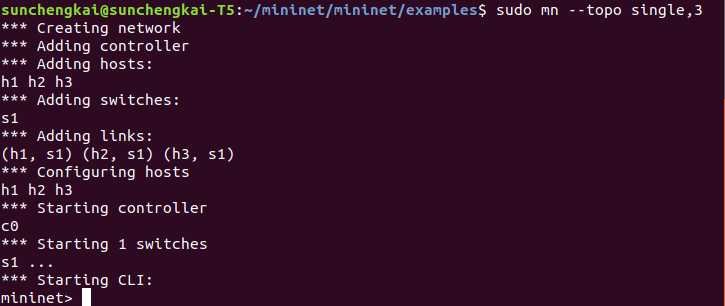
3.每个主机都连接到同一个交换机上。本例:三个主机,一个交换机。
1 sudo mn --topo single,3
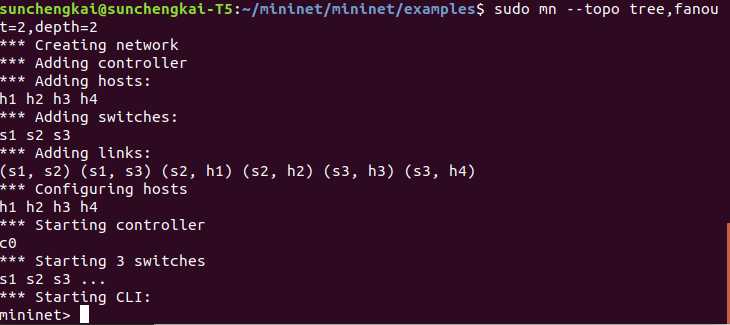
4.定义深度和扇形形成基于数的拓扑。本例:深度2,扇出2。
1 sudo mn --topo tree,fanout=2,depth=2
Python脚本定义拓扑
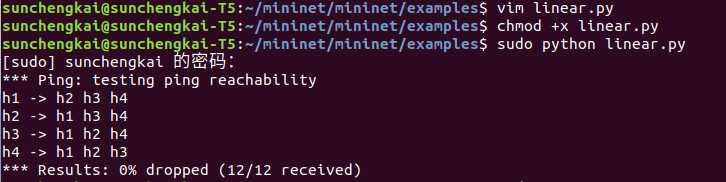
1.--topo linear,4 写一个linear.py脚本
1 from mininet.net import Mininet
2 from mininet.topo import LinearTopo
3 Linear4 = LinearTopo(k=4)
4 net = Mininet(topo=Linear4)
5 net.start()
6 net.pingAll()
7 net.stop()
1 touch linear.py
2 vim linear.py
3
4 //如果提示没有安装vim就
5 sudo apt install vim
赋予文件权限
1 chmod +x linear.py
2 //执行
3 sudo python linear.py
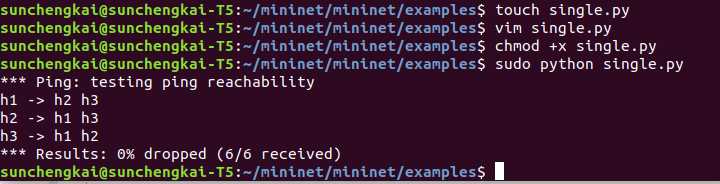
2.--topo single,3
1 from mininet.net import Mininet
2 from mininet.topo import SingleSwitchTopo
3 Single3 = SingleSwitchTopo(k=3)
4 net = Mininet(topo=Single3)
5 net.start()
6 net.pingAll()
7 net.stop()
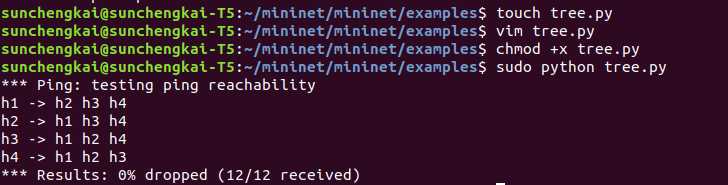
3 --topo tree,depth=2,fanout=2
1 from mininet.net import Mininet
2 from mininet.topolib import TreeTopo
3 Tree22 = TreeTopo(depth=2,fanout=2)
4 net = Mininet(topo=Tree22)
5 net.start()
6 net.pingAll()
7 net.stop()
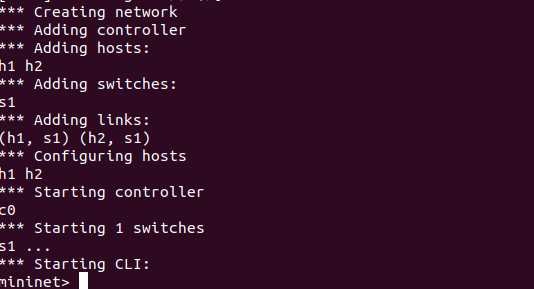
4.不是以上三种拓扑形式的话,可以利用以下的拓扑定义脚本。本例:1个交换机,2个主机,并且赋予主机IP地址。
 1 from mininet.net import Mininet
 2 net = Mininet()
 3 c0 = net.addController()
 4 h0 = net.addHost(‘h0‘)
 5 s0 = net.addSwitch(‘s0‘)
 6 h1 = net.addHost(‘h1‘)
 7 net.addLink(h0, s0)
 8 net.addLink(h1, s0)
 9 h0.setIP(‘192.168.1.1‘, 24)
10 h1.setIP(‘192.168.1.2‘, 24)
11 net.start()
12 net.pingAll()
13 net.stop()

5.除了可以通过Python脚本创建基本的拓扑以外,还能在此基础上对性能进行限制。观察下面给出的脚本文件,addHost()语法可以对主机cpu进行设置,以百分数的形式;addLink()语法可以设置带宽bw、延迟delay、最大队列的大小maxqueuesize、损耗率loss。
 1 from mininet.net import Mininet
 2 from mininet.node import CPULimitedHost
 3 from mininet.link import TCLink
 4 net = Mininet(host=CPULimitedHost, link=TCLink)
 5 c0 = net.addController()
 6 s0 = net.addSwitch(‘s0‘)
 7 h0 = net.addHost(‘h0‘)
 8 h1 = net.addHost(‘h1‘, cpu=0.5)
 9 h2 = net.addHost(‘h1‘, cpu=0.5)
10 net.addLink(s0, h0, bw=10, delay=‘5ms‘,max_queue_size=1000, loss=10, use_htb=True)
11 net.addLink(s0, h1)
12 net.addLink(s0, h2)
13 net.start()
14 net.pingAll()
15 net.stop()

交互式界面创建主机、交换机等
1.添加主机h3:

2.添加link:
1 py net.addLink(s1,net.get(‘h3‘))

3.给交换机s1添加端口eth3用于连接h3:
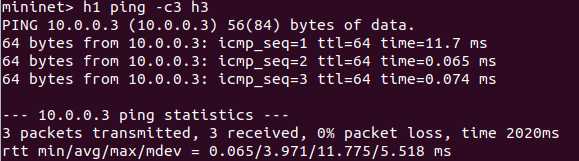
4.给h3赋予IP(10.0.0.3)
py s1.attach(‘s1-eth3‘)
py net.get(‘h3‘).cmd(‘ifconfig h3-eth0 10.3‘)

5.h1 ping h3 :
6.显示所有网络信息:
1  px from mininet.util import dumpNodeConnections
2  py dumpNodeConnections(net.hosts)

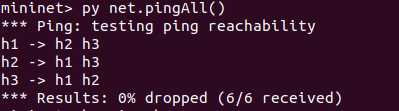
7.所有节点的ping测试:
Mininet实验 命令延伸实验扩展


 京公网安备 11010802041100号