热门标签 | HotTags
当前位置:  开发笔记 > 编程语言 > 正文

LinkedList源码分析(一)

这篇文章来自我的博客正文之前之前介绍过了ArrayList的源码了,在刚学Java的时候,书籍中就经常拿ArrayList和LinkedList来举例子

这篇文章来自我的博客

正文之前

之前介绍过了ArrayList的源码了,在刚学Java的时候,书籍中就经常拿ArrayListLinkedList来举例子,学完了ArrayList最常用部分的源码后,就打算把LinkedList也学完,源码中有两种操作,一种是列表操作,一种是队列操作,分两篇文章来讲,今天先讲列表操作

今天的内容有这些:

  1. LinkedList 概念介绍
  2. 结点
  3. 类的基本信息
  4. 构造
  5. 增删改查

正文

1. 概念介绍

* Doubly-linked list implementation of the {@code List} and {@code Deque}* interfaces. Implements all optional list operations, and permits all* elements (including {@code null}).**

All of the operations perform as could be expected for a doubly-linked* list. Operations that index into the list will traverse the list from* the beginning or the end, whichever is closer to the specified index.

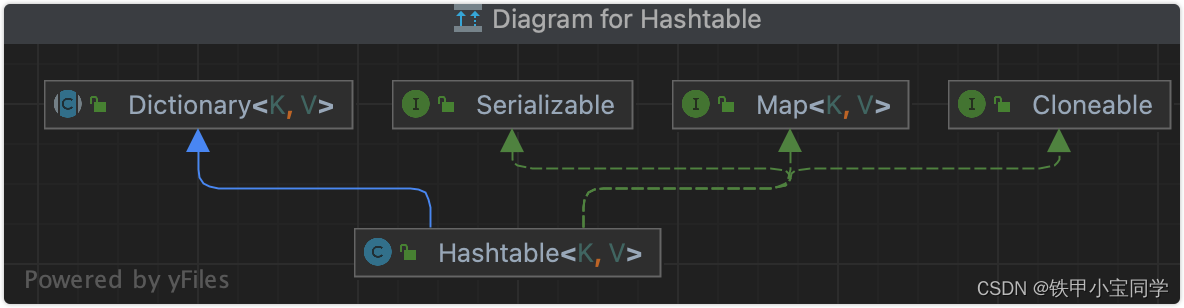
按照注释给出的,LinkedList叫做“双向链表”,实现了List(列表)接口和Deque(双向队列)接口,支持队列的操作

对特定的元素的操作,可以从列表的首或者尾开始,哪边离得近就从哪边开始

*

Note that this implementation is not synchronized.* If multiple threads access a linked list concurrently, and at least* one of the threads modifies the list structurally, it must be* synchronized externally. (A structural modification is any operation* that adds or deletes one or more elements; merely setting the value of* an element is not a structural modification.) This is typically* accomplished by synchronizing on some object that naturally* encapsulates the list.** If no such object exists, the list should be "wrapped" using the* {@link Collections#synchronizedList Collections.synchronizedList}* method. This is best done at creation time, to prevent accidental* unsynchronized access to the list:

*   List list = Collections.synchronizedList(new LinkedList(...));

ArrayList一样,这个容器也是非线程安全的,如果要在多线程环境下使用,也要使用synchronizedList包装起来

在源码中还有一些注释是关于迭代器的,等到以后的文章中再说明

2. 节点

  1. 节点的表示

需要先统一以下说法,Node叫做节点,Node.item叫做元素

//当前节点的类型是泛型private static class Node {E item;//前后节点都是Node类型,其中又包括了其当前节点和前后节点Node next;Node prev;Node(Node prev, E element, Node next) {this.item = element;this.next = next;this.prev = prev;}}

  1. 根据索引寻找节点

在查找的过程要一个一个节点的迭代,所以LinkedList随机读取的开销要比ArrayList

/*** Returns the (non-null) Node at the specified element index.*/Node node(int index) {// assert isElementIndex(index);//if-else来判断从头部还是尾部开始查找if (index <(size >> 1)) {Node x &#61; first;//一直迭代然后得到特定节点for (int i &#61; 0; i return x;} else {Node x &#61; last;for (int i &#61; size - 1; i > index; i--)x &#61; x.prev;return x;}}

3. 类的基本信息

先来看看这个类继承了什么类&#xff0c;实现了什么接口

public class LinkedListextends AbstractSequentialListimplements List, Deque, Cloneable, java.io.Serializable{
}

继承了AbstractSequentialList&#xff08;AbstractList的子类&#xff09;&#xff0c;多实现了一个Deque接口&#xff0c;其他的和ArrayList是一样的

变量&#xff1a;

//大小transient int size &#61; 0;/*** Pointer to first node.* Invariant: (first &#61;&#61; null && last &#61;&#61; null) ||* (first.prev &#61;&#61; null && first.item !&#61; null)*/ //第一个节点&#xff0c;满足上面这两个条件之一transient Node first;/*** Pointer to last node.* Invariant: (first &#61;&#61; null && last &#61;&#61; null) ||* (last.next &#61;&#61; null && last.item !&#61; null)*///最后一个节点&#xff0c;满足上面这两个条件之一transient Node last;

4. 构造

  1. 空链表

/*** Constructs an empty list.*/public LinkedList() {}

  1. 带有其他容器元素的链表

public LinkedList(Collection c) {//先构造一个空链表this();//添加指定容器的元素的方法&#xff0c;下文讲述addAll(c);}

5. 增删改查

因为链表是双向的&#xff0c;所以在增加元素的时候&#xff0c;要设置节点两边的指向&#xff0c;接下来说明指向的时候&#xff0c;会说明是向前指向还是向后指向&#xff0c;下文说的删除指向&#xff0c;就是把指向设为null

主要内容
  • addFirst()
    • linkFirst()
  • addLast()
    • linkLast()
  • add()
    • linkLast()
    • linkBefore()
  • addAll()

从内往外&#xff0c;先将内部方法&#xff0c;再讲公用方法&#xff1a;

增加至表头

/*** Links e as first element.*///将元素添加至链表头private void linkFirst(E e) {//先定义一个节点final Node f &#61; first;//newNode向后指向ffinal Node newNode &#61; new Node<>(null, e, f);//新的节点作为第一个节点first &#61; newNode;//如果f为null&#xff0c;表示链表里只有一个元素&#xff0c;这时候第一个和最后一个都是newNodeif (f &#61;&#61; null)last &#61; newNode;else//f向前指向newNodef.prev &#61; newNode;//大小加1size&#43;&#43;;modCount&#43;&#43;;}

增加至表尾

原理是一样的&#xff0c;就不画图了

/*** Links e as last element.*///基本套路是一样的void linkLast(E e) {final Node l &#61; last;//newNode向前指向lfinal Node newNode &#61; new Node<>(l, e, null);last &#61; newNode;if (l &#61;&#61; null)first &#61; newNode;else//l向后指向newNodel.next &#61; newNode;size&#43;&#43;;modCount&#43;&#43;;}

增加至指定位置

插入到指定位置&#xff0c;涉及三个元素&#xff0c;两两之间有关联&#xff0c;所有需要有四条指向

/*** Inserts element e before non-null Node succ.*/void linkBefore(E e, Node succ) {// assert succ !&#61; null;//把指定位置的前一个节点拿出来final Node pred &#61; succ.prev;//在创建节点的时候就有两条指向了final Node newNode &#61; new Node<>(pred, e, succ);//succ向前指向newNodesucc.prev &#61; newNode;if (pred &#61;&#61; null)//如果插入的位置前面没有节点&#xff0c;则插入的节点作为第一个first &#61; newNode;else//刚才创建的pred节点&#xff0c;向后指向newNodepred.next &#61; newNode;size&#43;&#43;;modCount&#43;&#43;;}

刚才上面的三个方法都是为下面这些方法服务的&#xff1a;

//添加至头部public void addFirst(E e) {linkFirst(e);}//添加至尾部public void addLast(E e) {linkLast(e);}//和上面加至队尾是等价的&#xff0c;除了有返回值public boolean add(E e) {linkLast(e);return true;}//在指定位置添加节点public void add(int index, E element) {//检查元素是否越界checkPositionIndex(index);/*** private void checkPositionIndex(int index) {* if (!isPositionIndex(index))* throw new IndexOutOfBoundsException(outOfBoundsMsg(index));* }*///如果索引在最后&#xff0c;直接加至队尾if (index &#61;&#61; size)linkLast(element);else//调用node()方法寻找节点linkBefore(element, node(index));}

还有直接添加另一个容器的元素至链表的方法&#xff1a;
  1. 将指定容器的元素添加至指定位置&#xff0c;插入的位置在index元素之前&#xff08;若index &#61; 1&#xff0c;表示第2个元素&#xff0c;则插入第1个和第2个元素之间&#xff09;

public boolean addAll(int index, Collection c) {//检查是否越界checkPositionIndex(index);//先用数组存放Object[] a &#61; c.toArray();int numNew &#61; a.length;if (numNew &#61;&#61; 0)return false;//前一个节点和当前节点Node pred, succ;if (index &#61;&#61; size) {succ &#61; null;//将容器内元素元素添加到表尾pred &#61; last;} else {//查找指定添加位置succ &#61; node(index);pred &#61; succ.prev;}for (Object o : a) {&#64;SuppressWarnings("unchecked") E e &#61; (E) o;Node newNode &#61; new Node<>(pred, e, null);//如果是第一个节点if (pred &#61;&#61; null)first &#61; newNode;else//把前一个节点向后指向newNodepred.next &#61; newNode;//这个在if-else之外&#xff0c;如果没有这语句&#xff0c;pred节点就固定是那一个节点&#xff0c;所以需要在每一次循环内更换节点pred &#61; newNode;}//如果是最后节点if (succ &#61;&#61; null) {last &#61; pred;} else {//两个节点之间进行连接pred.next &#61; succ;succ.prev &#61; pred;}size &#43;&#61; numNew;modCount&#43;&#43;;return true;}

  1. 将指定容器的元素添加至链表尾&#xff1a;

public boolean addAll(Collection c) {return addAll(size, c);}

删除节点的方式&#xff0c;就是把节点的元素和两边的指向设为null&#xff0c;让GC来收集

主要内容
  • removeFirst()
    • unlinkFirst()
  • removeLast()
    • unlinkLast()
  • remove()
    • unlink()
  • clear()

还是按照相同的顺序来&#xff1a;

删除第一个节点

删除节点内容&#xff0c;删除指向

private E unlinkFirst(Node f) {// assert f &#61;&#61; first && f !&#61; null;//把指定节点的内容拿出来&#xff0c;最后返回final E element &#61; f.item;final Node next &#61; f.next;//节点内容设为空f.item &#61; null;//清空节点的向后指向f.next &#61; null; // help GC//指定节点的下一个节点作为第一个节点first &#61; next;//如果没有下一个节点if (next &#61;&#61; null)last &#61; null;else//删除指向next.prev &#61; null;//改变大小size--;modCount&#43;&#43;;return element;}

删除最后一个节点

步骤是类似的&#xff0c;就画个图&#xff0c;代码就不解释了

/*** Unlinks non-null last node l.*/private E unlinkLast(Node l) {// assert l &#61;&#61; last && l !&#61; null;final E element &#61; l.item;final Node prev &#61; l.prev;l.item &#61; null;l.prev &#61; null; // help GClast &#61; prev;if (prev &#61;&#61; null)first &#61; null;elseprev.next &#61; null;size--;modCount&#43;&#43;;return element;}

删除指定节点

/*** Unlinks non-null node x.*/E unlink(Node x) {// assert x !&#61; null;final E element &#61; x.item;final Node next &#61; x.next;final Node prev &#61; x.prev;// 如果x是第一个节点&#xff0c;则设置下一个节点为第一节点if (prev &#61;&#61; null) {first &#61; next;} else {//x的前一个节点直接向后指向后一个节点prev.next &#61; next;//删除x的前指向x.prev &#61; null;}//如果x是最后一个节点if (next &#61;&#61; null) {//向前指向last节点last &#61; prev;} else {//把后一个节点直接向前指向前一个节点&#xff0c;打个比方&#xff0c;就是1和3节点相连&#xff0c;跳过节点2next.prev &#61; prev;//删除指向x.next &#61; null;}//删除节点内容x.item &#61; null;//改变大小size--;modCount&#43;&#43;;return element;}

这三个删除的方法写来是被以下这些方法调用的&#xff1a;

//移除第一个节点public E removeFirst() {final Node f &#61; first;if (f &#61;&#61; null)throw new NoSuchElementException();return unlinkFirst(f);}//移除最后节点public E removeLast() {final Node l &#61; last;if (l &#61;&#61; null)throw new NoSuchElementException();return unlinkLast(l);}//删除特定元素public boolean remove(Object o) {if (o &#61;&#61; null) {for (Node x &#61; first; x !&#61; null; x &#61; x.next) {if (x.item &#61;&#61; null) {unlink(x);return true;}}} else {//遍历链表&#xff0c;删去拥有和指定元素相同的内容的节点for (Node x &#61; first; x !&#61; null; x &#61; x.next) {if (o.equals(x.item)) {unlink(x);return true;}}}return false;}//删除指定位置元素public E remove(int index) {checkElementIndex(index);return unlink(node(index));}

清空链表

没有用到上面的方法&#xff0c;直接将所有的设为null

public void clear() {// Clearing all of the links between nodes is "unnecessary", but:// - helps a generational GC if the discarded nodes inhabit// more than one generation// - is sure to free memory even if there is a reachable Iterator//不断迭代&#xff0c;把节点的三个属性设为nullfor (Node x &#61; first; x !&#61; null; ) {Node next &#61; x.next;x.item &#61; null;x.next &#61; null;x.prev &#61; null;x &#61; next;}//把首尾设为null&#xff0c;改变大小first &#61; last &#61; null;size &#61; 0;modCount&#43;&#43;;}

链表中改变节点的方式就一个&#xff1a;set()方法

public E set(int index, E element) {//检查是否越界checkElementIndex(index);//根据索引查找节点Node x &#61; node(index);//oldVal存放需要改变的内容E oldVal &#61; x.item;x.item &#61; element;//返回改变前的值return oldVal;}

  1. 查找首尾元素&#xff1a;

这个没什么好说的&#xff0c;直接上代码

public E getFirst() {final Node f &#61; first;if (f &#61;&#61; null)throw new NoSuchElementException();return f.item;}public E getLast() {final Node l &#61; last;if (l &#61;&#61; null)throw new NoSuchElementException();return l.item;}

  1. 判断是否含有某个元素

public boolean contains(Object o) {//indexOf()方法在下面讲述return indexOf(o) !&#61; -1;}

  1. 根据索引查找

public E get(int index) {checkElementIndex(index);//node()方法根据索引来找到节点&#xff0c;在用 .item 来返回节点内容return node(index).item;}

  1. 根据元素得出索引

得到特定元素第一次出现的位置&#xff1a;

public int indexOf(Object o) {int index &#61; 0;//如果对象为null&#xff0c;则也可以查找出内容为null的节点的位置if (o &#61;&#61; null) {for (Node x &#61; first; x !&#61; null; x &#61; x.next) {if (x.item &#61;&#61; null)return index;index&#43;&#43;;}} else {//迭代寻找元素for (Node x &#61; first; x !&#61; null; x &#61; x.next) {if (o.equals(x.item))return index;index&#43;&#43;;}}return -1;}

得到特定元素最后一次出现的位置&#xff0c;也就是把上面的反过来找&#xff1a;

public int lastIndexOf(Object o) {int index &#61; size;if (o &#61;&#61; null) {for (Node x &#61; last; x !&#61; null; x &#61; x.prev) {index--;if (x.item &#61;&#61; null)return index;}} else {for (Node x &#61; last; x !&#61; null; x &#61; x.prev) {index--;if (o.equals(x.item))return index;}}return -1;}

LinkedList基于列表的操作到这里就介绍完了&#xff0c;下一篇会是基于队列的操作


推荐阅读
  • Java学习笔记之面向对象编程(OOP)
    本文介绍了Java学习笔记中的面向对象编程(OOP)内容,包括OOP的三大特性(封装、继承、多态)和五大原则(单一职责原则、开放封闭原则、里式替换原则、依赖倒置原则)。通过学习OOP,可以提高代码复用性、拓展性和安全性。 ... [详细]
  • JDK源码学习之HashTable(附带面试题)的学习笔记
    本文介绍了JDK源码学习之HashTable(附带面试题)的学习笔记,包括HashTable的定义、数据类型、与HashMap的关系和区别。文章提供了干货,并附带了其他相关主题的学习笔记。 ... [详细]
  • 本文由编程笔记#小编为大家整理,主要介绍了logistic回归(线性和非线性)相关的知识,包括线性logistic回归的代码和数据集的分布情况。希望对你有一定的参考价值。 ... [详细]
  • VScode格式化文档换行或不换行的设置方法
    本文介绍了在VScode中设置格式化文档换行或不换行的方法,包括使用插件和修改settings.json文件的内容。详细步骤为:找到settings.json文件,将其中的代码替换为指定的代码。 ... [详细]
  • Linux重启网络命令实例及关机和重启示例教程
    本文介绍了Linux系统中重启网络命令的实例,以及使用不同方式关机和重启系统的示例教程。包括使用图形界面和控制台访问系统的方法,以及使用shutdown命令进行系统关机和重启的句法和用法。 ... [详细]
  • 本文讨论了在Windows 8上安装gvim中插件时出现的错误加载问题。作者将EasyMotion插件放在了正确的位置,但加载时却出现了错误。作者提供了下载链接和之前放置插件的位置,并列出了出现的错误信息。 ... [详细]
  • CSS3选择器的使用方法详解,提高Web开发效率和精准度
    本文详细介绍了CSS3新增的选择器方法,包括属性选择器的使用。通过CSS3选择器,可以提高Web开发的效率和精准度,使得查找元素更加方便和快捷。同时,本文还对属性选择器的各种用法进行了详细解释,并给出了相应的代码示例。通过学习本文,读者可以更好地掌握CSS3选择器的使用方法,提升自己的Web开发能力。 ... [详细]
  • 本文介绍了九度OnlineJudge中的1002题目“Grading”的解决方法。该题目要求设计一个公平的评分过程,将每个考题分配给3个独立的专家,如果他们的评分不一致,则需要请一位裁判做出最终决定。文章详细描述了评分规则,并给出了解决该问题的程序。 ... [详细]
  • MyBatis多表查询与动态SQL使用
    本文介绍了MyBatis多表查询与动态SQL的使用方法,包括一对一查询和一对多查询。同时还介绍了动态SQL的使用,包括if标签、trim标签、where标签、set标签和foreach标签的用法。文章还提供了相关的配置信息和示例代码。 ... [详细]
  • 先看官方文档TheJavaTutorialshavebeenwrittenforJDK8.Examplesandpracticesdescribedinthispagedontta ... [详细]
  • 欢乐的票圈重构之旅——RecyclerView的头尾布局增加
    项目重构的Git地址:https:github.comrazerdpFriendCircletreemain-dev项目同步更新的文集:http:www.jianshu.comno ... [详细]
  • Android系统源码分析Zygote和SystemServer启动过程详解
    本文详细解析了Android系统源码中Zygote和SystemServer的启动过程。首先介绍了系统framework层启动的内容,帮助理解四大组件的启动和管理过程。接着介绍了AMS、PMS等系统服务的作用和调用方式。然后详细分析了Zygote的启动过程,解释了Zygote在Android启动过程中的决定作用。最后通过时序图展示了整个过程。 ... [详细]
  • 基于Socket的多个客户端之间的聊天功能实现方法
    本文介绍了基于Socket的多个客户端之间实现聊天功能的方法,包括服务器端的实现和客户端的实现。服务器端通过每个用户的输出流向特定用户发送消息,而客户端通过输入流接收消息。同时,还介绍了相关的实体类和Socket的基本概念。 ... [详细]
  • MySQL语句大全:创建、授权、查询、修改等【MySQL】的使用方法详解
    本文详细介绍了MySQL语句的使用方法,包括创建用户、授权、查询、修改等操作。通过连接MySQL数据库,可以使用命令创建用户,并指定该用户在哪个主机上可以登录。同时,还可以设置用户的登录密码。通过本文,您可以全面了解MySQL语句的使用方法。 ... [详细]
  • 重入锁(ReentrantLock)学习及实现原理
    本文介绍了重入锁(ReentrantLock)的学习及实现原理。在学习synchronized的基础上,重入锁提供了更多的灵活性和功能。文章详细介绍了重入锁的特性、使用方法和实现原理,并提供了类图和测试代码供读者参考。重入锁支持重入和公平与非公平两种实现方式,通过对比和分析,读者可以更好地理解和应用重入锁。 ... [详细]
author-avatar
wiggin
这个家伙很懒,什么也没留下!
PHP1.CN | 中国最专业的PHP中文社区 | DevBox开发工具箱 | json解析格式化 |PHP资讯 | PHP教程 | 数据库技术 | 服务器技术 | 前端开发技术 | PHP框架 | 开发工具 | 在线工具
Copyright © 1998 - 2020 PHP1.CN. All Rights Reserved | 京公网安备 11010802041100号 | 京ICP备19059560号-4 | PHP1.CN 第一PHP社区 版权所有