作者:哥小名叫青蛙 | 来源:互联网 | 2023-09-18 13:27
本文由编程笔记#小编为大家整理,主要介绍了expect脚本同步文件expect脚本指定host和要同步的文件构建文件分发系统批量远程执行相关的知识,希望对你有一定的参考价值。
本文由编程笔记#小编为大家整理,主要介绍了expect脚本同步文件 expect脚本指定host和要同步的文件 构建文件分发系统 批量远程执行相关的知识,希望对你有一定的参考价值。
一、expect脚本同步文件

实例4:
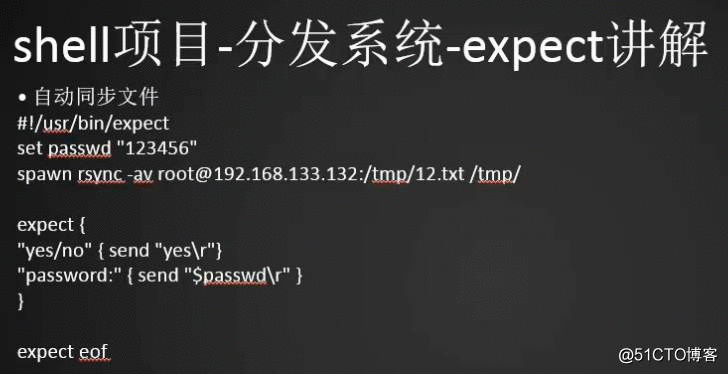
自动同步文件
[[email protected] sbin]# vi 4.expect
#!/usr/bin/expect
set passwd "123456"
spawn rsync -av [email protected]:/tmp/12.txt /tmp/
expect {
"yes/no" { send "yes
"}
"password:" { send "$passwd
" }
}
expect eof
[[email protected] sbin]# chmod a+x 4.expect //给脚本执行权限
[[email protected] sbin]# ./4.expect
spawn rsync -av [email protected]:/tmp/12.txt /tmp/
[email protected]‘s password:
receiving incremental file list
12.txt
sent 30 bytes received 84 bytes 228.00 bytes/sec
total size is 5 speedup is 0.04
如果把脚本内容的最后一行expect eof注释掉,结果是:还没有来得及传输就直接退出来远程机器了
所以在脚本结尾一定要加上expect eof,特别是在传输文件的时候
二、expect脚本指定host和要同步的文件

实例5:
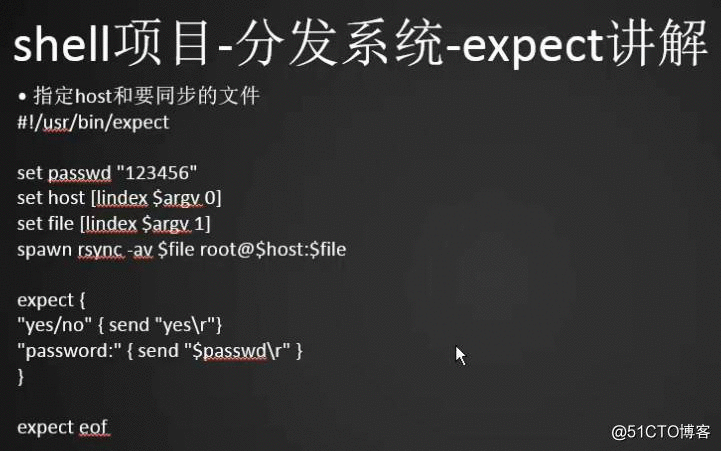
指定host和要同步的文件
[[email protected] sbin]# vi 5.expect
#!/usr/bin/expect
set passwd "123456"
set host [lindex $argv 0]
set file [lindex $argv 1]
spawn rsync -av $file [email protected]$host:$file
expect {
"yes/no" { send "yes
"}
"password:" { send "$passwd
" }
}
expect eof
//第一个是主机host的IP,第二个是要同步的文件,文件是从本机到对方,而且file一定要写绝对路径
[[email protected] sbin]# chmod a+x 5.expect //给脚本执行权限
[[email protected] sbin]# ./5.expect 192.168.238.130 /tmp/12.txt //IP+文件名,只适合同步一个文件
spawn rsync -av /tmp/12.txt [email protected]:/tmp/12.txt
[email protected]‘s password:
sending incremental file list
sent 39 bytes received 11 bytes 100.00 bytes/sec
total size is 5 speedup is 0.10
三、构建文件分发系统

list.txt文件里面的文件必须是全局路径,绝对路径

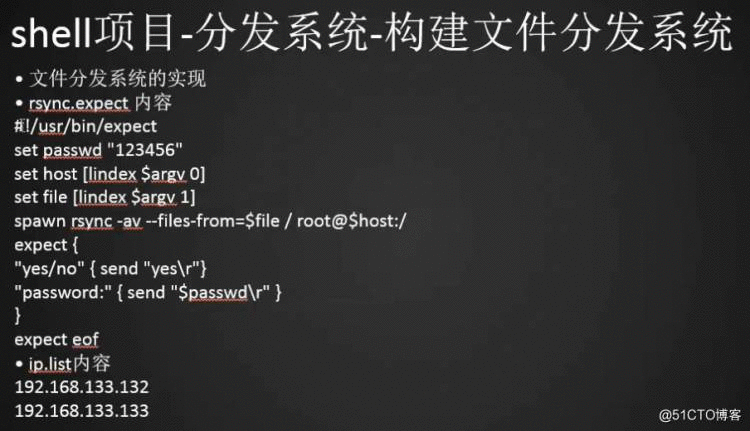
文件分发系统的实现
首先构建rsync.expect的内容:
[[email protected] sbin]# vi rsync.expect
#!/usr/bin/expect
set passwd "123456"
set host [lindex $argv 0]
set file [lindex $argv 1]
spawn rsync -av --files-from=$file / [email protected]$host:/ //源目录是根,目标目录也是根
expect {
"yes/no" { send "yes
"}
"password:" { send "$passwd
" }
}
expect eof
[[email protected] sbin]# vi /tmp/file.list
文件内容里面要保证对方机器上也要有这个路径,文件有没有无所谓
/tmp/12.txt
/root/shell/1.sh
/root/123/11.txt
如果不能保证对方机器也有相同的文件,可以在rsync.expect里面增加R选项
spawn rsync -avR --files-from=$file / [email protected]$host:/
[[email protected] sbin]# vi /tmp/ip.list
192.168.238.130
127.0.0.1
做expect脚本的前提是保证这两台机器的密码是一样的,如果密码不一致,需要挨个定义每台机器的密码,但是这样做的坏处是如果脚本泄露,那么机器的密码被别人拿到,我们另外一个思路是给每个机器设置密钥认证,如果密钥认证的话,输密码的这一行"password:" { send "$passwd
" }可以省略
创建rsync.sh

[[email protected] sbin]# vi rsync.sh
#!/bin/bash
for ip in cat /tmp/ip.list
do
./rsync.expect $ip /tmp/file.list
done
//shell内容主要是遍历IP地址
[[email protected] sbin]# chmod a+x rsync.expect //给脚本执行权限
[[email protected] sbin]# sh -x rsync.sh
如果有50台机器,那么每台机器都得执行下rsync.expect脚本,需要两个list文件,一个ip.llist,一个同步文件的file.list
四、批量远程执行命令

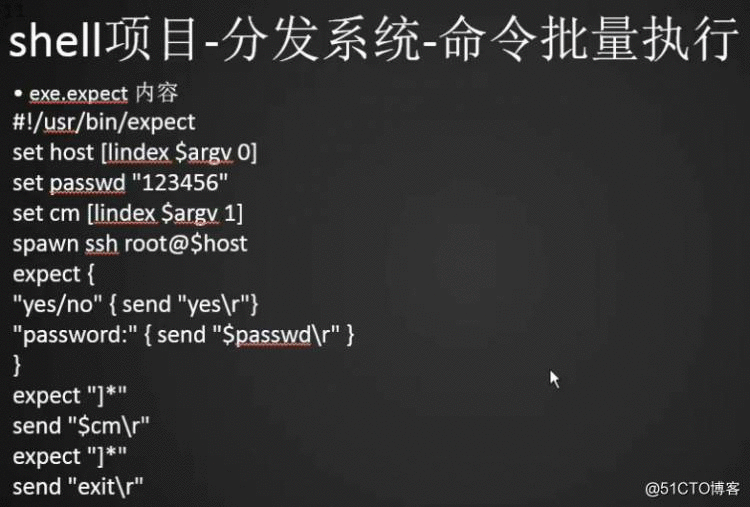
命令批量执行
[[email protected] sbin]# vim exe.expect
#!/usr/bin/expect
set host [lindex $argv 0]
set passwd "123456"
set cm [lindex $argv 1]
spawn ssh [email protected]$host
expect {
"yes/no" { send "yes
"}
"password:" { send "$passwd
" }
}
expect "]"
send "$cm
"
expect "]"
send "exit
"
//脚本解释:
set host [lindex $argv 0]中$argv 0是第一个参数;
set cm [lindex $argv 1]中$argv 1是第二个参数
[[email protected] sbin]# chmod a+x exe.expect //给脚本执行权限

[[email protected] sbin]# vim exe.sh
#!/bin/bash
for ip in cat /tmp/ip.list
do
./exe.expect $ip "w;free -m;ls /tmp"
done