作者:手机用户2602906305_849 | 来源:互联网 | 2023-10-12 14:18
本文由编程笔记#小编为大家整理,主要介绍了Teleport安装与配置相关的知识,希望对你有一定的参考价值。
系统环境
# cat /etc/redhat-release
CentOS Linux release 7.4.1708 (Core)
# uname -r
3.10.0-693.21.1.el7.x86_64
安装
下载最新的teleport安装包(teleport-server-linux-x64-3.0.1.6.tar),放到/usr/src目录下并执行下列命令:
# wget http://teleport.eomsoft.net/static/download/teleport-server-linux-x64-3.0.1.6.tar.gz
# tar zxvf  teleport-server-linux-x64-3.0.1.6.tar
# cd teleport-server-linux-x64-3.0.1.6.tar
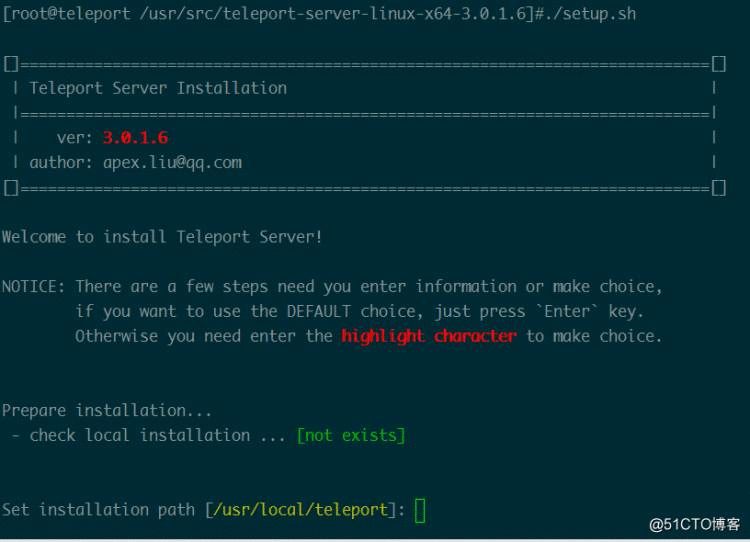
# ./setup.sh
仅需几秒钟,安装就已完成,并且teleport服务也成功启动运行了

现在,您的堡垒机已经准备就绪,可以访问了
安装完成后的必要设置
请访问 http://您的堡垒机IP地址:7190 进行配置管理。默认管理员账号 admin,默认管理员密码 admin。
安装完成后,请以管理员身份登录,首次安装的系统会进行数据库的创建和初始化操作,完成之后刷新页面即可进入teleport主界面。
Teleport服务的启动与停止
启动teleport服务:
# /etc/init.d/teleport start
停止teleport服务:
# /etc/init.d/teleport stop
重新启动teleport服务:
# /etc/init.d/teleport restart
查看Teleport服务的运行状况:
# /etc/init.d/teleport status
WEB服务设置
默认情况下,teleport的WEB服务使用7190端口,安装后可按如下地址访问:
http://您的堡垒机IP地址:7190
如果您需要更改默认端口号,请修改配置文件(注意,两个配置文件均涉及到web端口,要一并修改)。
# /usr/local/teleport/data/etc/web.ini
# /usr/local/teleport/data/etc/core.ini
重要提示:修改完配置文件后,需要重新启动teleport服务使修改生效!
管理配置
- 登录
管理员账号是 admin,默认密码是 admin。登录后,请第一时间修改管理员密码!!

登录成功,显示主界面

- 主机管理
添加主机
点击添加主机按钮添加单台主机或者根据导入模版批量添加主机

单台主机添加


批量添加主机

编辑好主机信息文件后,点击“导入主机和账号”按钮,选择刚刚编辑好的主机信息文件,即可上传到服务器并自动导入到主机列表中。
- 账号管理
远程访问Windows主机一般通过RDP协议(即,远程桌面协议),用户认证方式采用 用户名/密码 方式。
远程访问Linux主机一般通过SSH,用户认证方式有两种:用户名/密码 和用户名/ SSH密钥认证
添加账号
点击账号数,添加主机账号

账号认证方式
用户名+密码认证

用户名+私钥认证

- 用户管理
添加用户
这里可以添加,删除用户。

用户授权

- 配置管理
Teleport核心服务默认端口设置:
监听地址 |
端口号 |
用途 |
备注 |
|---|
localhost |
52080 |
提供给WEB后台的RPC接口 |
本机跨进程通讯建议不做修改 |
0.0.0.0 |
52089 |
提供RDP跳转服务 |
对外提供RDP跳转服务可以不做修改 |
0.0.0.0 |
52189 |
提供SSH跳转服务 |
对外提供SSH跳转服务可以不做修改 |
Teleport在默认端口配置下即可正常工作,但是在某些情况下,可能需要修改端口号来匹配您公司的防火墙策略,您可以在配置文件中进行设置。
运维人员日常使用
登录
系统中没有默认的运维人员账号,需要由管理员添加用户,方可登录。新创建的用户,请登录绑定邮箱,获取账号密码,如若忘记密码,可以在登录界面选择忘记密码,输入账号,绑定邮箱,登录绑定邮箱点击重置链接,重新设置登录密码(密码长度不得少于8位,且必须包含字母大小写及数字)


主机管理

远程连接
远程助手
点击主机信息右侧的“远程”按钮,可以进行远程连接。但是在第一次使用远程连接时,会跳出以下对话框:

需要下载并运行 远程助手
官网下载地址:http://teleport.eomsoft.net/download


安装完成后双击启动它(您可以在系统托盘区看到助手小图标)。启动之后,刷新主机管理页面。


连接主机
点击 远程 按钮,助手会打开对应的客户端软件进行远程连接。
SSH:

RDP:

助手设置
助手设置默认的SSH连接和Telnet连接是Putty,SFTP连接是WinSCP,RDP连接是FreeRDP。
点击红框内的助手设置可以选择其他连接工具代替。


完成后保存即可
安装mysql(用mysql替代默认的sqlite数据库)
# yum install -y mariadb mariadb-devel mariadb-server
运行mysql
# systemctl start mariadb
设置开机启动
# systemctl enable mariadb
初始化设置账号密码
mysql_secure_installation
root初始密码为空,设置root密码并禁止root远程登陆,删除guest等

设置mysql字符集
# vim /etc/my.cnf
在[mysqld]标签下添加
 init_cOnnect=‘SET collation_cOnnection= utf8_unicode_ci‘
 init_cOnnect=‘SET NAMES utf8‘
 character-set-server=utf8
 collation-server=utf8_unicode_ci
 skip-character-set-client-handshake

# vim /etc/my.cnf.d/client.cnf
在[client]中添加
default-character-set=utf8

# vim /etc/my.cnf.d/mysql-clients.cnf
在[mysql]中添加
default-character-set=utf8

重启mysql
# systemctl restart mariadb
进入mysql查看是否配置正确
> show variables like "%character%";show variables like "%collation%";

建立数据库账号及实例
建立数据库新用户(teleport)
> create user [email protected] identified by ‘123456‘;
建立新实例(teleport)
> create database teleport;
赋予用户权限
> grant all privileges on teleport.* to [email protected] identified by ‘123456‘ with grant option;
用户名是teleport,密码是123456.
接下来我们需要更改配置文件将mariadb数据库的一些信息填入。
配置文件的默认路径是/usr/local/teleport/data/etc,我们需要编辑文件web.ini.
# cp /usr/local/teleport/data/etc/web.ini /usr/local/teleport/data/etc/web.ini.bak #先备份配置文件
编辑配置文件web.ini

重启teleport:
# /etc/init.d/teleport restart
常见问题FAQ
- rdp客户端连接win2008以上服务器失败,日志提示“协议不支持”
解决办法:
服务器端打开 计算机-属性-远程设置,将默认的“仅允许运行使用网络级别身份验证的远程桌面的计算机连接”,更改为“允许运行任意版本远程桌面的计算机连接” 即可正常连接
如下图红框,取消该项目的的勾选

- 将web界面运行在80端口后无法正常查看log录像(此问题已在3.0.1.6版本修正)
问题原因:原软件bug,由于80端口默认不显示,服务器取不到端口值导致
解决办法:vim /usr/local/teleport/www/teleport/static/js/ui/log.js
          if (protocol === PROTOCOL_TYPE_RDP) {
              $(cell_obj).find(‘[ywl-btn-record]‘).click(function () {
                  var ip = window.location.hostname;
                  var port = parseInt(window.location.port);
                  var url = ‘http://‘ + ip + ‘:‘ + port + ‘/log/replay/rdp/‘ + row_data.id;
                  var tail = ‘log/replay/rdp/‘ + prefixInteger(row_data.id, 6);
                  var args = {};
                  args.id = parseInt(row_data.id);
                  args.host = ip;
                  args.port = port;
                  args.tail = tail;
                  args.url = url;
                  start_rdp_replay(args,
                      function () {
                          ywl.notify_success(‘RDP 录像播放器成功启动!‘);
                      },
                      function (code, msg) {
                          if (code === TPE_NO_ASSIST)
                              g_assist.alert_assist_not_found();
                          else {
                              ywl.notify_error(msg);
                              console.log(‘error:‘, msg)
                          }
                      });
              });
将代码中的
args.port = port
改为
if(port){
args.port = port;}
else{
args.port = 80;}
业务迁移
因业务需求,需要将原有teleport迁移到新的虚拟机,其思路如下:环境配置+数据库导出导入,若是阿里云机器,还需要放开对应的端口
- 第一步、配置环境,具体步骤如上述,确保数据库名称及密码跟原机器一样
- 第二步、导出数据库文件
# mysqldump -uroot -p teleport > teleport.sql
可以将导出的数据库文件下载到本地后再上传到新机器,或者通过命令scp teleport.sql [email protected]:/root传到新的机器上(确保两台台机器是互通的)
- 第三步、导入数据文件到新机器
# mysql -uroot -p teleport
nginx反向代理
添加反向代理
安装nginx
# yum install -y nginx
添加nginx代理配置文件ops.conf,
vim /etc/nginx/conf.d/ops.conf
...略
server
{
listen      80;
location  /
{
    proxy_pass http://x.x.x.x:7190;
    proxy_set_header    Host $http_host;
    proxy_set_header    X-Forwarded-Host $host;
    proxy_set_header    X-Forwarded-Server $host;
    proxy_set_header    X-Forwarded-For $proxy_add_x_forwarded_for;
}
}
保存,重启nginx。浏览器输入地址:http://IP地址 即可