热门标签 | HotTags
当前位置:  开发笔记 > 编程语言 > 正文

开发笔记:Python:GUI之tkinter学习笔记1控件的介绍及使用

篇首语:本文由编程笔记#小编为大家整理,主要介绍了Python:GUI之tkinter学习笔记1控件的介绍及使用相关的知识,希望对你有一定的参考价值。   相关内容: tkinte

篇首语:本文由编程笔记#小编为大家整理,主要介绍了Python:GUI之tkinter学习笔记1控件的介绍及使用相关的知识,希望对你有一定的参考价值。


相关内容:
  • tkinter的使用
    • 1.模块的导入
    • 2.使用
    • 3.控件介绍
      • Tk
      • Button
      • Label
      • Frame
      • Toplevel
      • Menu
      • Menubutton
      • Canvas
      • Entry
      • Message
      • Text
      • Listbox
      • Checkbutton
      • Radiobutton
      • Scale
      • Scrollbar


首发时间:2018-03-04 16:39


Python的GUI各有各特点。

由于只是轻微涉及GUI开发,所以就以轻量级的tkinter来学习。


tkinter的使用:


  • 1.模块的导入

    • [tkinter是python默认的gui库,所以一般不需要另外安装模块]:from tkinter import *
  • 2.使用:

    • 创建主窗口:root=Tk()   【root是一个主窗口对象】
    • 创建若干个控件:控件对象=控件(root,控件参数设置)    【这里的控件也可以添加到其他窗口中】
    • 将控件显示出来:控件对象.pack()     【这里也不一定是pack,也可以是其他的显示方式,比如grid,后面介绍】
    • 让主窗口持续显示:root.mainloop()


  • 3.控件介绍:


    • 主窗口Tk[所有控件都需要附着在界面上]:

      • 介绍:主窗口是所有控件附着的基础,所有控件都需要附着在界面上,如果程序中没有指定控件附着的窗口,将默认附着到主窗口Tk中,如果程序中没有定义Tk,那么将自动创建一
      • 常见属性【想要初始化主窗口的属性需要使用 主窗口对象.属性(“参数”) :
        • title:窗口标题
        • geometry:窗口大小,大写格式是”宽度x高度+x位置+y位置”【注意不是*是x】,其中x,y将左上角作为(0,0)

from tkinter import *
root
=Tk()
root.title(
\'我的窗口\'
)
root.geometry(
\'500x500\'
)
root.mainloop()


  • 按钮Button:


    • 介绍:按钮image
    • 常用参数设置【可以在创建按钮的时候指定,也可以创建后使用   按钮对象.config()  来设置】:


      • text:按钮上的文本显示
      • anchor:按钮上内容的位置[取值:n, ne, e, se, s, sw, w, nw, or center,其中n e s w是东南西北的缩写]
      • cursor:当鼠标移动到按钮上时所显示的光标【arrow:箭头,cross:十字,dot: 点,hand1:手 …….】
      • font:字体,使用元组来指定一个字体,这个元组包含了一个字体类型名字,一个以磅为单位的高度,代表一个或多个样式的字符串,比如("Times", 10, "bold")
      • background[可缩写为bg]:背景色,取值可未英文颜色字符串,或者RGB值
      • foreground[可缩写为fg]:前景色,取值可未英文颜色字符串,或者RGB值
      • borderwidth[可缩写为bd]::边框大小
      • activebackground:按钮处于活动状态时使用的背景颜色。
      • activeforeground:按钮处于活动状态时使用的前景颜色。
      • disabledforeground:禁用按钮时使用的颜色。
      • highlightbackground:当按钮没有焦点时用于高亮边框的颜色
      • relief:边框的装饰

        • 列表里面是relief的可选值:["flat", "raised", "sunken", "solid", "ridge", "groove"]
        • flat是指按钮边框是平坦的,raise是指按钮边框是凸起的,sunken是指按钮边框是凹入的,solid是指按钮边框是粗边框…
        • 按钮relief的效果:image

      • padx和pady:指定文本或图象与按钮边框的间距,x,y为x轴,y轴方向
      • height,widht:按钮的尺寸,height为高度,width为宽度,如果不设置则默认为包括文本内容
      • state:按钮的状态,可取值:NORMAL, ACTIVE 或 DISABLED。默认值为NORMAL。
      • justify:对齐方式
      • command:当按下按钮时调用的方法


Button所有的可设置参数

activebackground, activeforeground, anchor,
background, bitmap, borderwidth, cursor,
disabledforeground, font, foreground
highlightbackground, highlightcolor,
highlightthickness, image, justify,
padx, pady, relief, repeatdelay,
repeatinterval, takefocus, text,
textvariable, underline, wraplength

 WIDGET-SPECIFIC OPTIONS【特有选项】:
command, compound, default, height,
overrelief, state, width


from tkinter import *
def
hello():
print("hello"
)
root
=
Tk()
# RELIEF=["flat", "raised", "sunken", "solid", "ridge", "groove"]

btn1
=Button(root,text=\'click me\')
btn1.config(bg
=\'green\',fg=\'white\',cursor=\'hand1\',
)
btn1.config(anchor
=
LEFT)
btn1.pack()
# for col,i in enumerate(RELIEF):

#
btn=Button(root,text=i,relief=i,anchor=S)
#
btn.grid(row=0,column=col)

root.mainloop()


  • Label:


      • 介绍:显示一个文本或图象。
      • 参数设置:label没有什么特别的参数,可用参数参考下面的可用参数,再可以参考Button的参数设置

    STANDARD OPTIONS【label的标准可选参数】
    activebackground, activeforeground, anchor,
    background, bitmap, borderwidth, cursor,
    disabledforeground, font, foreground,
    highlightbackground, highlightcolor,
    highlightthickness, image, justify,
    padx, pady, relief, takefocus, text,
    textvariable, underline, wraplength


    WIDGET-SPECIFIC OPTIONS【特有选项】:
    height, state, width


    from tkinter import *
    root
    =Tk()
    root.title(
    \'我的窗口\'
    )
    root.geometry(
    \'500x500\'
    )
    label
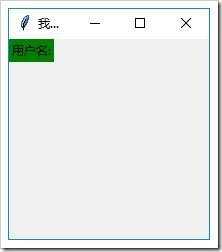
    =Label(text=\'用户名:\',bg=\'green\'
    )
    label.grid()
    root.mainloop()

    image


    • 框架Frame:


        • 介绍:一个容器窗口部件。可以有边框和背景。Frame默认是没有大小的,所以必须要设置高度和宽度,而当加了控件到Frame后它会“缩水”【这里缩水是因为Frame自动缩小到刚好能包裹控件】,需要在显示的时候强制设置大小比如pack(fill=X),这是强制填充水平方向,又或者使用 Frame对象.pack_propagate(0),这个函数可以使得设置的高度和宽度生效
        • 参数设置:可用参数参考下面的可用参数,再参考按钮的参数设置

      STANDARD OPTIONS【标准可用参数】
      activebackground, activeforeground, anchor,
      background, bitmap, borderwidth, cursor,
      disabledforeground, font, foreground,
      highlightbackground, highlightcolor,
      highlightthickness, image, justify,
      padx, pady, relief, takefocus, text,
      textvariable, underline, wraplength


      #这是一段没有显示Frame 代码
      from tkinter import *

      root
      =Tk()
      root.geometry(
      \'500x500\'
      )
      frame
      =Frame(root,height = 200,width = 400,bg = \'black\'
      )
      Label(frame,text
      =\'mylabel\'
      ).pack()
      frame.pack()
      root.mainloop()

      #下面是探究出缩水原因的代码
      from tkinter import *

      root
      =Tk()
      root.geometry(
      \'500x500\'
      )
      frame
      =Frame(root,height = 400,width = 400,bg = \'green\'
      )
      button1
      =Button(frame,text=\'hello\'
      )
      button1.pack(side
      =LEFT,padx=5,pady=5)#增加了边距之后,发现出了frame的背景颜色
      button2=Button(frame,text=\'hello\'
      )
      button2.pack(side
      =
      LEFT)
      frame.pack(side
      =
      TOP)
      root.mainloop()


      image

      #下面的是使用.pack_propagate(0)解决了问题的代码
      from tkinter import *

      root
      =Tk()
      root.geometry(
      \'500x500\'
      )
      frame
      =Frame(root,height = 400,width = 400,bg = \'green\'
      )
      # Label(frame,text=\'mylabel\',padx=5,pady=5).pack(side=LEFT)
      button1=Button(frame,text=\'hello\'
      )
      button1.pack(side
      =LEFT,padx=5,pady=5
      )
      button2
      =Button(frame,text=\'hello\'
      )
      button2.pack(side
      =
      LEFT)
      frame.pack_propagate(0)
      frame.pack(side
      =
      TOP)
      # frame.pack(side=TOP,fill=X)

      root.mainloop()


      • Toplevel:


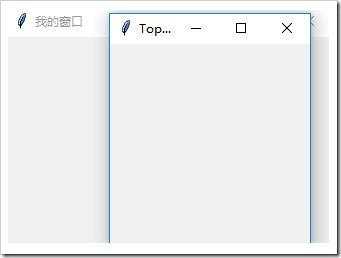
          • 介绍:一个容器窗口,作为一个单独的、最上面的窗口显示。 image
          • 参数设置:可用参数参考下面的,用法参考Tk的
          • Toplevel是一个子窗口,当父窗口关闭时子窗口会关闭,但子窗口关闭时父窗口不关闭

        Valid resource names:

        background, bd, bg, borderwidth, class,
        colormap, container, cursor, height, highlightbackground,
        highlightcolor, highlightthickness, menu, relief, screen, takefocus,
        use, visual, width


        from tkinter import *
        root
        =Tk()
        root.title(
        \'我的窗口\')
        root.geometry(
        \'500x500\')
        t1
        =Toplevel(root)
        t1.title(
        "Top窗口")
        t1.geometry(
        "100x100")
        label
        =Label(t1,text="用户名:")
        label.pack()
        root.mainloop()


        • 菜单Menu:


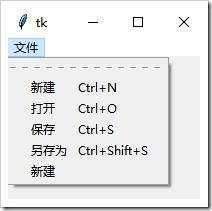
            • 介绍:菜单控件,相当于一个菜单组\\菜单栏,没有添加其他菜单时默认没有显示,只有添加其他的菜单,才会了实际的意义
            • 要想显示菜单,必须在“要添加菜单的窗口对象”的config中允许添加上“菜单对象”image
            • 参数设置:可用参数参考下面的可用参数,再参考按钮的参数设置

              • 注意:Menu是没有text的

            • 添加菜单按钮:

              • 添加命令菜单:Menu对象.add_command()
              • 添加多级菜单:Menu对象.add_cascade(**options)  【多级菜单可以传入一个菜单对象】image
              • 添加分割线:Menu对象.add_separator(**options)
              • 添加复选框菜单:Menu对象.add_checkbutton(**options)
              • 添加单选框菜单:Menu对象.add_radiobutton(**options)
              • 插入菜单:insert_separator(),insert_checkbutton(),insert_radiobutton(),insert_cascade(),
              • 其他。。。。

          常见可用参数:

          activebackground, activeborderwidth,
          activeforeground, background, bd, bg, borderwidth, cursor,
          disabledforeground, fg, font, foreground, postcommand, relief,
          selectcolor, takefocus, tearoff, tearoffcommand, title, type


          from tkinter import *
          root
          =Tk()
          menuBar
          =Menu(root,tearoff=0)
          root.config(menu
          =menuBar)
          filemenu
          =Menu(menuBar,fg=\'green\')#文件菜单下的字体是绿色的
          filemenu.add_command(label=\'新建\',accelerator = \'Ctrl+N\')
          filemenu.add_command(label
          =\'打开\',accelerator = \'Ctrl+O\')
          filemenu.add_command(label
          =\'保存\',accelerator = \'Ctrl+S\')
          filemenu.add_command(label
          =\'另存为\',accelerator =\'Ctrl+Shift+S\')
          menuBar.add_cascade(label
          =\'文件\',menu=filemenu)
          #这里测试root.config(menu=menuBar)的作用
          #
          def show_menuBar():
          #
          root.config(menu=menuBar)
          #
          button=Button(text=\'show_menu\',command=show_menuBar)
          #
          button.pack()

          root.mainloop()


          • Menubutton:


              • 介绍:菜单按钮。用来实现下拉式菜单。 image
              • 参数设置:可用参数参考上面Menu的,用法同样可以参考按钮Button的
              • 添加菜单的方法参考Menu的
              • 注意:这次不是在root里面config了,而是在菜单按钮中设置

            from tkinter import *
            root
            =Tk()
            menubtn
            =Menubutton(root,text=\'单击出现下拉菜单\',relief=\'raise\')#建立一个菜单按钮
            menubtn.pack()
            #添加菜单
            filemenu=Menu(menubtn)
            filemenu.add_command(label
            =\'新建\')
            menubtn.config(menu
            =filemenu)#设置菜单按钮允许显示菜单,这里不是root了
            root.mainloop()


            • Canvas:


              • 介绍:组织图形。这个部件可以用来绘制图表和图,创建图形编辑器,实现定制窗口部件
              • 参数设置:可用参数参考下面的,用法同样可以参考按钮Button的
              • 添加图像的方法:


                • create_rectangle:根据四个参数画一个矩形,四个参数是位置
                • create_polygon:根据提供的多个参数画一个多边形
                • 其他。。

            可用参数: background, bd, bg, borderwidth, closeenough,
            confine, cursor, height, highlightbackground, highlightcolor,
            highlightthickness, insertbackground, insertborderwidth,
            insertofftime, insertontime, insertwidth, offset, relief,
            scrollregion, selectbackground, selectborderwidth, selectforeground,
            state, takefocus, width, xscrollcommand, xscrollincrement,
            yscrollcommand, yscrollincrement


            from tkinter import *
            root
            =Tk()
            root.title(
            \'我的窗口\'
            )
            root.geometry(
            \'500x500\'
            )
            mycanvas
            =Canvas(root,green\'
            )
            mycanvas.pack()
            #画一个矩形
            mycanvas.create_rectangle(10,10,110,110,outline = \'red\',width = 5
            )
            root.mainloop()


            • Entry:


                • 介绍:单行文本输入域。 image
                • 参数设置:可用参数参考下面的,用法同样可以参考按钮Button的

              Valid resource names: background, bd, bg, borderwidth, cursor,
              exportselection, fg, font, foreground, highlightbackground,
              highlightcolor, highlightthickness, insertbackground,
              insertborderwidth, insertofftime, insertontime, insertwidth,
              invalidcommand, invcmd, justify, relief, selectbackground,
              selectborderwidth, selectforeground, show, state, takefocus,
              textvariable, validate, validatecommand, vcmd, width,
              xscrollcommand.


              from tkinter import *
              root
              =Tk()
              root.title(
              \'我的窗口\')
              root.geometry(
              \'300x300+20+10\')
              entry
              =Entry(root)
              entry.pack()
              root.mainloop()


              • Text:


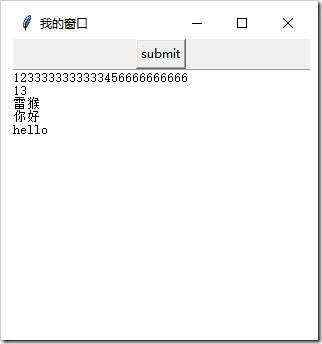
                  • 介绍:多行文本输入域,允许你用不同的样式和属性来显示和编辑文本。同时支持内嵌图象和窗口。 image
                  • 参数设置:可用参数参考下面的,用法同样可以参考按钮Button的

                STANDARD OPTIONS
                background, borderwidth, cursor,
                exportselection, font, foreground,
                highlightbackground, highlightcolor,
                highlightthickness, insertbackground,
                insertborderwidth, insertofftime,
                insertontime, insertwidth, padx, pady,
                relief, selectbackground,
                selectborderwidth, selectforeground,
                setgrid, takefocus,
                xscrollcommand, yscrollcommand,
                WIDGET-SPECIFIC OPTIONS
                autoseparators, height, maxundo,
                spacing1, spacing2, spacing3,
                state, tabs, undo, width, wrap,


                from tkinter import *
                root
                =Tk()
                root.title(
                \'我的窗口\')
                root.geometry(
                \'300x300+250+55\')
                button
                =Button(text=\'submit\')
                button.pack()
                t1
                =Text(root,)
                t1.pack()
                root.mainloop()


                • Message:


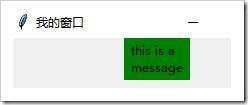
                • 介绍:显示多行文本。类似label窗口部件,但是能够自动地调整文本到给定的宽度或比率。 image
                • 参数设置:与Label类似
                • 由于Label也可以显示多行文本后,就逐渐少用Message了。"""Message widget to display multiline text. Obsolete since Label does it too."""


                • Listbox:


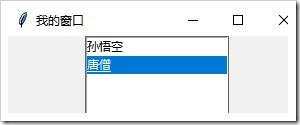
                  • 介绍:列表框用于从一组文本项目中进行选择。 根据列表框的配置方式,用户可以从列表中选择一个或多个项目。image
                  • 参数设置:可用参数参考下面的,参数设置同样可以参考按钮Button的


                    • selectmode:选择模式,selectmode=EXTENDED时允许多选
                    • selectbackground:选中时的背景颜色
                    • selectforeground:选中时的字体颜色
                    • selectborderwidth:选中时的边框大小

                  • 常用函数:


                    • 插入:insert(索引,元素)
                    • 删除:delete(索引,元素)
                    • 获取listbox元素:get()

                Valid resource names: background, bd, bg, borderwidth, cursor,
                exportselection, fg, font, foreground, height, highlightbackground,
                highlightcolor, highlightthickness, relief, selectbackground,
                selectborderwidth, selectforeground, selectmode, setgrid, takefocus,
                width, xscrollcommand, yscrollcommand, listvariable


                from tkinter import *
                root
                =Tk()
                root.title(
                \'我的窗口\')
                root.geometry(
                \'300x300+20+10\')
                # listbox=Listbox(root)
                listbox=Listbox(root,selectmode=EXTENDED)
                listbox.insert(0,
                "孙悟空")
                listbox.insert(
                1,"唐僧")
                listbox.insert(
                2,"葫芦娃")
                listbox.pack()
                def func1():
                print(listbox.get(0,END))#以元组形式返回所有listbox的元素
                def func2():
                print(listbox.select_includes(1))#当对应索引被选中时返回True
                def func3():
                print(listbox.curselection())#以元组形式返回被选中的元素

                btn1
                =Button(text="获取所有元素",command=func1)
                btn1.pack()
                btn2
                =Button(text="判断1是否选中",command=func2)
                btn2.pack()
                btn3
                =Button(text="获取选中的索引",command=func3)
                btn3.pack()
                root.mainloop()


                •  复选框Checkbutton:


                  • 介绍:复选框点击这个按钮将会在这两个值间切换。
                  • 参数设置:可用参数参考下面的,用法同样可以参考按钮Button的


                    • variable:值为tkinter变量,可以使用   tkinter变量.get方法 来获取是否选中

                  • 如果想要获取选中值,必须设置一个tkinter变量来获取,tkinter变量类型有:BooleanVar, DoubleVar, IntVar, StringVar

                可用参数:activebackground, activeforeground, anchor,
                background, bd, bg, bitmap, borderwidth, command, cursor,
                disabledforeground, fg, font, foreground, height,
                highlightbackground, highlightcolor, highlightthickness, image,
                indicatoron, justify, offvalue, onvalue, padx, pady, relief,
                selectcolor, selectimage, state, takefocus, text, textvariable,
                underline, variable, width, wraplength


                from tkinter import *
                root
                =Tk()
                root.title(
                \'我的窗口\')
                root.geometry(
                \'200x200\')
                def submit():
                print(\'男:\',v1.get(),\'女:\',v2.get(),\'另外:\',v3.get())#选择则值为1,不选中为0
                # pass

                v1
                = IntVar() #用tkinter变量来表示按钮是否选中
                v2 = IntVar()
                v3
                = IntVar()
                # 使用 Checkbutton时,必须创建一个 Tkinter 变量用于存放按钮的状态:
                cbtn=Checkbutton(root,text=\'\',variable=v1,command=submit)
                cbtn2
                =Checkbutton(root,text=\'\',variable=v2,command=submit)
                #v3是为了测试variable相同时,点一个,所有的v3都被选中
                cbtn3=Checkbutton(root,text=\'不明\',variable=v3,command=submit)
                cbtn4
                =Checkbutton(root,text=\'保密\',variable=v3,command=submit)
                button
                =Button(text=\'submit\',command=submit)
                button.pack()
                cbtn.pack()
                cbtn2.pack()
                cbtn3.pack()
                cbtn4.pack()
                root.mainloop()


                • Radiobutton:


                  • 介绍:代表一个变量,它可以有多个值中的一个。点击它将为这个变量设置值,并且清除与这同一变量相关的其它radiobutton。
                  • 参数设置:可用参数参考下面的,用法同样可以参考按钮Button的


                    • variable:值为tkinter变量,可以使用   tkinter变量.get方法 来获取是否选中
                    • value:根据前面的variable来决定数据类型,使用   tkinter变量.get方法 此时获取的是选中选项的value的值

                Valid resource names: activebackground, activeforeground, anchor,
                background, bd, bg, bitmap, borderwidth, command, cursor,
                disabledforeground, fg, font, foreground, height,
                highlightbackground, highlightcolor, highlightthickness, image,
                indicatoron, justify, padx, pady, relief, selectcolor, selectimage,
                state, takefocus, text, textvariable, underline, value, variable,
                width, wraplength


                from tkinter import *
                root
                =Tk()
                v
                =StringVar()
                l
                =[\'man\',\'woman\',\'unknow\']
                def ptr():
                print(v.get())
                for i in l:
                rbtn
                =Radiobutton(root,text=i,variable=v,value=i,command=ptr)
                rbtn.pack()
                root.mainloop()


                •  Scale:


                    介绍:允许你通过滑块来设置一数字值。
                  • 介绍:允许你通过滑块来设置一数字值。 image

                  • 常用参数设置:


                    • from_:设置滑块起始值
                    • to:设置滑块最大值
                    • orient:设置方向,默认是竖的,如果想改成水平的:orient=HORIZONTAL

                Valid resource names:

                activebackground, background, bigincrement, bd,
                bg, borderwidth, command, cursor, digits, fg, font, foreground, from,
                highlightbackground, highlightcolor, highlightthickness, label,
                length, orient, relief, repeatdelay, repeatinterval, resolution,
                showvalue, sliderlength, sliderrelief, state, takefocus,
                tickinterval, to, troughcolor, variable, width


                from tkinter import *
                root
                =Tk()
                root.title(
                \'我的窗口\')
                root.geometry(
                \'300x300+20+10\')
                scale
                =Scale(root,from_=0, to=100)#默认是竖的
                scale2=Scale(root,from_=0, to=100,orient=HORIZONTAL)#横的
                scale.pack()
                scale2.pack()
                root.mainloop()


                • Scrollbar:


                    • 介绍:为配合使用canvas, entry, listbox, and text窗口部件的标准滚动条。
                    • 参数设置:可用参数参考下面的,用法参考按钮Button的

                  Valid resource names:

                  activebackground, activerelief,
                  background, bd, bg, borderwidth, command, cursor,
                  elementborderwidth, highlightbackground,
                  highlightcolor, highlightthickness, jump, orient,
                  relief, repeatdelay, repeatinterval, takefocus,
                  troughcolor, width.


                  from tkinter import *
                  root
                  =Tk()
                  root.title(
                  \'我的窗口\')
                  root.geometry(
                  \'300x300+250+55\')
                  button
                  =Button(text=\'submit\')
                  button.pack()
                  t1
                  =Text(root,)
                  slb
                  =Scrollbar(root)
                  slb.pack(side
                  =RIGHT,fill=Y)#设置滚动条的显示形式
                  t1.config(yscrollcommand=slb.set)#设置允许滚动条
                  #
                  由于没有绑定事件,所以直接拖拽滚动条无效

                  t1.pack()
                  root.mainloop()


                  想要了解更多,可以参考tkinter的官方文档:http://effbot.org/tkinterbook/


                  推荐阅读
                  author-avatar
                  取个名字忒难le
                  这个家伙很懒,什么也没留下!
                  PHP1.CN | 中国最专业的PHP中文社区 | DevBox开发工具箱 | json解析格式化 |PHP资讯 | PHP教程 | 数据库技术 | 服务器技术 | 前端开发技术 | PHP框架 | 开发工具 | 在线工具
                  Copyright © 1998 - 2020 PHP1.CN. All Rights Reserved | 京公网安备 11010802041100号 | 京ICP备19059560号-4 | PHP1.CN 第一PHP社区 版权所有