作者:阳光美女新干线- | 来源:互联网 | 2024-09-30 18:22
本文由编程笔记#小编为大家整理,主要介绍了(源码开放) React + webpack3 多页面应用 及 常见问题解答相关的知识,希望对你有一定的参考价值。
开发环境:Windows 8,node v8.9.1,npm 5.5.1,WebStorm 2017.2.2
github:
https://github.com/frontend-everyone/react-webpack3-multipage-feeo
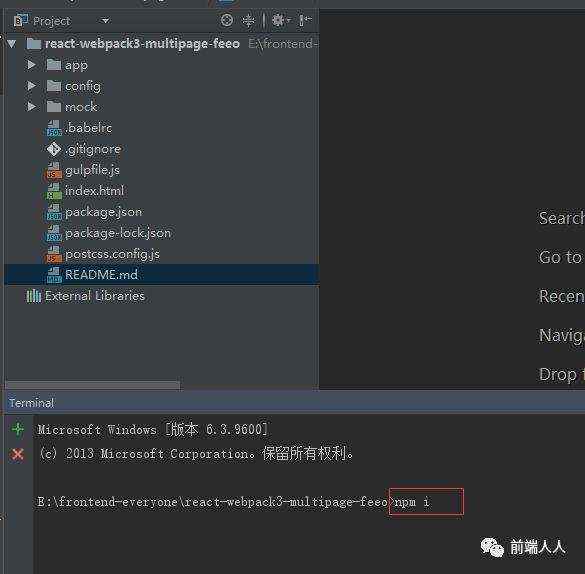
安装
npm i
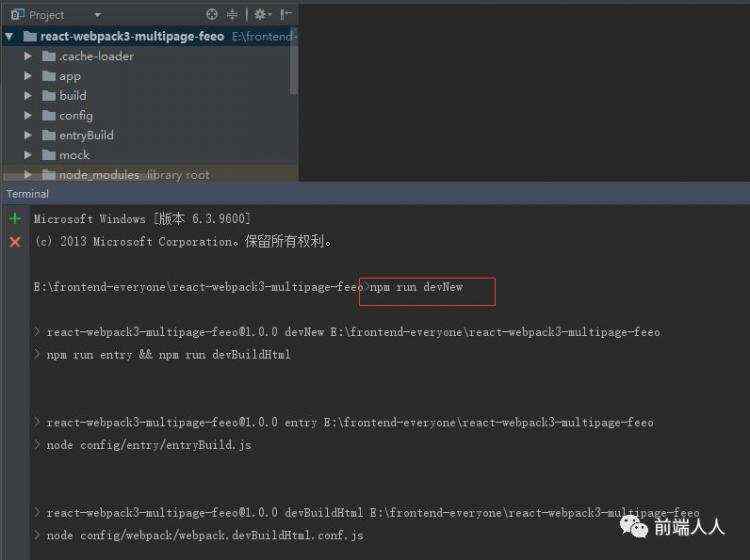
开发 (先生成webpack入口文件,每次修改entry都需要执行改命令)
npm run devNew
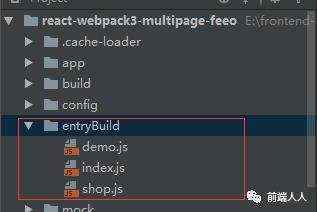
该命令会自动生成 webpack 入口文件,会在根目录下生成一个 entryBuild 文件夹
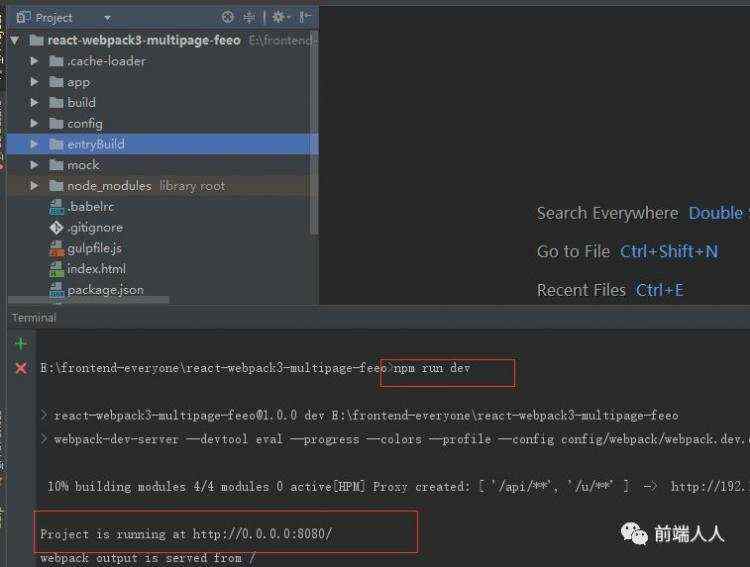
npm run devNew
命令执行完 浏览器会自动打开 http://localhost:8080/
--------------------------------------------------------------------------------------------------------
以上工程从0到1搭建过程,请见下面教程
--------------------------------------------------------------------------------------------------------
常见问题解答(如果你按照以上教程一步一步去做,可能会遇到下面几个问题)
1、版本问题
请拷贝 一下内容 全部替换 你的 package.json 然后 npm i 安装下
{
"name": "react-webpack3-multipage-feeo",
"version": "1.0.0",
"description": "There are no deploy keys for this repository.",
"main": "index.js",
"repository": {
"type": "git",
"url": "https://github.com/frontend-everyone/react-webpack3-multipage-feeo"
},
"scripts": {
"entry": "node config/entry/entryBuild.js",
"devBuildhtml": "node config/webpack/webpack.devBuildHtml.conf.js",
"devNew": "npm run entry && npm run devBuildHtml",
"dev": "webpack-dev-server --devtool eval --progress --colors --profile --config config/webpack/webpack.dev.conf.js",
"p": "SET BABEL_ENV=production && webpack --progress --colors --config config/webpack/webpack.prod.conf.js",
"ptp": "npm run p && gulp buildTime zip",
"test": "echo \"Error: no test specified\" && exit 1"
},
"keywords": [],
"author": "",
"license": "ISC",
"dependencies": {
"babel-polyfill": "^6.26.0",
"flux": "^3.1.3",
"mobx": "^3.4.1",
"mobx-react": "^4.3.5",
"react": "^16.2.0",
"react-COOKIE": "^0.4.6",
"react-dom": "^16.2.0",
"react-kirk-pc-ui": "^1.0.0",
"react-redux": "^5.0.7",
"react-router-dom": "^4.2.2",
"redux": "^3.7.2",
"redux-thunk": "^2.2.0",
"refast": "^2.1.0",
"refast-logic-render": "^2.2.3",
"reflux": "^6.4.1"
},
"devDependencies": {
"babel-cli": "^6.26.0",
"babel-eslint": "^8.1.2",
"babel-loader": "^7.1.2",
"babel-plugin-transform-class-properties": "^6.24.1",
"babel-plugin-transform-decorators-legacy": "^1.3.4",
"babel-preset-env": "^1.6.1",
"babel-preset-react": "^6.24.1",
"babel-preset-react-hmre": "^1.1.1",
"babel-preset-react-native-stage-0": "^1.0.1",
"bundle-loader": "^0.5.5",
"cache-loader": "^1.2.0",
"clean-webpack-plugin": "^0.1.17",
"copy-webpack-plugin": "^4.3.1",
"css-loader": "^0.28.7",
"eslint": "^4.14.0",
"eslint-config-react-app": "^2.0.1",
"eslint-loader": "^1.9.0",
"eslint-plugin-flowtype": "^2.40.1",
"eslint-plugin-import": "^2.8.0",
"eslint-plugin-jsx-a11y": "^5.1.1",
"eslint-plugin-react": "^7.5.1",
"extract-text-webpack-plugin": "^3.0.2",
"file": "^0.2.2",
"file-loader": "^1.1.6",
"gulp": "^3.9.1",
"gulp-vsftp": "^0.7.8",
"gulp-zip": "^4.0.0",
"html-webpack-plugin": "^2.30.1",
"mockjs": "^1.0.1-beta3",
"moment-kirk": "^1.0.1",
"optimize-css-assets-webpack-plugin": "^3.2.0",
"postcss-cssnext": "^3.0.2",
"postcss-loader": "^2.0.9",
"precss": "^2.0.0",
"react-dev-utils": "^4.2.1",
"style-loader": "^0.19.1",
"url-loader": "^0.6.2",
"webpack": "^3.10.0",
"webpack-dev-server": "^2.9.7",
"webpack-merge": "^4.1.1"
},
"eslintConfig": {
"extends": "react-app",
"rules": {
"import/no-webpack-loader-syntax": 0,
"no-script-url": 0
}
}
}
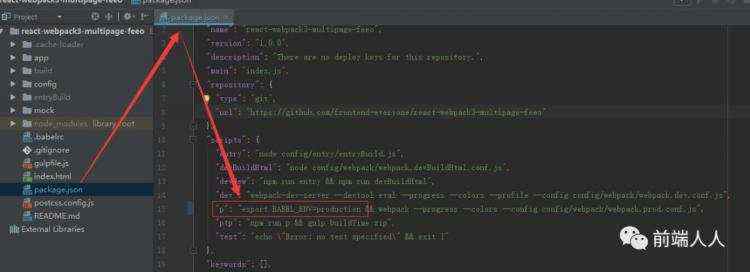
2、打包问题 主要是执行 npm run p 在mac上会 set= 错误
在windows 平台 如下是正常的
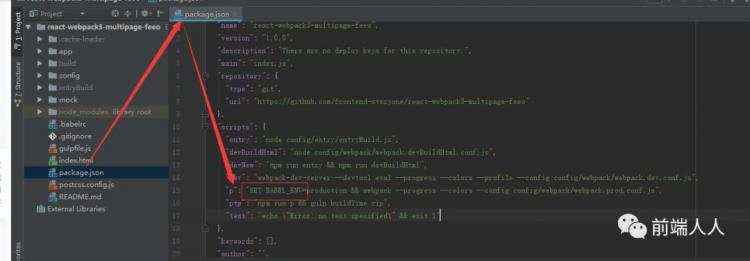
在MAC电脑上需要改成
export BABEL_ENV=production
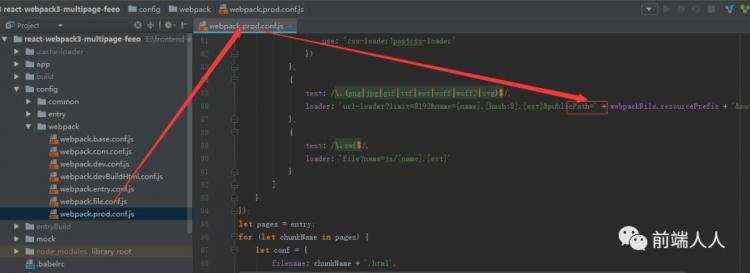
在这个地方 添加 路径即可,如:
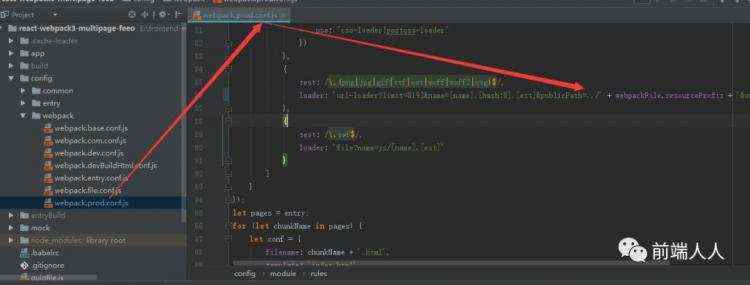
4、上传问题 ,主要问题出在, 执行 npm run ptp 等命令 需要调用 gulp 上传任务时
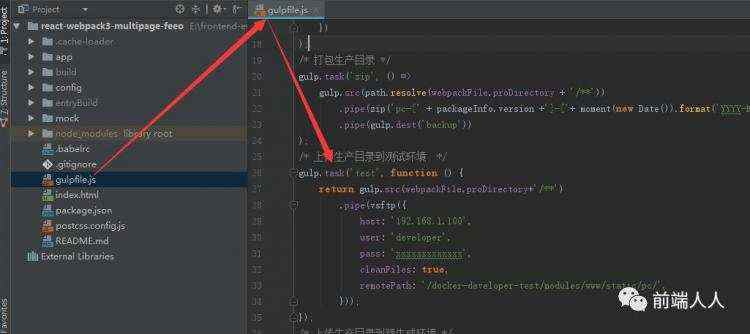
如果你的远程服务器是linux系统,则不需要修改。
如果是windows系统,则需要修改成如下:
https://www.npmjs.com/package/gulp-ftp
本文完 


感谢童鞋们支持,希望对你有所帮助!
如果你有什么问题,可以在下方留言给我们!