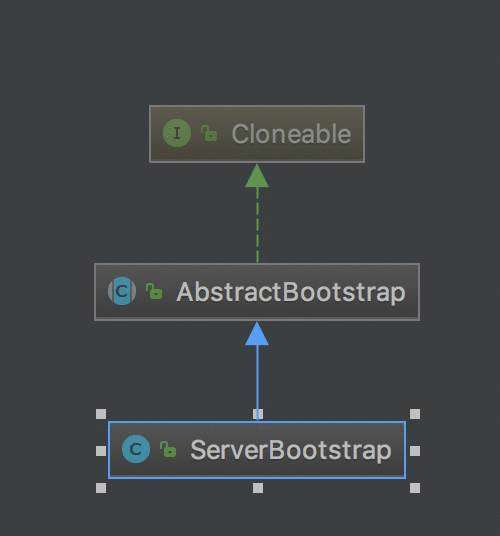
这个类是比较核心的类,这个类定义了很多关键的操作,算比较底层的了,其实以前我们有讲过他的两个子类,一个就是AbstractNioMessageChannel的NioMessageUnsafe,这个是用于NioServerSocketChannel的unsafe类,另外一个AbstractNioByteChannel的NioByteUnsafe,用于NioSocketChannel,其实也就是一些读取方法不一样,毕竟一个是取接受连接,一个是读取数据,不一样。我们前面其实有分析过一些他们的read方法。今天主要来分析下NioSocketChannelUnsafe的write和flush方法,。
先看下这个NioSocketChannelUnsafe的结构,他是专门用来操作写和刷新的:

会将数据msg封装成直接缓冲区,然后添加到出站缓冲区中:
&#64;Overridepublic final void write(Object msg, ChannelPromise promise) {assertEventLoop();ChannelOutboundBuffer outboundBuffer &#61; this.outboundBuffer;if (outboundBuffer &#61;&#61; null) {// If the outboundBuffer is null we know the channel was closed and so// need to fail the future right away. If it is not null the handling of the rest// will be done in flush0()// See https://github.com/netty/netty/issues/2362safeSetFailure(promise, newClosedChannelException(initialCloseCause));// release message now to prevent resource-leakReferenceCountUtil.release(msg);return;}int size;try {msg &#61; filterOutboundMessage(msg);//封装成直接缓冲区size &#61; pipeline.estimatorHandle().size(msg);//获取缓冲区大小if (size < 0) {size &#61; 0;}} catch (Throwable t) {safeSetFailure(promise, t);ReferenceCountUtil.release(msg);return;}outboundBuffer.addMessage(msg, size, promise);//往出站缓冲区添加消息}
这个是专门把数据封装成直接缓冲区&#xff0c;以便于进行零拷贝&#xff0c;利用堆外内存&#xff0c;提高效率&#xff0c;关于零拷贝&#xff0c;可以看看这篇文章&#xff0c;其实这里可以立即为没有用CPU将数据从内核拷贝到Java虚拟机中&#xff1a;
&#64;Overrideprotected final Object filterOutboundMessage(Object msg) {if (msg instanceof ByteBuf) {ByteBuf buf &#61; (ByteBuf) msg;if (buf.isDirect()) {//如果是直接缓冲区就返回return msg;}return newDirectBuffer(buf);//否则封装成直接缓冲区就可以零拷贝}if (msg instanceof FileRegion) {//文件缓冲区也可以零拷贝return msg;}
//剩下的就不支持了throw new UnsupportedOperationException("unsupported message type: " &#43; StringUtil.simpleClassName(msg) &#43; EXPECTED_TYPES);}
其实就是获得一个新的直接缓冲区&#xff0c;把旧的缓冲区释放了&#xff1a;
protected final ByteBuf newDirectBuffer(ByteBuf buf) {final int readableBytes &#61; buf.readableBytes();if (readableBytes &#61;&#61; 0) {//如果没有数据&#xff0c;就释放&#xff0c;返回一个空的ReferenceCountUtil.safeRelease(buf);return Unpooled.EMPTY_BUFFER;}
//字节缓冲区分配器final ByteBufAllocator alloc &#61; alloc();if (alloc.isDirectBufferPooled()) {//是直接缓冲区池化的ByteBuf directBuf &#61; alloc.directBuffer(readableBytes);//申请直接缓冲区directBuf.writeBytes(buf, buf.readerIndex(), readableBytes);//写入直接缓冲区ReferenceCountUtil.safeRelease(buf);//释放原来的缓冲区return directBuf;//返回直接缓冲区}final ByteBuf directBuf &#61; ByteBufUtil.threadLocalDirectBuffer();//线程中的直接缓冲区if (directBuf !&#61; null) {directBuf.writeBytes(buf, buf.readerIndex(), readableBytes);ReferenceCountUtil.safeRelease(buf);return directBuf;}// Allocating and deallocating an unpooled direct buffer is very expensive; give up.return buf;//如果申请或者释放未池化的直接缓冲区消耗太大&#xff0c;就直接返回原来的}
这里才是将直接缓冲区添加到出站缓冲区中&#xff0c;不过是会创建一个实体Entry&#xff0c;然后用一个单链表结构来存取的&#xff0c;这个后面会讲&#xff1a;
public void addMessage(Object msg, int size, ChannelPromise promise) {Entry entry &#61; Entry.newInstance(msg, size, total(msg), promise);//创建实体if (tailEntry &#61;&#61; null) {flushedEntry &#61; null;} else {Entry tail &#61; tailEntry;tail.next &#61; entry;}tailEntry &#61; entry;if (unflushedEntry &#61;&#61; null) {unflushedEntry &#61; entry;//指向第一个未冲刷的实体}// increment pending bytes after adding message to the unflushed arrays.// See https://github.com/netty/netty/issues/1619incrementPendingOutboundBytes(entry.pendingSize, false);//增加待冲刷的消息}
链表结构大致是这样&#xff1a;

这个就是增加待出站的字节数&#xff0c;如果超过上限的话&#xff0c;就设置不可以写了&#xff1a;
private void incrementPendingOutboundBytes(long size, boolean invokeLater) {if (size &#61;&#61; 0) {return;}long newWriteBufferSize &#61; TOTAL_PENDING_SIZE_UPDATER.addAndGet(this, size);if (newWriteBufferSize > channel.config().getWriteBufferHighWaterMark()) {//如果大于配置的16位大小setUnwritable(invokeLater);//设置不可写}}
我们先来看看可写是怎么判断的&#xff1a;
public boolean isWritable() {return unwritable &#61;&#61; 0;}
然后设置不可写就是这样&#xff0c;将unwritable 原子操作改为非0&#xff0c;然后触发fireChannelWritabilityChanged&#xff0c;也就是写能力改变了&#xff0c;不可写了&#xff1a;
private void setUnwritable(boolean invokeLater) {for (;;) {final int oldValue &#61; unwritable;//可写的时候是0final int newValue &#61; oldValue | 1;if (UNWRITABLE_UPDATER.compareAndSet(this, oldValue, newValue)) {if (oldValue &#61;&#61; 0 && newValue !&#61; 0) {//开始是0&#xff0c;后来变为非0&#xff0c;就是不可写了fireChannelWritabilityChanged(invokeLater);}break;}}}
如果是立即改变&#xff0c;就会调用pipeline.fireChannelWritabilityChanged();&#xff0c;就会从头结点开始传递这个事件&#xff0c;否则就给通道的事件循环提交个任务&#xff1a;
private void fireChannelWritabilityChanged(boolean invokeLater) {final ChannelPipeline pipeline &#61; channel.pipeline();if (invokeLater) {Runnable task &#61; fireChannelWritabilityChangedTask;if (task &#61;&#61; null) {fireChannelWritabilityChangedTask &#61; task &#61; new Runnable() {&#64;Overridepublic void run() {pipeline.fireChannelWritabilityChanged();}};}channel.eventLoop().execute(task);} else {pipeline.fireChannelWritabilityChanged();}}
至此&#xff0c;write写数据就完成了&#xff0c;其实就是写入出站缓冲区里面&#xff0c;并没有将数据冲刷到对端&#xff0c;要进行flush才会将数据发出去。
可以看到这里才会开始冲刷&#xff0c;会先进行打标记&#xff0c;然后冲刷&#xff1a;
&#64;Overridepublic final void flush() {assertEventLoop();ChannelOutboundBuffer outboundBuffer &#61; this.outboundBuffer;//获得出站缓冲区if (outboundBuffer &#61;&#61; null) {return;}outboundBuffer.addFlush();//添加冲刷计数flush0();//冲刷}
这里会将flushedEntry设置为要冲刷的第一个entry&#xff0c;然后遍历链表&#xff0c;冲刷计数flushed&#43;1&#xff0c;如果此时请求取消的话&#xff0c;就进行取消和出站字节数的减少&#xff0c;最后将为冲刷实体unflushedEntry设为空&#xff0c;表示这些都已经要冲刷的了&#xff0c;后续会根据flushed来进行冲刷&#xff1b;
public void addFlush() {Entry entry &#61; unflushedEntry;//第一个没冲刷的数据&#xff0c;也是链表的第一个if (entry !&#61; null) {//有数据才刷了if (flushedEntry &#61;&#61; null) {// there is no flushedEntry yet, so start with the entryflushedEntry &#61; entry;//设置第一个要冲刷的实体}do {flushed &#43;&#43;;//冲刷数&#43;1if (!entry.promise.setUncancellable()) {//如果取消的话需要回收内存// Was cancelled so make sure we free up memory and notify about the freed bytesint pending &#61; entry.cancel();decrementPendingOutboundBytes(pending, false, true);}entry &#61; entry.next;} while (entry !&#61; null);//遍历冲刷是否有取消的// All flushed so reset unflushedEntryunflushedEntry &#61; null;//重置未冲刷的}}
要冲刷了&#xff1a;
&#64;Overrideprotected final void flush0() {if (!isFlushPending()) {//没有待冲刷的操作super.flush0();}}
先判断下是否已经有待冲刷存在&#xff0c;也就是有设置OP_WRITE事件&#xff1a;
private boolean isFlushPending() {SelectionKey selectionKey &#61; selectionKey();return selectionKey.isValid() && (selectionKey.interestOps() & SelectionKey.OP_WRITE) !&#61; 0;}
这里就要开始真正的冲刷了,省略了非核心的操作&#xff1a;
protected void flush0() {...doWrite(outboundBuffer);...}
最终当然还是封装了NIO的SocketChannel 的write方法来进行写数据啦&#xff0c;他会进行16次自旋尝试&#xff0c;来写消息&#xff0c;直到出站缓冲区的数据全部写出去了&#xff0c;然后就clearOpWrite清除OP_WRITE设置&#xff0c;返回&#xff0c;否则要去设置任务是否写操作incompleteWrite&#xff1a;
&#64;Overrideprotected void doWrite(ChannelOutboundBuffer in) throws Exception {SocketChannel ch &#61; javaChannel();//内部还是用NIO的操作的int writeSpinCount &#61; config().getWriteSpinCount();//写自旋的次数&#xff0c;默认是16次do {if (in.isEmpty()) {// All written so clear OP_WRITEclearOpWrite();//全部写完后&#xff0c;进行写事件的清除// Directly return here so incompleteWrite(...) is not called.return;//直接返回&#xff0c;不需要调用incompleteWrite}// Ensure the pending writes are made of ByteBufs only.int maxBytesPerGatheringWrite &#61; ((NioSocketChannelConfig) config).getMaxBytesPerGatheringWrite();//获取最大的待写字节数16384ByteBuffer[] nioBuffers &#61; in.nioBuffers(1024, maxBytesPerGatheringWrite);//获取ByteBuffer数组int nioBufferCnt &#61; in.nioBufferCount();// Always us nioBuffers() to workaround data-corruption.// See https://github.com/netty/netty/issues/2761switch (nioBufferCnt) {case 0:// We have something else beside ByteBuffers to write so fallback to normal writes.writeSpinCount -&#61; doWrite0(in);break;case 1: {// Only one ByteBuf so use non-gathering write 一个就不用gathering// Zero length buffers are not added to nioBuffers by ChannelOutboundBuffer, so there is no need// to check if the total size of all the buffers is non-zero. 0字节的不会放进缓冲区里&#xff0c;不用检查ByteBuffer buffer &#61; nioBuffers[0];//只有一个int attemptedBytes &#61; buffer.remaining();final int localWrittenBytes &#61; ch.write(buffer);//用NIO的SocketChannel写出去if (localWrittenBytes <&#61; 0) {incompleteWrite(true);return;}adjustMaxBytesPerGatheringWrite(attemptedBytes, localWrittenBytes, maxBytesPerGatheringWrite);in.removeBytes(localWrittenBytes);--writeSpinCount;break;}default: {// Zero length buffers are not added to nioBuffers by ChannelOutboundBuffer, so there is no need// to check if the total size of all the buffers is non-zero.// We limit the max amount to int above so cast is safelong attemptedBytes &#61; in.nioBufferSize();//获取发多少字节数据final long localWrittenBytes &#61; ch.write(nioBuffers, 0, nioBufferCnt);//一起写出去了if (localWrittenBytes <&#61; 0) {//没完成incompleteWrite(true);return;}// Casting to int is safe because we limit the total amount of data in the nioBuffers to int above.adjustMaxBytesPerGatheringWrite((int) attemptedBytes, (int) localWrittenBytes,maxBytesPerGatheringWrite);in.removeBytes(localWrittenBytes);--writeSpinCount;break;}}} while (writeSpinCount > 0);incompleteWrite(writeSpinCount < 0);}
上面这个方法涉及到的东西比较多&#xff0c;讲起来东西很多&#xff0c;因为还涉及到ChannelOutboundBuffer&#xff0c;还有一些ByteBuf相关的东西等等&#xff0c;下一篇详细的来介绍下这些东西&#xff0c;不然很难讲清楚doWrite。
好了&#xff0c;今天就到这里了&#xff0c;希望对学习理解有帮助&#xff0c;大神看见勿喷&#xff0c;仅为自己的学习理解&#xff0c;能力有限&#xff0c;请多包涵。


 京公网安备 11010802041100号 | 京ICP备19059560号-4 | PHP1.CN 第一PHP社区 版权所有