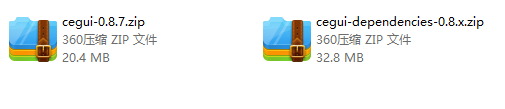
登录CEGUI官网网站:
http://cegui.org.uk/download
下载CEGUI0.8.7源码+ 0.8.X Dependencies

#include "CEGUI/RendererModules/OpenGL/GL.h"
#include "CEGUI/CEGUI.h"
#include "CEGUI/RenderTarget.h"
#include
#include
#include
#include "CEGUI/RendererModules/OpenGL/GLRenderer.h"/*************************************************************************Sample specific initialisation goes here.
*************************************************************************/
bool HelloWorldDemo::initialise(CEGUI::GUIContext* guiContext)
{using namespace CEGUI;d_usedFiles = CEGUI::String(__FILE__);// CEGUI relies on various systems being set-up, so this is what we do// here first.//// The first thing to do is load a CEGUI 'scheme' this is basically a file// that groups all the required resources and definitions for a particular// skin so they can be loaded / initialised easily//// So, we use the SchemeManager singleton to load in a scheme that loads the// imagery and registers widgets for the TaharezLook skin. This scheme also// loads in a font that gets used as the system default.SchemeManager::getSingleton().createFromFile("TaharezLook.scheme");// The next thing we do is to set a default mouse cursor image. This is// not strictly essential, although it is nice to always have a visible// cursor if a window or widget does not explicitly set one of its own.//// The TaharezLook Imageset contains an Image named "MouseArrow" which is// the ideal thing to have as a defult mouse cursor image.guiContext->getMouseCursor().setDefaultImage("TaharezLook/MouseArrow");// Now the system is initialised, we can actually create some UI elements, for// this first example, a full-screen 'root' window is set as the active GUI// sheet, and then a simple frame window will be created and attached to it.// All windows and widgets are created via the WindowManager singleton.WindowManager& winMgr = WindowManager::getSingleton();// Here we create a "DefaultWindow". This is a native type, that is, it does// not have to be loaded via a scheme, it is always available. One common use// for the DefaultWindow is as a generic container for other windows. Its// size defaults to 1.0f x 1.0f using the Relative metrics mode, which means// when it is set as the root GUI sheet window, it will cover the entire display.// The DefaultWindow does not perform any rendering of its own, so is invisible.//// Create a DefaultWindow called 'Root'.d_root = (DefaultWindow*)winMgr.createWindow("DefaultWindow", "Root");// load font and setup default if not loaded via schemeFont& defaultFont = FontManager::getSingleton().createFromFile("DejaVuSans-12.font");// Set default font for the gui contextguiContext->setDefaultFont(&defaultFont);// Set the root window as root of our GUI ContextguiContext->setRootWindow(d_root);// A FrameWindow is a window with a frame and a titlebar which may be moved around// and resized.//// Create a FrameWindow in the TaharezLook style, and name it 'Demo Window'FrameWindow* wnd = (FrameWindow*)winMgr.createWindow("TaharezLook/FrameWindow", "Demo Window");// Here we attach the newly created FrameWindow to the previously created// DefaultWindow which we will be using as the root of the displayed gui.d_root->addChild(wnd);// Windows are in Relative metrics mode by default. This means that we can// specify sizes and positions without having to know the exact pixel size// of the elements in advance. The relative metrics mode co-ordinates are// relative to the parent of the window where the co-ordinates are being set.// This means that if 0.5f is specified as the width for a window, that window// will be half as its parent window.//// Here we set the FrameWindow so that it is half the size of the display,// and centered within the display.wnd->setPosition(UVector2(cegui_reldim(0.0f), cegui_reldim( 0.0f)));wnd->setSize(USize(cegui_reldim(1.0f), cegui_reldim(1.0f)));// now we set the maximum and minum sizes for the new window. These are// specified using relative co-ordinates, but the important thing to note// is that these settings are aways relative to the display rather than the// parent window.//// here we set a maximum size for the FrameWindow which is equal to the size// of the display, and a minimum size of one tenth of the display.wnd->setMaxSize(USize(cegui_reldim(1.0f), cegui_reldim( 1.0f)));wnd->setMinSize(USize(cegui_reldim(0.1f), cegui_reldim( 0.1f)));// As a final step in the initialisation of our sample window, we set the window's// text to "Hello World!", so that this text will appear as the caption in the// FrameWindow's titlebar.wnd->setText("Hello World Linduo!");wnd->subscribeEvent(CEGUI::Window::EventMouseClick, Event::Subscriber(&HelloWorldDemo::handleHelloWorldClicked, this));// return true so that the samples framework knows that initialisation was a// success, and that it should now run the sample.return true;
}/*************************************************************************Cleans up resources allocated in the initialiseSample call.
*************************************************************************/
void HelloWorldDemo::deinitialise()
{
}bool HelloWorldDemo::handleHelloWorldClicked(const CEGUI::EventArgs&)
{std::cout << "Hello World!" << std::endl;std::cout << "Test For me" << std::endl;return false;
}/*************************************************************************Define the module function that returns an instance of the sample
*************************************************************************/
extern "C" SAMPLE_EXPORT Sample& getSampleInstance()
{static HelloWorldDemo sample;return sample;
}
const char d_windowTitle[] = "Crazy Eddie&#39;s GUI Mk-2 - Sample Application";void initCEGUI()
{using namespace CEGUI;// create renderer and enable extra statesOpenGLRenderer& cegui_renderer = OpenGLRenderer::create(Sizef(800.f, 600.f));cegui_renderer.enableExtraStateSettings(true);// create CEGUI system objectCEGUI::System::create(cegui_renderer);// setup resource directoriesDefaultResourceProvider* rp = static_cast<DefaultResourceProvider*>(System::getSingleton().getResourceProvider());rp->setResourceGroupDirectory("schemes", "../../datafiles/schemes/");rp->setResourceGroupDirectory("imagesets", "../../datafiles/imagesets/");rp->setResourceGroupDirectory("fonts", "../../datafiles/fonts/");rp->setResourceGroupDirectory("layouts", "../../datafiles/layouts/");rp->setResourceGroupDirectory("looknfeels", "../../datafiles/looknfeel/");rp->setResourceGroupDirectory("lua_scripts", "../../datafiles/lua_scripts/");rp->setResourceGroupDirectory("schemas", "../../datafiles/xml_schemas/");// set default resource groupsImageManager::setImagesetDefaultResourceGroup("imagesets");Font::setDefaultResourceGroup("fonts");Scheme::setDefaultResourceGroup("schemes");WidgetLookManager::setDefaultResourceGroup("looknfeels");WindowManager::setDefaultResourceGroup("layouts");ScriptModule::setDefaultResourceGroup("lua_scripts");XMLParser* parser = System::getSingleton().getXMLParser();if (parser->isPropertyPresent("SchemaDefaultResourceGroup"))parser->setProperty("SchemaDefaultResourceGroup", "schemas");// load TaharezLook scheme and DejaVuSans-10 fontSchemeManager::getSingleton().createFromFile("TaharezLook.scheme", "schemes");FontManager::getSingleton().createFromFile("DejaVuSans-10.font");// set default font and cursor image and tooltip typeSystem::getSingleton().getDefaultGUIContext().setDefaultFont("DejaVuSans-10");System::getSingleton().getDefaultGUIContext().getMouseCursor().setDefaultImage("TaharezLook/MouseArrow");System::getSingleton().getDefaultGUIContext().setDefaultTooltipType("TaharezLook/Tooltip");
}void initWindows()
{using namespace CEGUI;/// Add your gui initialisation code in here.// You should preferably use layout loading because you won&#39;t// have to recompile everytime you change the layout. But you// can also use static window creation code here, of course./// load layoutWindow* root = WindowManager::getSingleton().loadLayoutFromFile("application_templates.layout");System::getSingleton().getDefaultGUIContext().setRootWindow(root);
}static void GLFWCALL glfwWindowResizeCallback(int width, int height)
{CEGUI::System::getSingleton().notifyDisplaySizeChanged(CEGUI::Sizef(static_cast<float>(width), static_cast<float>(height)));glViewport(0, 0, width, height);
}int main()
{//Init fw initif (glfwInit() != GL_TRUE)CEGUI_THROW(RendererException("Failed to initialise GLFW."));glfwOpenWindowHint(GLFW_OPENGL_VERSION_MAJOR, 1);glfwOpenWindowHint(GLFW_OPENGL_VERSION_MINOR, 2);if (glfwOpenWindow(800, 600, 0, 0, 0, 0,24, 8, GLFW_WINDOW) != GL_TRUE){CEGUI_THROW(RendererException("Failed to open GLFW window."));glfwTerminate();}glfwEnable (GLFW_KEY_REPEAT);glfwSetWindowTitle(d_windowTitle);//Deactivate VSYNCglfwSwapInterval(0);// Disable the mouse position in Non_Debug mode
#ifndef DEBUGglfwDisable(GLFW_MOUSE_CURSOR);
#endif// Clear Errors by GLFW, even if Setup is correct.glGetError();initCEGUI();#if 0// Input callbacks of glfw for CEGUIglfwSetKeyCallback(glfwKeyCallback);glfwSetCharCallback(glfwCharCallback);glfwSetMouseButtonCallback(glfwMouseButtonCallback);glfwSetMouseWheelCallback(glfwMouseWheelCallback);glfwSetMousePosCallback(glfwMousePosCallback);//Window callbacksglfwSetWindowCloseCallback(glfwWindowCloseCallback);#endifglfwSetWindowSizeCallback(glfwWindowResizeCallback);CEGUI::System::getSingleton().notifyDisplaySizeChanged(CEGUI::Sizef(800.f, 600.f));glViewport(0, 0, 800, 600);glClearColor(0.0f, 0.0f, 0.0f, 0.0f);// initWindows();HelloWorldDemo demo;CEGUI::GUIContext* conext = &CEGUI::System::getSingleton().getDefaultGUIContext();demo.initialise(conext);float time = glfwGetTime();CEGUI::OpenGLRenderer* renderer = static_cast<CEGUI::OpenGLRenderer*>(CEGUI::System::getSingleton().getRenderer());while (true && glfwGetWindowParam(GLFW_OPENED)){glClear(GL_COLOR_BUFFER_BIT);// inject time pulsesconst float newtime = glfwGetTime();const float time_elapsed = newtime - time;CEGUI::System::getSingleton().injectTimePulse(time_elapsed);CEGUI::System::getSingleton().getDefaultGUIContext().injectTimePulse(time_elapsed);time = newtime;// render guirenderer->beginRendering();CEGUI::System::getSingleton().renderAllGUIContexts();renderer->endRendering();glfwSwapBuffers();}return 0;
}


 京公网安备 11010802041100号 | 京ICP备19059560号-4 | PHP1.CN 第一PHP社区 版权所有