作者:手机用户2702938842_284 | 来源:互联网 | 2023-09-17 18:53
一、写在前面的话
- 一直想写一篇关于蓝牙与ble设备通讯的博客,但是一直也不知道从何下手,可能是之前思路不清晰吧,也就一直拖拖拖,拖到现在。最近又做到关于ble设备的项目了,在此总结一下吧。(如有不到位或者不太对的地方,希望各位多多指教)
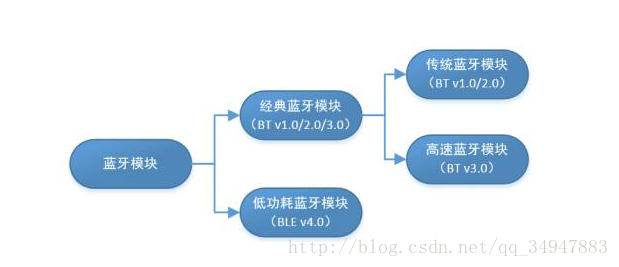
二、关于蓝牙
三、梳理整体逻辑(思路/步骤)
- 权限问题:先判断手机是否满足android4.3以上版本,再判断手机是否开启蓝牙。
- 搜索蓝牙:搜索蓝牙,回调接口中查看ble设备相关信息,一定时间停止扫描。
- 连接蓝牙:首先获取到ble设备的mac地址,然后调用connect()方法进行连接。
- 获取特征:蓝牙连接成功后,需要获取蓝牙的服务特征等,然后开启接收设置。
- 发送消息:writeCharacteristic()方法,发送数据给ble设备。
- 接收消息:通过蓝牙的回调接口中onCharacteristicRead()方法,接收蓝牙收的消息。
- 释放资源:断开连接,关闭资源。
四、具体实现
1、权限问题
step1、在AndroidManifest.xml中声明权限
step2、获取蓝牙适配器
BluetoothManager mBluetoothManager =(BluetoothManager)context.getSystemService(Context.BLUETOOTH_SERVICE);BluetoothAdapter mBluetoothAdapter = mBluetoothManager.getAdapter();
-
- 如果mBluetoothAdapter为空,是因为手机蓝牙不支持与ble设备通讯,换句话说就是安卓手机系统在4.3以下了。
step3、判断手机蓝牙是否被打开
mBluetoothAdapter.isEnabled()
- 如果返回true,这个时候就可以扫描了
- 如果返回false,这时候需要打开手机蓝牙。 可以调用系统方法让用户打开蓝牙。
Intent enable = new Intent(BluetoothAdapter.ACTION_REQUEST_DISCOVERABLE);startActivity(enable);
2、搜索蓝牙
step1、开始扫描
//10s后停止搜索
new Handler().postDelayed(new Runnable() {@Overridepublic void run() {mBluetoothAdapter.stopLeScan(mLeScanCallback);}}, 1000 * 10);UUID[] serviceUuids = {UUID.fromString(service_uuid)};
mBluetoothAdapter.startLeScan(serviceUuids, mLeScanCallback);
step2、扫描的回调
//蓝牙扫描回调接口
private BluetoothAdapter.LeScanCallback mLeScanCallback = new BluetoothAdapter.LeScanCallback(){@Overridepublic void onLeScan(final BluetoothDevice device, int rssi, byte[] scanRecord) {if (device.getName() == null) {return;}Log.e("--->搜索到的蓝牙名字:", device.getName());//可以将扫描的设备弄成列表,点击设备连接,也可以根据每个设备不同标识,自动连接。}};
3、连接蓝牙
step1、获取设备的mac地址,然后连接。
//获取所需地址String mDeviceAddress = device.getAddress();BluetoothGatt mBluetoothGatt = device.connectGatt(context, false, mGattCallback);
step2、onConnectionStateChange()被调用
- 连接状态改变时,mGattCallback中onConnectionStateChange()方法会被调用,当连接成功时,需要调用
mBluetoothGatt.discoverServices();去获取服务。
step3、onServicesDiscovered()被调用
// BLE回调操作private BluetoothGattCallback mGattCallback = new BluetoothGattCallback() {@Overridepublic void onConnectionStateChange(BluetoothGatt gatt, int status,int newState){super.onConnectionStateChange(gatt, status, newState);if (newState == BluetoothProfile.STATE_CONNECTED) {// 连接成功mBluetoothGatt.discoverServices();} else if (newState == BluetoothProfile.STATE_DISCONNECTED) {// 连接断开Log.d("TAG","onConnectionStateChange fail-->" + status);}}@Overridepublic void onServicesDiscovered(BluetoothGatt gatt, int status) {super.onServicesDiscovered(gatt, status);if (status == BluetoothGatt.GATT_SUCCESS) {//发现设备,遍历服务,初始化特征initBLE(gatt);} else {Log.d("TAG","onServicesDiscovered fail-->" + status);}}@Overridepublic void onCharacteristicRead(BluetoothGatt gatt,BluetoothGattCharacteristic characteristic, int status){super.onCharacteristicRead(gatt, characteristic, status);if (status == BluetoothGatt.GATT_SUCCESS) {// 收到的数据byte[] receiveByte = characteristic.getValue();}else{Log.d("TAG","onCharacteristicRead fail-->" + status);}}@Overridepublic void onCharacteristicChanged(BluetoothGatt gatt,BluetoothGattCharacteristic characteristic){super.onCharacteristicChanged(gatt, characteristic);//当特征中value值发生改变}/*** 收到BLE终端写入数据回调* @param gatt* @param characteristic* @param status*/@Overridepublic void onCharacteristicWrite(BluetoothGatt gatt,BluetoothGattCharacteristic characteristic, int status) {super.onCharacteristicWrite(gatt, characteristic, status);if (status == BluetoothGatt.GATT_SUCCESS) {// 发送成功} else {// 发送失败}}@Overridepublic void onDescriptorWrite(BluetoothGatt gatt,BluetoothGattDescriptor descriptor, int status) {super.onDescriptorWrite(gatt, descriptor, status);if (status == BluetoothGatt.GATT_SUCCESS) {}}@Overridepublic void onReadRemoteRssi(BluetoothGatt gatt, int rssi, int status) {super.onReadRemoteRssi(gatt, rssi, status);if (status == BluetoothGatt.GATT_SUCCESS) {}}@Overridepublic void onDescriptorRead(BluetoothGatt gatt,BluetoothGattDescriptor descriptor, int status) {super.onDescriptorRead(gatt, descriptor, status);if (status == BluetoothGatt.GATT_SUCCESS) {}}};
4、获取特征
step1、ble设备相关的UUID
//写通道uuidprivate static final UUID writeCharactUuid = UUID.fromString("0000fff6-0000-1000-8000-00805f9b34fb");//通知通道 uuidprivate static final UUID notifyCharactUuid =UUID.fromString( "0000fff7-0000-1000-8000-00805f9b34fb");
-
- 不同的ble设备的UUID不相同,请根据自己的设备初始化UUID。
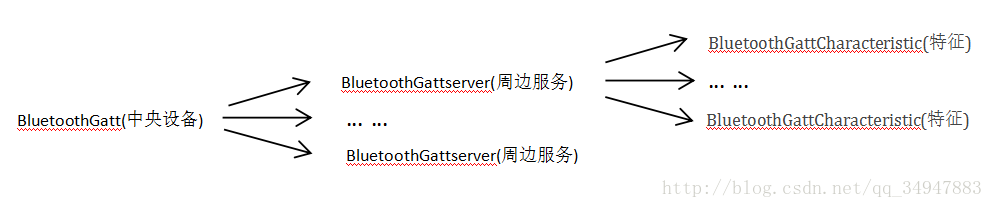
step2、获取bluetoothGattCharacteristic(因为有的设备可能存在双服务的情况,所以这里遍历所有服务)
//初始化特征public void initBLE(BluetoothGatt gatt) {if (gatt == null) {return;}//遍历所有服务for (BluetoothGattService BluetoothGattService : gatt.getServices()) {Log.e(TAG, "--->BluetoothGattService" + BluetoothGattService.getUuid().toString());//遍历所有特征for (BluetoothGattCharacteristic bluetoothGattCharacteristic : BluetoothGattService.getCharacteristics()) {Log.e("---->gattCharacteristic", bluetoothGattCharacteristic.getUuid().toString());String str = bluetoothGattCharacteristic.getUuid().toString();if (str.equals(writeCharactUuid)) {//根据写UUID找到写特征mBluetoothGattCharacteristic = bluetoothGattCharacteristic;} else if (str.equals(notifyCharactUuid)) {//根据通知UUID找到通知特征mBluetoothGattCharacteristicNotify = bluetoothGattCharacteristic;}}}}
step3、开启通知
- 设置开启之后,才能在onCharacteristicRead()这个方法中收到数据。
mBluetoothGatt.setCharacteristicNotification(mGattCharacteristicNotify, true);
5、发送消息
mGattCharacteristicWrite .setValue(sData);if (mBluetoothGatt != null) {mBluetoothGatt.setCharacteristicNotification(notifyCharactUuid , true);mBluetoothGatt.writeCharacteristic(mGattCharacteristicWrite );}
6、接收消息
- 接收到数据后,mGattCallback 中的onCharacteristicRead()这个方法会被调用。
@Overridepublic void onCharacteristicRead(BluetoothGatt gatt,BluetoothGattCharacteristic characteristic, int status){super.onCharacteristicRead(gatt, characteristic, status);if (status == BluetoothGatt.GATT_SUCCESS) {// 收到的数据byte[] receiveByte = characteristic.getValue();}else{Log.d("TAG","onCharacteristicRead fail-->" + status);}}
7、释放资源
public boolean disConnect() {if (mBluetoothGatt != null) {mBluetoothGatt.disconnect();mBluetoothGatt.close();mBluetoothGatt = null;return true;}return false;}
五、开发中踩过的坑
- 通知开启后,才能读到数据,否则读不到。
- 发送数据时,如果一包数据超过20字节,需要分包发送,一次最多发送二十字节。
- 接收数据时,一次最多也只接收20字节的数据,需要将接收到的数据拼接起来,在数据的结尾弄一个特定的标识,去判断数据是否接受完毕。
- 每次发送数据或者数据分包发送时, 操作间要有至少15ms的间隔。
- 最近公司来了个新的蓝牙产品,发现获取不到需要的特征,后来打断点,发现他们蓝牙设备的通知特征根本没有,是他们给错协议了。。。所以建议各位开发的时候,如果一直连接失败,也可以查看一下写特征和通知特征是否为空,是不是卖家搞错了,协议和产品不匹配。(当然,这样马虎的卖家估计是少数)。
- 又补充来了!这个蓝牙如果出现扫描不到的情况,那是因为手机没有开启定位权限,清单文件中写上定位权限,代码中在动态获取下就OK了。
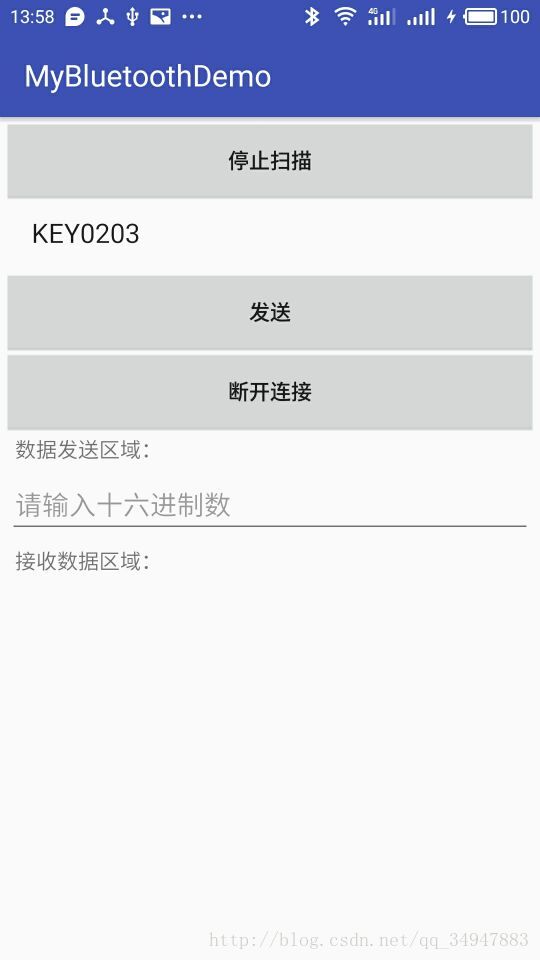
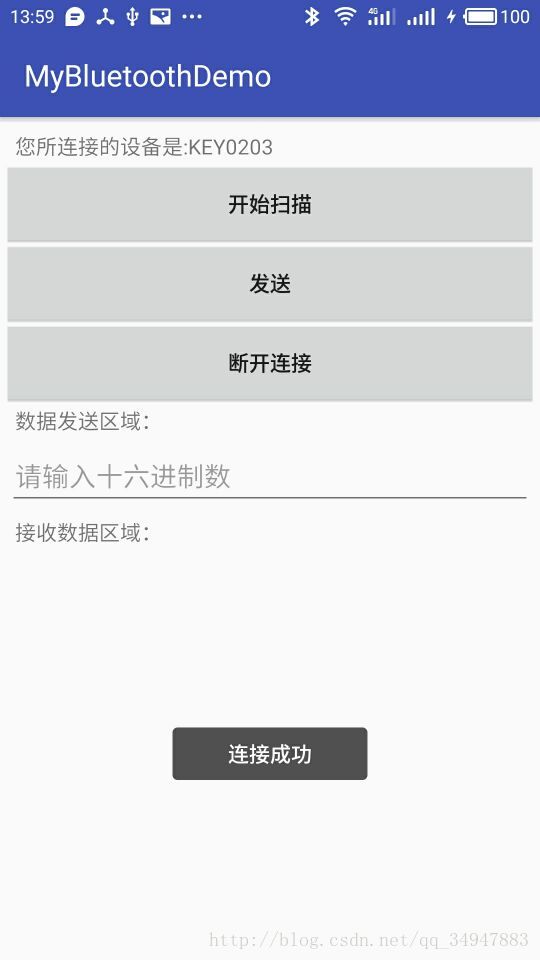
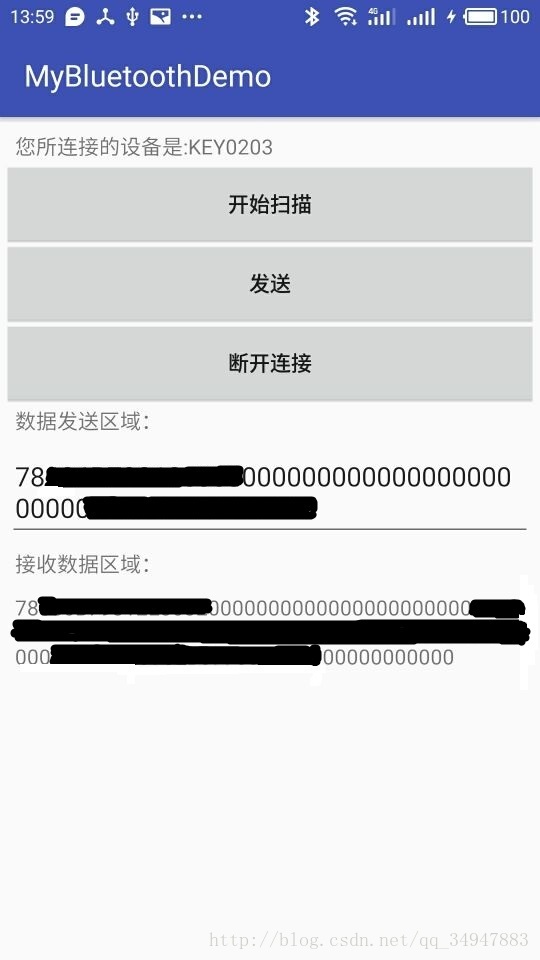
六、demo图示
点我下载
欢迎关注技术公众号,微信号搜索ColorfulCode 代码男人
分享技术文章,投稿分享,不限技术种类,不限技术深度,让更多人因为分享而受益。


 京公网安备 11010802041100号