-
-
- 需求分析
本章节使用mesher接入学成在线令牌系统,此令牌系统使用Java开发,没有采用CSE开发,此系统基于Spring Security开发考虑改造微服务框架的成本决定采用mesher接入认证系统,认证系统与其它微服务的关系如下:

1、微服务介绍
xc-edu-ucenter-auth:认证系统,采用serviceComb开发。
xc-edu-ucenter-security: 令牌系统,非微服务框架开发,使用mesher接入cse。xc-edu-ucenter:用户中心服务,提供用户信息管理、查询功能。 2、认证流程
1)用户登录,输入账号和密码 2)请求xc-edu-ucenter-auth,校验账号和密码
3)xc-edu-ucenter-auth请求xc-edu-ucenter-security申请令牌4)xc-edu-ucenter-security请求xc-edu-ucenter查询用户信息。
3、mesher接入分析
根据上边的流程涉及到mesher交互的业务如下:
- xc-edu-ucenter-auth请求xc-edu-ucenter-security申请令牌
微服务xc-edu-ucenter-auth是通过mesher请求xc-edu-ucenter-security
- xc-edu-ucenter-security请求xc-edu-ucenter查询用户信息。
xc-edu-ucenter-security是通过mesher请求微服务xc-edu-ucenter。
4、目标
通过本次xc-edu-ucenter-security接入CSE,可以学习到mesher作为服务消费方及服务提供方的开发方法。
-
-
- 导入工程
解压“资料”-》“学成在线”-》xc-edu-ucenter.zip,将解压得到的xc-edu-ucenter-auth、xc-edu-ucenter-security、
xc-edu-ucenter三个工程导入IDEA,导入成功如下图:

-
-
- mesher配置
本次测试在本地运行mesher,将服务向公网云平台服务中心注册。
-
-
-
- 配置微服务信息
xc-edu-ucenter-security通过mesher向服务中心注册为微服务。修改mesher目录下的"conf/microservice.yaml"文件
APPLICATION_ID: xc‐edu‐cloud1.0 service_description:
name: xc‐service‐security version: 1.0.0 properties:
allowCrossApp: true
-
-
-
- 配置认证信息
配置ak/sk,作业向公网服务中心注册的凭证。
修改mesher目录下的"conf/auth.yaml"文件。注意:ak/sk需与自己账号匹配。
## Huawei Public Cloud ak/sk cse:
credentials:
accessKey: 9AKR38RXJG48XMDDIUUA
secretKey: 2MEIV4VhNzRausA3tLOsN1s7nWw66SSp9hVXBJrl project:
akskCustomCipher: default #used to decrypt sk when it is encrypted
-
-
-
- 对接服务中心和配置中心
修改mesher目录下的"conf/chassis.yaml"文件
‐‐‐ cse:
protocols: http:
listenAddress: 192.168.1.104:30101 service:
registry:
# address: http://127.0.0.1:30100 # uri of service center
address: https://cse.cn‐north‐1.myhuaweicloud.com # uri of service center scope: full #set full to be able to discover other app's service
watch: false # set if you want to watch instance change event
autoIPIndex: false # set to true if u want to resolve source IP to microservice config:
client:
serverUri: https://cse.cn‐north‐1.myhuaweicloud.com #uri of config center refreshMode: 1 # 1: only pull config.
refreshInterval: 30 # unit is second
-
-
- 查询用户信息
- 方法介绍
本章节实现xc-edu-ucenter-security是通过mesher请求微服务xc-edu-ucenter查询用户信息,即mesher作为服务消费方的开发方法。
通过mesher调用微服务的方法如下:
1、设置http代理
xc-edu-ucenter-security发起的请求全部通过mesher,代理地址为mesher的地址(本机地址) 2、通过服务名请求
将原来的通过IP:Port请求方式改为 通过服务名请求。
-
-
-
- 设置http代理
xc-edu-ucenter-security是通过RestTemplate发起http请求,这里向RestTemplate对象设置http代理地址,方法如下:
在SpringBoot启动类中定义RestTemplate
@Bean
public RestTemplate restTemplate(SimpleClientHttpRequestFactory httpClientFactory) { return new RestTemplate(httpClientFactory);
}@Bean
public SimpleClientHttpRequestFactory httpClientFactory() { SimpleClientHttpRequestFactory httpRequestFactory = new
SimpleClientHttpRequestFactory();
SocketAddress address = new InetSocketAddress("127.0.0.1", 30101); Proxy proxy = new Proxy(Proxy.Type.HTTP, address); httpRequestFactory.setProxy(proxy);return httpRequestFactory;
-
-
-
- 通过服务名请求
修改原来的UserDetailsServiceImpl类,使用RestTemplate通过mesher代理请求xc-service-ucenter,代码如下:
@Service
public class UserDetailsServiceImpl implements UserDetailsService {
@Autowired
RestTemplate restTemplate;
//	@Autowired
//	UserService userService;@Override
public UserDetails loadUserByUsername(String username) throws UsernameNotFoundException { if (StringUtils.isEmpty(username)) {
return null;
}
Map map = null;
String path = "http://xc‐service‐ucenter/ucenter/getuserext?username="+username; try {
Object result = restTemplate.exchange(path, HttpMethod.GET, null, Object.class).getBody();
map = (Map) result;
} catch (Exception e) { e.printStackTrace(); return null;
}
if(map == null){ return null;
}
/**
{
"id": "49",
"username": "itcast",
"password": "$2a$10$TJ4TmCdK.X4wv/tCqHW14.w70U3CC33CeVncD3SLmyMXMknstqKRe", "salt": null,
"name": "test02",
"utype": "101002",
"birthday": null, "userpic": null, "sex": "1",
"email": "",
"phone": "12345",
"status": "1",
"createTime": "2018‐03‐07T08:27:47.000Z",
"updateTime": null,
*/ userext.setId(map.get("id"));
userext.setName(map.get("name")); userext.setUsername(map.get("username")); userext.setPassword(map.get("password"));
//		XcUserExt userext = userService.getUserExt(username); if(userext == null){
return null;
}
//取出正确密码(hash值)
String password = userext.getPassword();
//这里暂时使用静态密码
//	String password ="123";
//用户权限,这里暂时使用静态数据,最终会从数据库读取
//从数据库获取权限
List permissions = userext.getPermissions(); if(permissions == null){
permissions &#61; new ArrayList<>();
}
List user_permission &#61; new ArrayList<>(); permissions.forEach(item‐> user_permission.add(item.getCode()));
//	user_permission.add("course_get_baseinfo");
//	user_permission.add("course_find_pic");
String user_permission_string &#61; StringUtils.join(user_permission.toArray(), ","); UserJwt userDetails &#61; new UserJwt(username,
password, AuthorityUtils.commaSeparatedStringToAuthorityList(user_permission_string));
userDetails.setId(userext.getId());
userDetails.setUtype(userext.getUtype());//用户类型userDetails.setCompanyId(userext.getCompanyId());//所属企业userDetails.setName(userext.getName());//用户名称userDetails.setUserpic(userext.getUserpic());//用户头像
/* UserDetails userDetails &#61; new org.springframework.security.core.userdetails.User(username,
password, AuthorityUtils.commaSeparatedStringToAuthorityList(""));*/
//	AuthorityUtils.createAuthorityList("course_get_baseinfo","course_get_list"));
return userDetails;
}
}
-
-
-
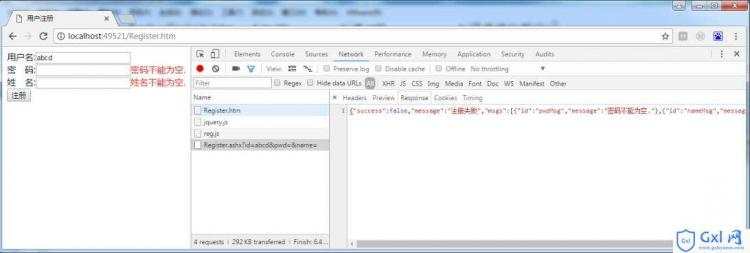
- 测试
直接请求xc-edu-ucenter-security申请令牌的Url进行测试&#xff0c;观察通过mesher请求是否正常。
post&#xff1a;http://localhost:40401/oauth/token 参 数 如 下 &#xff1a;
grant_type&#xff1a;密码模式授权填写password
username&#xff1a;账号password&#xff1a;密码
并且此链接需要使用 http Basic认证。
-
-
- 申请令牌
- 方法介绍
本章节实现微服务xc-edu-ucenter-auth是通过mesher请求xc-edu-ucenter-security申请令牌&#xff0c;即mesher作为服务提供方的开发方法。
mesher作为提供者被其它微服务调用的方法如下&#xff1a;
1、xc-edu-ucenter-auth调用微服务请求“cse://xc-edu-security/url”地址
2、mesher监听本地服务提供方的地址&#xff0c;设置环境变量 SPECIFIC_ADDR&#61;127.0.0.1:40401
3、编写契约
-
-
-
- 服务消费方
xc-edu-ucenter-auth调用微服务的方法修改为请求“cse://xc-edu-ucenter-security/url”地址
修改&#xff1a;com.xuecheng.auth.service.AuthService的public AuthToken applyToken(String username,String password,String clientId,String clientSecret)方法&#xff1a;
......
String path &#61; "cse://xc‐service‐security/oauth/token"; Map map &#61; null;
Object obj &#61; null;
RestTemplate restTemplate &#61; RestTemplateBuilder.create(); try {
Object result &#61; restTemplate.exchange(path, HttpMethod.POST,
new HttpEntity>(formData, headers), Object.class).getBody();
System.out.println(result);
map &#61; (Map) result;
} catch (Exception e) {
LOGGER.error("request oauth_token_password error: {}",e.getMessage()); e.printStackTrace();
ExceptionCast.cast(AuthCode.AUTH_LOGIN_ERROR);
}
......
-
-
-
- mesher配置
1、mesher监听本地服务提供方的地址&#xff0c;在mesher目录下的“start.bat”中设置环境变量SPECIFIC_ADDR&#61;127.0.0.1:40401
&#64;echo off
SET SPECIFIC_ADDR&#61;127.0.0.1:40401
start /B /WAIT mesher.exe pause
2 、 编 写 契 约 mesher作为服务提供方需要为服务提供方编写契约&#xff0c;契约格式采用OpenApi规范&#xff0c;下边是/oauth/token的契约&#xff1a;
swagger: &#39;2.0&#39; info:
title: hello version: 1.0.0
basePath: / produces:
- application/jsonpaths:
/oauth/token: post:
operationId: "postAccessToken" produces:
-"application/json" parameters:
-name: "grant_type" in: "formData" required: false type: "string"
-name: "username" in: "formData" required: false type: "string"
-name: "password" in: "formData" required: false type: "string"
responses:
200:
description: "response of 200" schema:
type: "object"
-
-
-
- 测试
请求xc-edu-ucenter-auth的认证方法&#xff1a;Post http://localhost:40400/auth/userlogin
参数&#xff1a;
username&#xff1a;账号
password&#xff1a;密码


 京公网安备 11010802041100号