数据源(连接池)的出现是为了提高程序性能的
事先实例化数据源,初始化部分连接资源
使用连接资源时从数据源中获取
使用完毕后将连接资源归还给数据源
常见的数据源(连接池):DBCP、C3P0、BoneCP、Druid等
①导入数据源的坐标和数据库驱动坐标
<dependency> <groupId>mysqlgroupId> <artifactId>mysql-connector-javaartifactId> <version>5.1.47version>dependency><dependency> <groupId>c3p0groupId> <artifactId>c3p0artifactId> <version>0.9.1.2version>dependency><dependency> <groupId>com.alibabagroupId> <artifactId>druidartifactId> <version>1.1.16version>dependency>
②创建数据源对象
③设置数据源的基本连接数据
@Test// c3p0 public void testsql() throws Exception { //创建数据源 ComboPooledDataSource dataSource = new ComboPooledDataSource();// 设置数据源参数// version 5// dataSource.setDriverClass("com.mysql.jdbc.Driver");// dataSource.setJdbcUrl("jdbc:mysql://localhost:3306/springlearn");// version 8 dataSource.setDriverClass("com.mysql.cj.jdbc.Driver"); dataSource.setJdbcUrl("jdbc:mysql://localhost:3306/springlearn?useSSL=false&serverTimezOne=UTC&characterEncoding=UTF-8"); dataSource.setUser("root"); dataSource.setPassword("root");// 获取连接对象 Connection cOnnection= dataSource.getConnection(); System.out.println(connection);// 关闭资源 connection.close(); }@Test// druid public void testsql1() throws Exception { //创建数据源 DruidDataSource dataSource = new DruidDataSource();// 设置数据源参数// version 5// dataSource.setDriverClassName("com.mysql.jdbc.Driver");// dataSource.setUrl("jdbc:mysql://localhost:3306/test");// version 8 dataSource.setDriverClassName("com.mysql.cj.jdbc.Driver"); dataSource.setUrl("jdbc:mysql://localhost:3306/springlearn?useSSL=false&serverTimezOne=UTC&characterEncoding=UTF-8"); dataSource.setUsername("root"); dataSource.setPassword("root");// 获取连接对象 Connection cOnnection= dataSource.getConnection(); System.out.println(connection);// 关闭资源 connection.close(); }
④使用数据源获取连接资源和归还连接资源

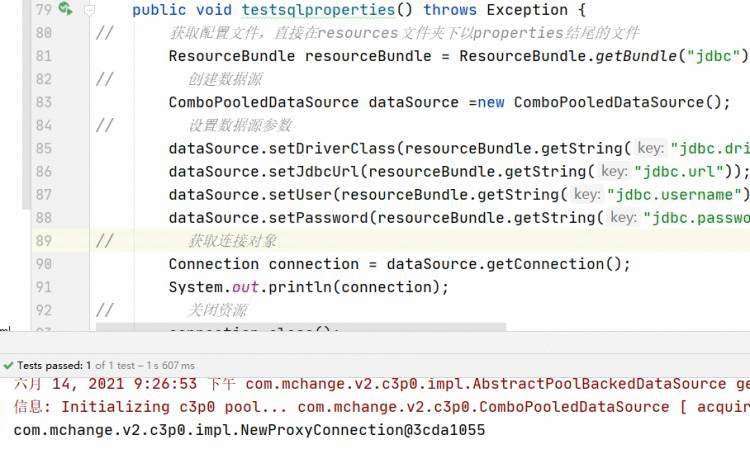
@Test public void testsqlproperties() throws Exception {// 获取配置文件,直接在resources文件夹下以properties结尾的文件 ResourceBundle resourceBundle = ResourceBundle.getBundle("jdbc");// 创建数据源 ComboPooledDataSource dataSource =new ComboPooledDataSource();// 设置数据源参数 dataSource.setDriverClass(resourceBundle.getString("jdbc.driver")); dataSource.setJdbcUrl(resourceBundle.getString("jdbc.url")); dataSource.setUser(resourceBundle.getString("jdbc.username")); dataSource.setPassword(resourceBundle.getString("jdbc.password"));// 获取连接对象 Connection cOnnection= dataSource.getConnection(); System.out.println(connection);// 关闭资源 connection.close(); }

引入对应依赖
由于需要spring管控创建的类是引用的(已存在),直接配置文件配置即可
配置bean
<property name="driverClass" value="com.mysql.cj.jdbc.Driver">property> <property name="jdbcUrl" value="jdbc:mysql://localhost:3306/springlearn?useSSL=false&serverTimezOne=UTC&characterEncoding=UTF-8">property> <property name="user" value="root">property> <property name="password" value="root">property> bean>
从spring容器获取bean
@Test public void testsqlspring() throws Exception {// 读取配置文件 ApplicationContext app = new ClassPathXmlApplicationContext("applicationContext.xml");// 获取bean ComboPooledDataSource dataSource = (ComboPooledDataSource) app.getBean("dataSource");// 获取连接 Connection cOnnection= dataSource.getConnection(); System.out.println(connection); connection.close(); }
applicationContext.xml加载jdbc.properties配置文件
命名空间:xmlns:cOntext="http://www.springframework.org/schema/context"约束路径:http://www.springframework.org/schema/contexthttp://www.springframework.org/schema/context/spring-context.xsd
然后在Spring容器加载properties文件
<beans xmlns="http://www.springframework.org/schema/beans" xmlns:xsi="http://www.w3.org/2001/XMLSchema-instance" xmlns:context="http://www.springframework.org/schema/context" xsi:schemaLocation=" http://www.springframework.org/schema/beans http://www.springframework.org/schema/beans/spring-beans.xsd http://www.springframework.org/schema/context http://www.springframework.org/schema/context/spring-context.xsd "> <context:property-placeholder location="classpath:jdbc.properties">context:property-placeholder> <bean id="dataProPSource" class="com.mchange.v2.c3p0.ComboPooledDataSource"> <property name="driverClass" value="${jdbc.driver}">property> <property name="jdbcUrl" value="${jdbc.url}">property> <property name="user" value="${jdbc.username}">property> <property name="password" value="${jdbc.password}">property> bean>beans>
Spring原始注解主要是替代的配置
注解 | 说明 |
@Component | 使用在类上用于实例化Bean |
@Controller | 使用在web层类上用于实例化Bean |
@Service | 使用在service层类上用于实例化Bean |
@Repository | 使用在dao层类上用于实例化Bean |
@Autowired | 使用在字段上用于根据类型依赖注入 |
@Qualifier | 搭配@Autowired一起使用,根据名称进行依赖注入 |
@Resource | 相当于@Autowired+@Qualifier,按照名称进行注入 |
@Value | 注入普通属性 |
@Scope | 标注Bean的作用范围 |
@PostConstruct | 使用在方法上标注该方法是Bean的初始化方法 |
@PreDestroy | 使用在方法上标注该方法是Bean的销毁方法 |
先开启注解扫描
<context:component-scan base-package="com.joyfully">context:component-scan>
Dao层
//接口public interface StudentDao { public void study();}//实现类// //@Component("studentDao")//区分dao层@Repository("studentDao")public class StudentDaoImpl implements StudentDao { public void study() { System.out.println("studying******"); }}
Service层
//接口public interface StudentService { public void study();}//实现类////@Component("studentService")//区分service层@Service("studentService")public class StudentServiceImpl implements StudentService {// //@Autowired //@Qualifier("studentDao") //是根据id的内容 从spring容器中进行匹配的,与autowired使用 @Resource(name = "studentDao") //等同于 @Autowired + @Qualifier private StudentDao studentDao; public void study() { studentDao.study(); }}
测试类
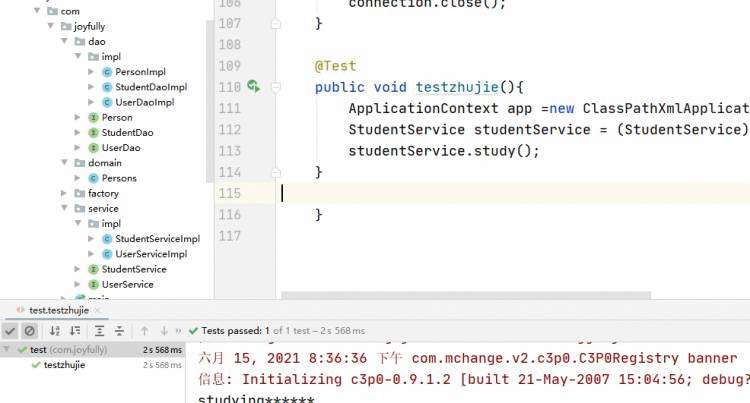
@Test public void testzhujie(){ ApplicationContext app =new ClassPathXmlApplicationContext("applicationContext.xml"); StudentService studentService = (StudentService) app.getBean("studentService"); studentService.study(); }

其他常用注解
@Value("普通数据") private String str;// 容器中的bean的数值 @Value("${jdbc.driver}") private String sqldriver; @PostConstruct public void init(){ System.out.println("初始化方法...."); } @PreDestroy public void destroy(){ System.out.println("销毁方法....."); }
减少配置文件,使用注解简易开发
注解 | 说明 |
@Configuration | 用于指定当前类是一个 Spring 配置类,当创建容器时会从该类上加载注解 |
@ComponentScan | 用于指定 Spring 在初始化容器时要扫描的包。 作用和在 Spring 的 xml 配置文件中的 |
@Bean | 使用在方法上,标注将该方法的返回值存储到 Spring 容器中 |
@PropertySource | 用于加载.properties 文件中的配置 |
@Import | 用于导入其他配置类 |
创建Spring核心配置类
@Configuration //Spring的核心配置文件//@ComponentScan("com.joyfully")// @Import({SQLDataSource.class})public class SpringConfiguration {}
创建数据源配置文件类
// @PropertySource("classpath:jdbc.properties")public class SQLDataSource { //注入内容 @Value("${jdbc.driver}") private String driver; @Value("${jdbc.url}") private String url; @Value("${jdbc.username}") private String username; @Value("${jdbc.password}") private String password; //spring容器创建一个跟方法返回值类型相同的bean @Bean("dataSource") public DataSource getDataSource() throws Exception { ComboPooledDataSource dataSource = new ComboPooledDataSource(); dataSource.setDriverClass(driver); dataSource.setJdbcUrl(url); dataSource.setUser(username); dataSource.setPassword(password); return dataSource; }}
其他Service层和Dao层不变
测试
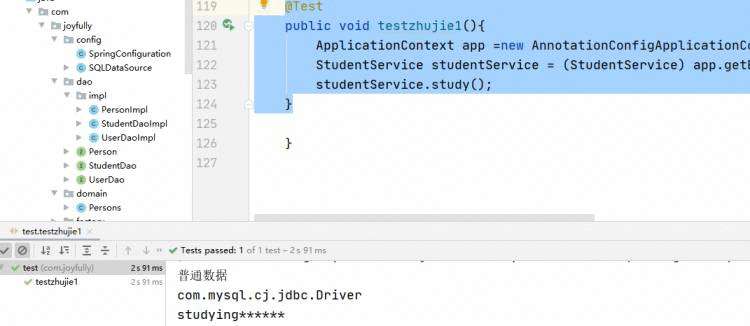
@Test public void testzhujie1(){ ApplicationContext app =new AnnotationConfigApplicationContext(SpringConfiguration.class); StudentService studentService = (StudentService) app.getBean("studentService"); studentService.study(); }

步骤:
①导入spring集成Junit的坐标
②使用@Runwith注解替换原来的运行期
③使用@ContextConfiguration指定配置文件或配置类
④使用@Autowired注入需要测试的对象
⑤创建测试方法进行测试
引入坐标
<dependency> <groupId>org.springframeworkgroupId> <artifactId>spring-testartifactId> <version>5.2.4.RELEASEversion>dependency><dependency> <groupId>junitgroupId> <artifactId>junitartifactId> <version>4.12version> <scope>testscope>dependency>
具体实现:
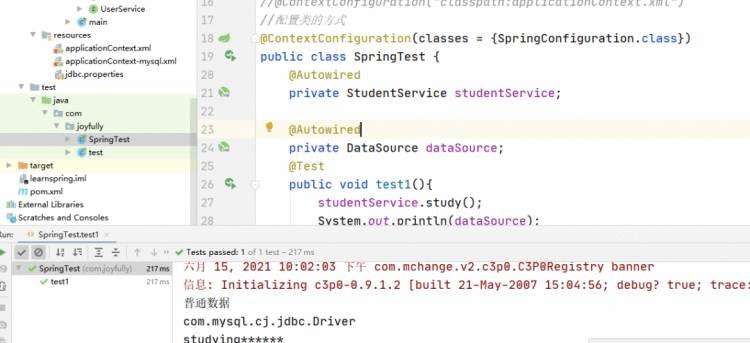
//使用那个运行@RunWith(SpringJUnit4ClassRunner.class)//配置文件的方式//@ContextConfiguration("classpath:applicationContext.xml")//配置类的方式@ContextConfiguration(classes = {SpringConfiguration.class})public class SpringTest { //注入需要测试的对象 @Autowired private StudentService studentService; @Autowired private DataSource dataSource; @Test public void test1(){ studentService.study(); System.out.println(dataSource); }}


 京公网安备 11010802041100号 | 京ICP备19059560号-4 | PHP1.CN 第一PHP社区 版权所有