Spring Cloud Bus 配合 Spring Cloud Config 使用可以实现配置的动态刷新。
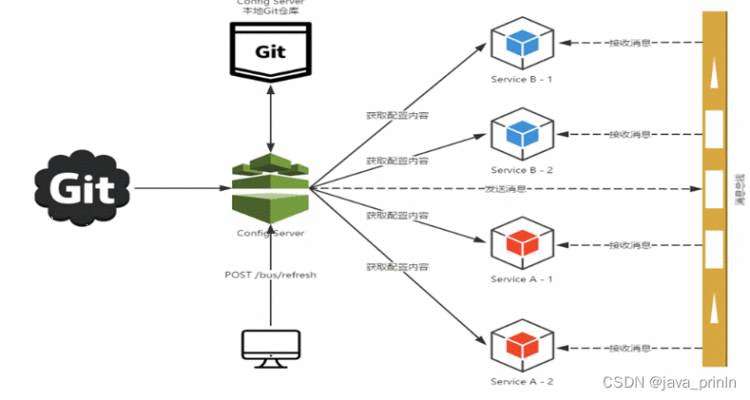
什么是总线
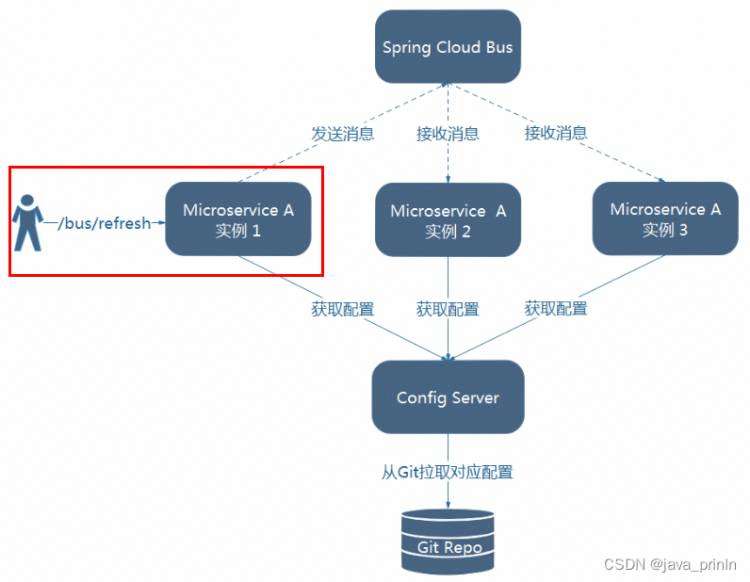
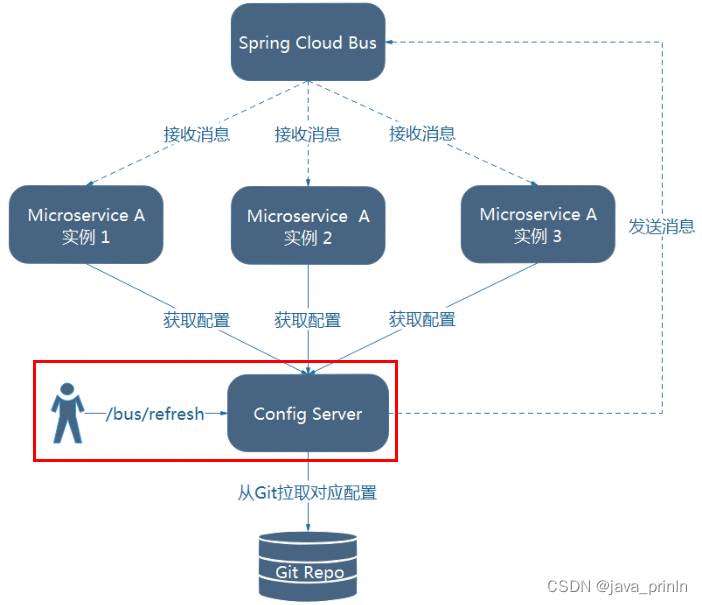
在微服务架构的系统中,通常会使用轻量级的消息代理来构建一个共用的消息主题,并让系统中所有微服务实例都连接上来。由于该主题中产生的消息会被所有实例监听和消费,所以称它为消息总线。在总线上的各个实例,都可以方便地广播一些需要让其他连接在该主题上的实例都知道的消息。
基本原理
ConfigClient实例都监听MQ中同一个topic(默认是springCloudBus)。当一个服务刷新数据的时候,它会把这个信息放入到Topic中,这样其它监听同一Topic的服务就能得到通知,然后去更新自身的配置。
总线
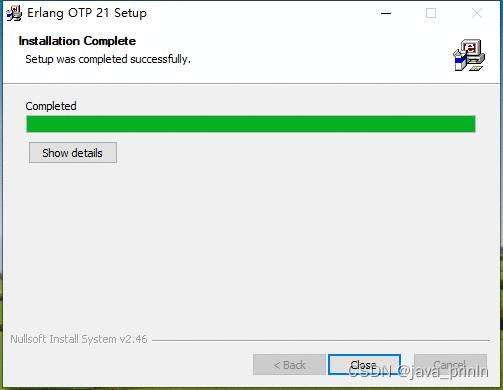
http://erlang.org/download/otp_win64_21.3.exe
步骤:
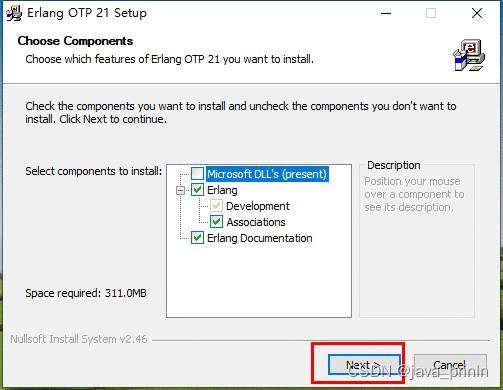
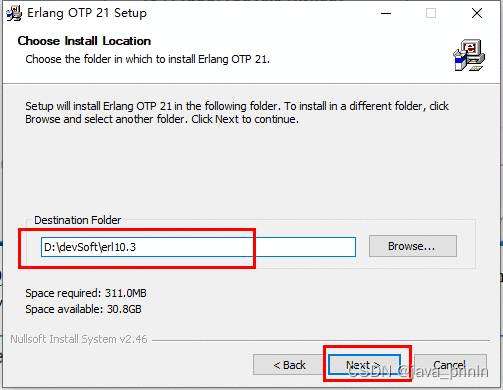
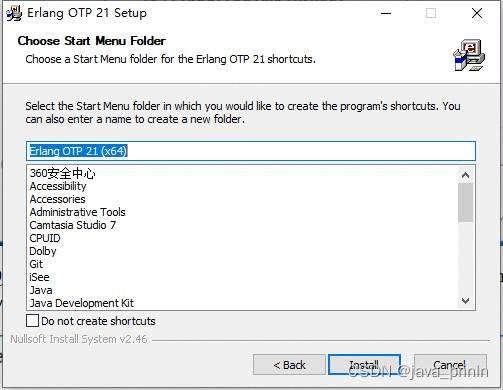
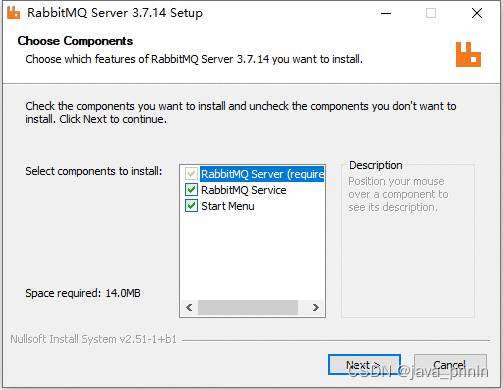
https://dl.bintray.com/rabbitmq/all/rabbitmq-server/3.7.14/rabbitmq-server-3.7.14.exe
步骤
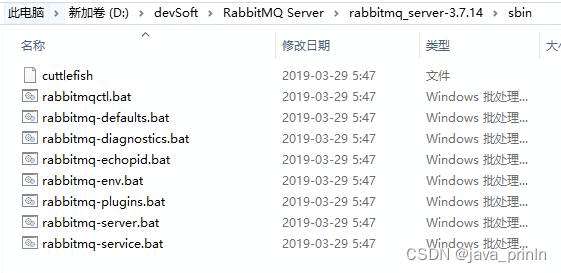
D:\devSoft\RabbitMQ Server\rabbitmq_server-3.7.14\sbin
rabbitmq-plugins enable rabbitmq_management
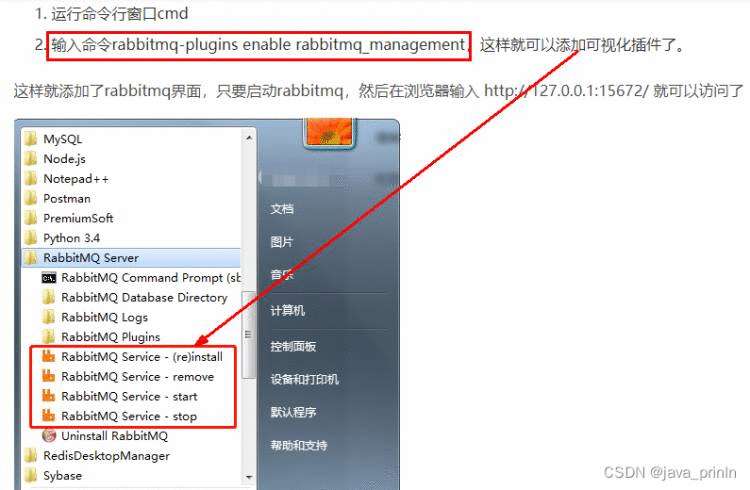
http://localhost:15672/
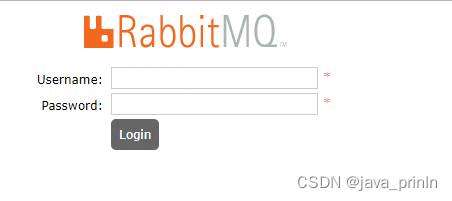
必须先具备良好的RabbitMQ环境先
<project xmlns="http://maven.apache.org/POM/4.0.0"
         xmlns:xsi="http://www.w3.org/2001/XMLSchema-instance"
         xsi:schemaLocation="http://maven.apache.org/POM/4.0.0 http://maven.apache.org/xsd/maven-4.0.0.xsd">
    <parent>
        <artifactId>mscloud03artifactId>
        <groupId>com.atguigu.springcloudgroupId>
        <version>1.0-SNAPSHOTversion>
    parent>
    <modelVersion>4.0.0modelVersion>
    <artifactId>cloud-config-client-3366artifactId>
    <dependencies>
        <dependency>
            <groupId>org.springframework.cloudgroupId>
            <artifactId>spring-cloud-starter-configartifactId>
        dependency>
        <dependency>
            <groupId>org.springframework.cloudgroupId>
            <artifactId>spring-cloud-starter-netflix-eureka-clientartifactId>
        dependency>
        <dependency>
            <groupId>org.springframework.bootgroupId>
            <artifactId>spring-boot-starter-webartifactId>
        dependency>
        <dependency>
            <groupId>org.springframework.bootgroupId>
            <artifactId>spring-boot-starter-actuatorartifactId>
        dependency>
        <dependency>
            <groupId>org.springframework.bootgroupId>
            <artifactId>spring-boot-devtoolsartifactId>
            <scope>runtimescope>
            <optional>trueoptional>
        dependency>
        <dependency>
            <groupId>org.projectlombokgroupId>
            <artifactId>lombokartifactId>
            <optional>trueoptional>
        dependency>
        <dependency>
            <groupId>org.springframework.bootgroupId>
            <artifactId>spring-boot-starter-testartifactId>
            <scope>testscope>
        dependency>
    dependencies>
project>
server:
  port: 3366
spring:
  application:
    name: config-client
  cloud:
    #Config客户端配置
    config:
      label: master #分支名称
      name: config #配置文件名称
      profile: dev #读取后缀名称   上述3个综合:master分支上config-dev.yml的配置文件被读取http://config-3344.com:3344/master/config-dev.yml
      uri: http://localhost:3344 #配置中心地址
#服务注册到eureka地址
eureka:
  client:
    service-url:
      defaultZone: http://localhost:7001/eureka
# 暴露监控端点
management:
  endpoints:
    web:
      exposure:
        include: "*"
package com.atguigu.springcloud;
import org.springframework.boot.SpringApplication;
import org.springframework.boot.autoconfigure.springbootApplication;
import org.springframework.cloud.netflix.eureka.EnableEurekaClient;
/**
 * @auther zzyy
 * @create 2020-02-08 11:09
 */
@EnableEurekaClient
@SpringBootApplication
public class ConfigClientMain3366
{
    public static void main(String[] args)
    {
        SpringApplication.run(ConfigClientMain3366.class,args);
    }
}
package com.atguigu.springcloud.controller;
import org.springframework.beans.factory.annotation.Value;
import org.springframework.cloud.context.config.annotation.RefreshScope;
import org.springframework.web.bind.annotation.GetMapping;
import org.springframework.web.bind.annotation.RestController;
/**
 * @auther zzyy
 * @create 2020-02-08 11:11
 */
@RestController
@RefreshScope
public class ConfigClientController
{
    @Value("${server.port}")
    private String serverPort;
    @Value("${config.info}")
    private String configInfo;
    @GetMapping("/configInfo")
    public String configInfo()
    {
        return "serverPort: "+serverPort+"\t\n\n configInfo: "+configInfo;
    }
}
<dependency>
    <groupId>org.springframework.cloudgroupId>
    <artifactId>spring-cloud-starter-bus-amqpartifactId>
dependency>
<dependency>
    <groupId>org.springframework.bootgroupId>
    <artifactId>spring-boot-starter-actuatorartifactId>
dependency>
server:
  port: 3344
spring:
  application:
    name:  cloud-config-center #注册进Eureka服务器的微服务名
  cloud:
    config:
      server:
        git:
          uri: git@github.com:zzyybs/springcloud-config.git #GitHub上面的git仓库名字
        ####搜索目录
          search-paths:
            - springcloud-config
      ####读取分支
      label: master
#rabbitmq相关配置
rabbitmq:
    host: localhost
    port: 5672
    username: guest
    password: guest
#服务注册到eureka地址
eureka:
  client:
    service-url:
      defaultZone: http://localhost:7001/eureka
##rabbitmq相关配置,暴露bus刷新配置的端点
management:
  endpoints: #暴露bus刷新配置的端点
    web:
      exposure:
        include: 'bus-refresh'
<dependency>
    <groupId>org.springframework.cloudgroupId>
    <artifactId>spring-cloud-starter-bus-amqpartifactId>
dependency>
<dependency>
    <groupId>org.springframework.bootgroupId>
    <artifactId>spring-boot-starter-actuatorartifactId>
dependency>
server:
  port: 3355
spring:
  application:
    name: config-client
  cloud:
    #Config客户端配置
    config:
      label: master #分支名称
      name: config #配置文件名称
      profile: dev #读取后缀名称   上述3个综合:master分支上config-dev.yml的配置文件被读取
      uri: http://localhost:3344 #配置中心地址k
#rabbitmq相关配置 15672是Web管理界面的端口;5672是MQ访问的端口
  rabbitmq:
    host: localhost
    port: 5672
    username: guest
    password: guest
#服务注册到eureka地址
eureka:
  client:
    service-url:
      defaultZone: http://localhost:7001/eureka
# 暴露监控端点
management:
  endpoints:
    web:
      exposure:
        include: "*"   # 'refresh'
<dependency>
    <groupId>org.springframework.cloudgroupId>
    <artifactId>spring-cloud-starter-bus-amqpartifactId>
dependency>
<dependency>
    <groupId>org.springframework.bootgroupId>
    <artifactId>spring-boot-starter-actuatorartifactId>
dependency>
server:
  port: 3366
spring:
  application:
    name: config-client
  cloud:
    #Config客户端配置
    config:
      label: master #分支名称
      name: config #配置文件名称
      profile: dev #读取后缀名称   上述3个综合:master分支上config-dev.yml的配置文件被读取
      uri: http://localhost:3344 #配置中心地址k
#rabbitmq相关配置 15672是Web管理界面的端口;5672是MQ访问的端口
  rabbitmq:
    host: localhost
    port: 5672
    username: guest
    password: guest
#服务注册到eureka地址
eureka:
  client:
    service-url:
      defaultZone: http://localhost:7001/eureka
# 暴露监控端点
management:
  endpoints:
    web:
      exposure:
        include: "*"   # 'refresh'

http://config-3344.com:3344/config-dev.yml
http://localhost:3355/configInfo
http://localhost:3366/configInfo
获取配置信息,发现都已经刷新了
一次修改,广播通知,处处生效
curl -X POST "http://localhost:3344/actuator/bus-refresh/config-client:3355"


 京公网安备 11010802041100号 | 京ICP备19059560号-4 | PHP1.CN 第一PHP社区 版权所有