1.导入jar包:
   org.springframework.boot
   spring-boot-starter-activemq


   org.apache.activemq
   activemq-pool
2.填写配置文件(application.properties)
#设置JMS(AMQ)
spring.activemq.broker-url=tcp://localhost:61616
spring.activemq.user=admin
spring.activemq.password=admin
spring.activemq.pool.enabled=true
#spring.jms.pub-sub-domain=true
spring.activemq.pool.max-cOnnections=50
spring.activemq.pool.expiry-timeout=10000
spring.activemq.pool.idle-timeout=30000
上面需要注意的是,如果开启订阅者和发布者模式下面的代码会使监听器失效。
3.编写控制器代码
@RestController
@RequestMapping("/Jms")
public class ProducerController {

 @Autowired
 private JmsProducerService jmsProducerService;

 @RequestMapping("/send")
 public void contextLoads() throws InterruptedException {
  Destination destination = new ActiveMQQueue("mytest.queue");
  for(int i=0; i<10; i++){
   jmsProducerService.sendMessage(destination, "我是超人啊");
  }
  System.out.println("发送成功");
 }

}
4.服务层代码:
package com.zzf.finals.service.impl;

import com.zzf.finals.service.JmsProducerService;
import org.springframework.beans.factory.annotation.Autowired;
import org.springframework.jms.core.JmsTemplate;
import org.springframework.stereotype.Service;

import javax.jms.Destination;

@Service
public class JmsProducerServiceImpl implements JmsProducerService {

 @Autowired
 private JmsTemplate jmsTemplate;

 @Override
 public void sendMessage(Destination destination, String message) {
  this.jmsTemplate.convertAndSend(destination,message);
 }
}
5.最后加上监听器类
package com.zzf.finals.domain;

import org.springframework.jms.annotation.JmsListener;
import org.springframework.stereotype.Component;

@Component
public class Consumer {

 @JmsListener(destination = "mytest.queue")
 public void receiveQueue(String text) {
  System.out.println("Message:"+text);
 }
}


OK~
但是这样有另外一个问题:如果开启了订阅者和发布者模式则无法发送和接收queue消息。
这里我提供两种写法xml和java配置:
首先贴上我的xml配置代码
<&#63;xml version="1.0" encoding="UTF-8"&#63;>tcp://localhost:61616
JavaConfig配置为:
package com.zzf.finals.domain;

import org.apache.activemq.command.ActiveMQQueue;
import org.apache.activemq.command.ActiveMQTopic;
import org.springframework.context.annotation.Bean;
import org.springframework.context.annotation.Configuration;
import org.springframework.jms.config.DefaultJmsListenerContainerFactory;
import org.springframework.jms.config.JmsListenerContainerFactory;

import javax.jms.ConnectionFactory;
import javax.jms.Queue;
import javax.jms.Topic;

@Configuration
public class JmsConfig {
 public final static String TOPIC = "topic.test";
 public final static String QUEUE = "queue.test";
 @Bean
 public Queue queue() {
  return new ActiveMQQueue(QUEUE);
 }

 @Bean
 public Topic topic() {
  return new ActiveMQTopic(TOPIC);
 }

 // topic模式的ListenerContainer
 @Bean
 public JmsListenerContainerFactory<&#63;> jmsListenerContainerTopic(ConnectionFactory activeMQConnectionFactory) {
  DefaultJmsListenerContainerFactory bean = new DefaultJmsListenerContainerFactory();
  bean.setPubSubDomain(true);
  bean.setConnectionFactory(activeMQConnectionFactory);
  return bean;
 }
 // queue模式的ListenerContainer
 @Bean
 public JmsListenerContainerFactory<&#63;> jmsListenerContainerQueue(ConnectionFactory activeMQConnectionFactory) {
  DefaultJmsListenerContainerFactory bean = new DefaultJmsListenerContainerFactory();
  bean.setConnectionFactory(activeMQConnectionFactory);
  return bean;
 }

}
控制台代码为:
package com.zzf.finals.controller;

import com.zzf.finals.service.JmsProducerService;
import org.apache.activemq.command.ActiveMQQueue;
import org.springframework.beans.factory.annotation.Autowired;
import org.springframework.web.bind.annotation.RequestMapping;
import org.springframework.web.bind.annotation.RestController;

import javax.jms.Destination;
import javax.jms.Queue;
import javax.jms.Topic;

@RestController
@RequestMapping("/Jms")
public class ProducerController {

 @Autowired
 private JmsProducerService jmsProducerService;
 @Autowired
 private Topic topic;
 @Autowired
 private Queue queue;

 @Autowired
 private Topic destinationTopic;
 @Autowired
 private Queue destinationQueue;


 @RequestMapping("/send3")
 public void testJms2() {
  for (int i=0;i<10;i++) {
   jmsProducerService.sendMessage(destinationQueue,"queue,world!" + i);
   jmsProducerService.sendMessage(destinationTopic, "topic,world!" + i);
  }
 }

 @RequestMapping("/send2")
 public void testJms() {
  for (int i=0;i<10;i++) {
   jmsProducerService.sendMessage(queue,"queue,world!" + i);
   jmsProducerService.sendMessage(topic, "topic,world!" + i);
  }
 }

  @RequestMapping("/send")
 public void contextLoads() throws InterruptedException {
  Destination destination = new ActiveMQQueue("mytest.queue");
  for(int i=0; i<10; i++){
   jmsProducerService.sendMessage(destination, "我是超人啊");
  }
  System.out.println("发送成功");
 }
}
最后的监听器类:
package com.zzf.finals.domain;
import org.springframework.jms.annotation.JmsListener;
import org.springframework.stereotype.Component;
@Component
public class Consumer {
@JmsListener(destination = "mytest.queue")
public void receiveQueue(String text) {
System.out.println("Message:"+text);
}
@JmsListener(destination = JmsConfig.TOPIC,cOntainerFactory= "jmsListenerContainerTopic")
public void onTopicMessage(String msg) {
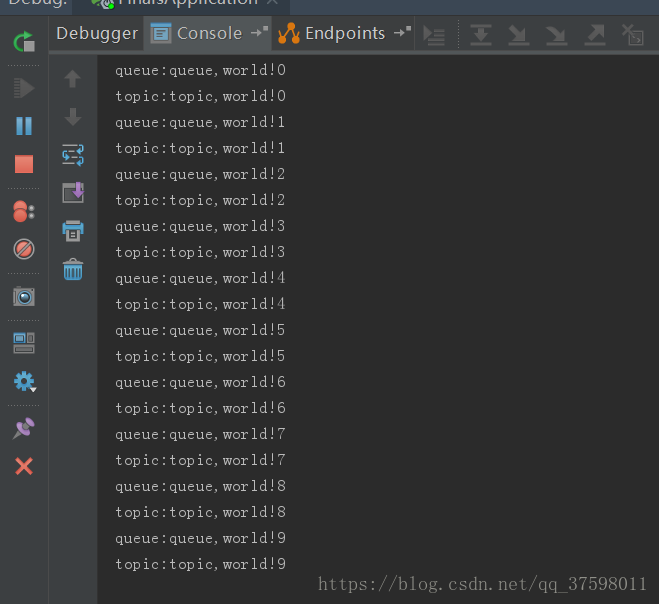
System.out.println("topic:"+msg);
}
@JmsListener(destination = JmsConfig.QUEUE,cOntainerFactory= "jmsListenerContainerQueue")
public void onQueueMessage(String msg) {
System.out.println("queue:"+msg);
}
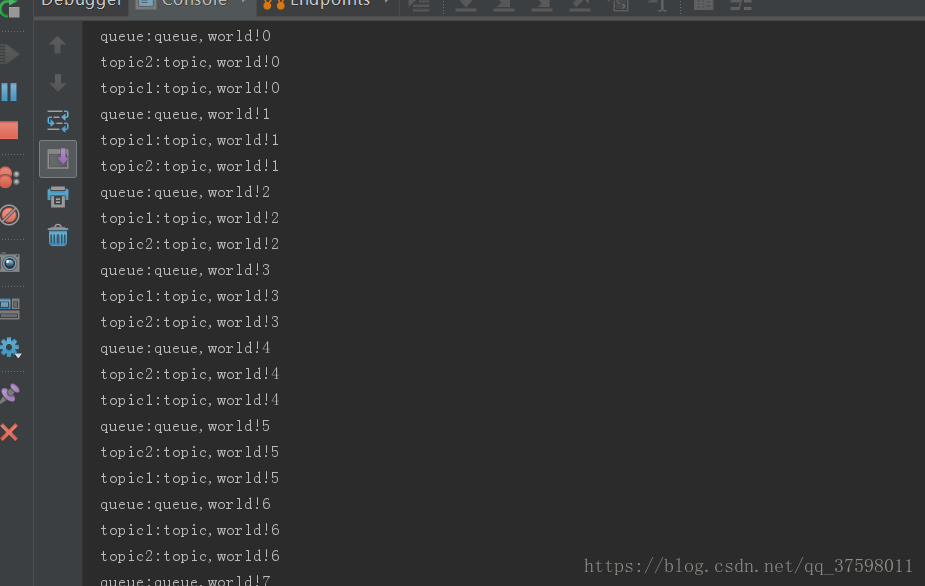
@JmsListener(destination = "spring-topic",cOntainerFactory= "TopicContainers")
public void onTopicMessageXML(String msg) {
System.out.println("topic1:"+msg);
}
@JmsListener(destination = "spring-topic",cOntainerFactory= "TopicContainers")
public void onTopicMessageXML2(String msg) {
System.out.println("topic2:"+msg);
}
@JmsListener(destination = "spring-queue",cOntainerFactory= "QueueContainers")
public void onQueueMessageXML(String msg) {
System.out.println("queue:"+msg);
}
}


OK~JmsTemplate的使用和配置Demo就完成了 ,有兴趣的可以自己跑下试试
总结
到此这篇关于SpringBoot集成JmsTemplate(队列模式和主题模式)及xml和JavaConfig配置详解的文章就介绍到这了,更多相关SpringBoot集成JmsTemplate内容请搜索以前的文章或继续浏览下面的相关文章希望大家以后多多支持!


 京公网安备 11010802041100号 | 京ICP备19059560号-4 | PHP1.CN 第一PHP社区 版权所有