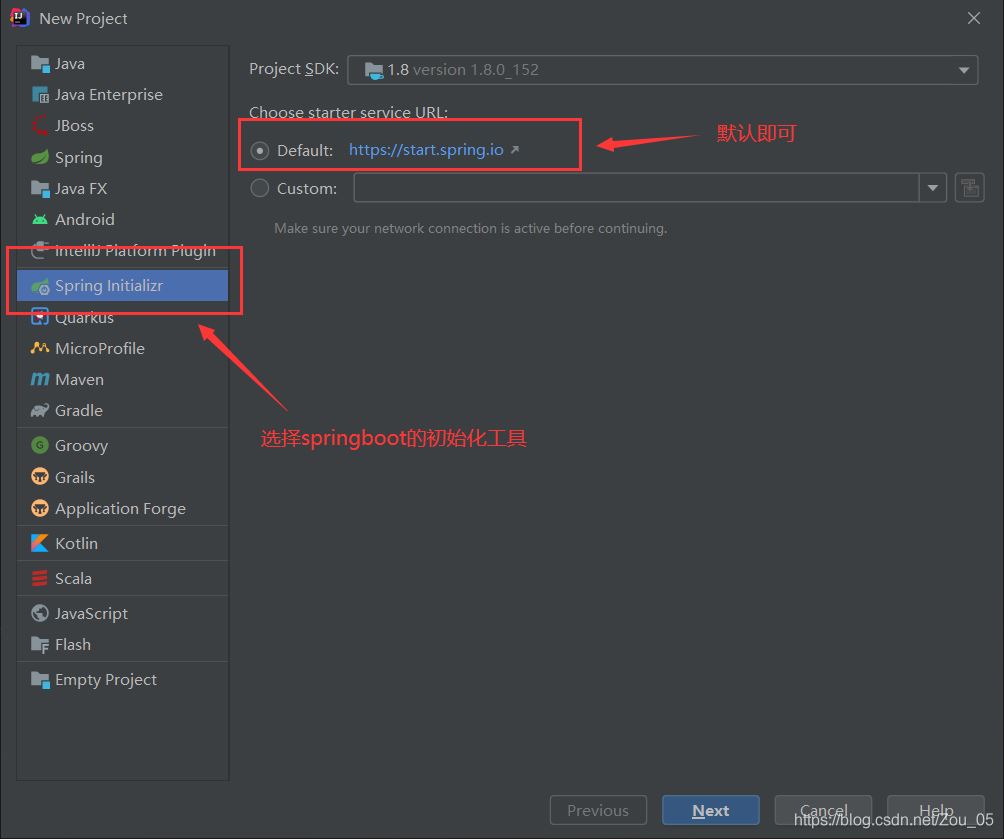
1.新建一个springboot初始化项目
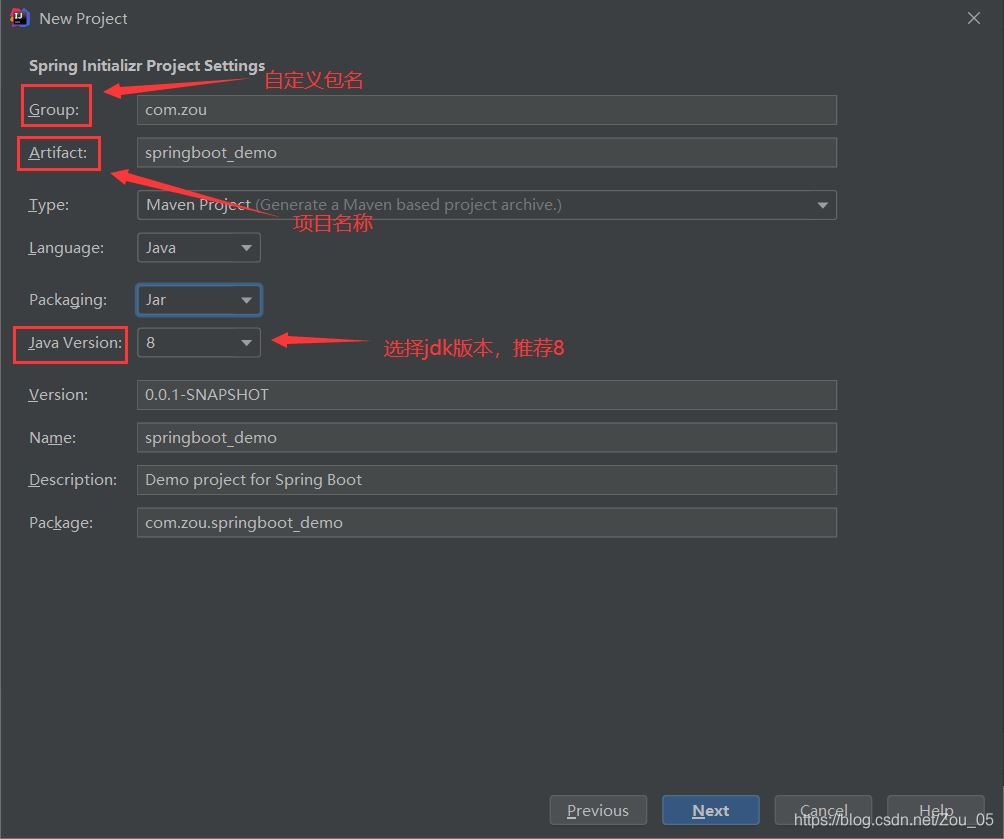
2.输入自己的包名,项目名及jdk版本,再点击Next
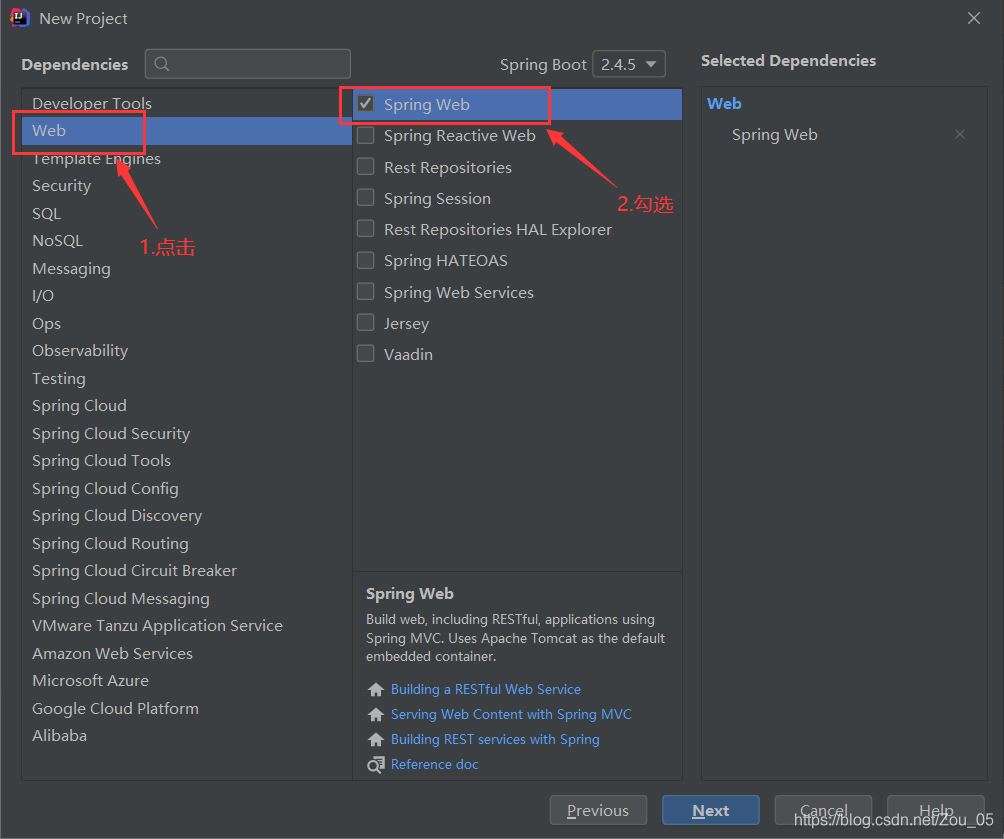
3.勾选Spring Web,再点击Next
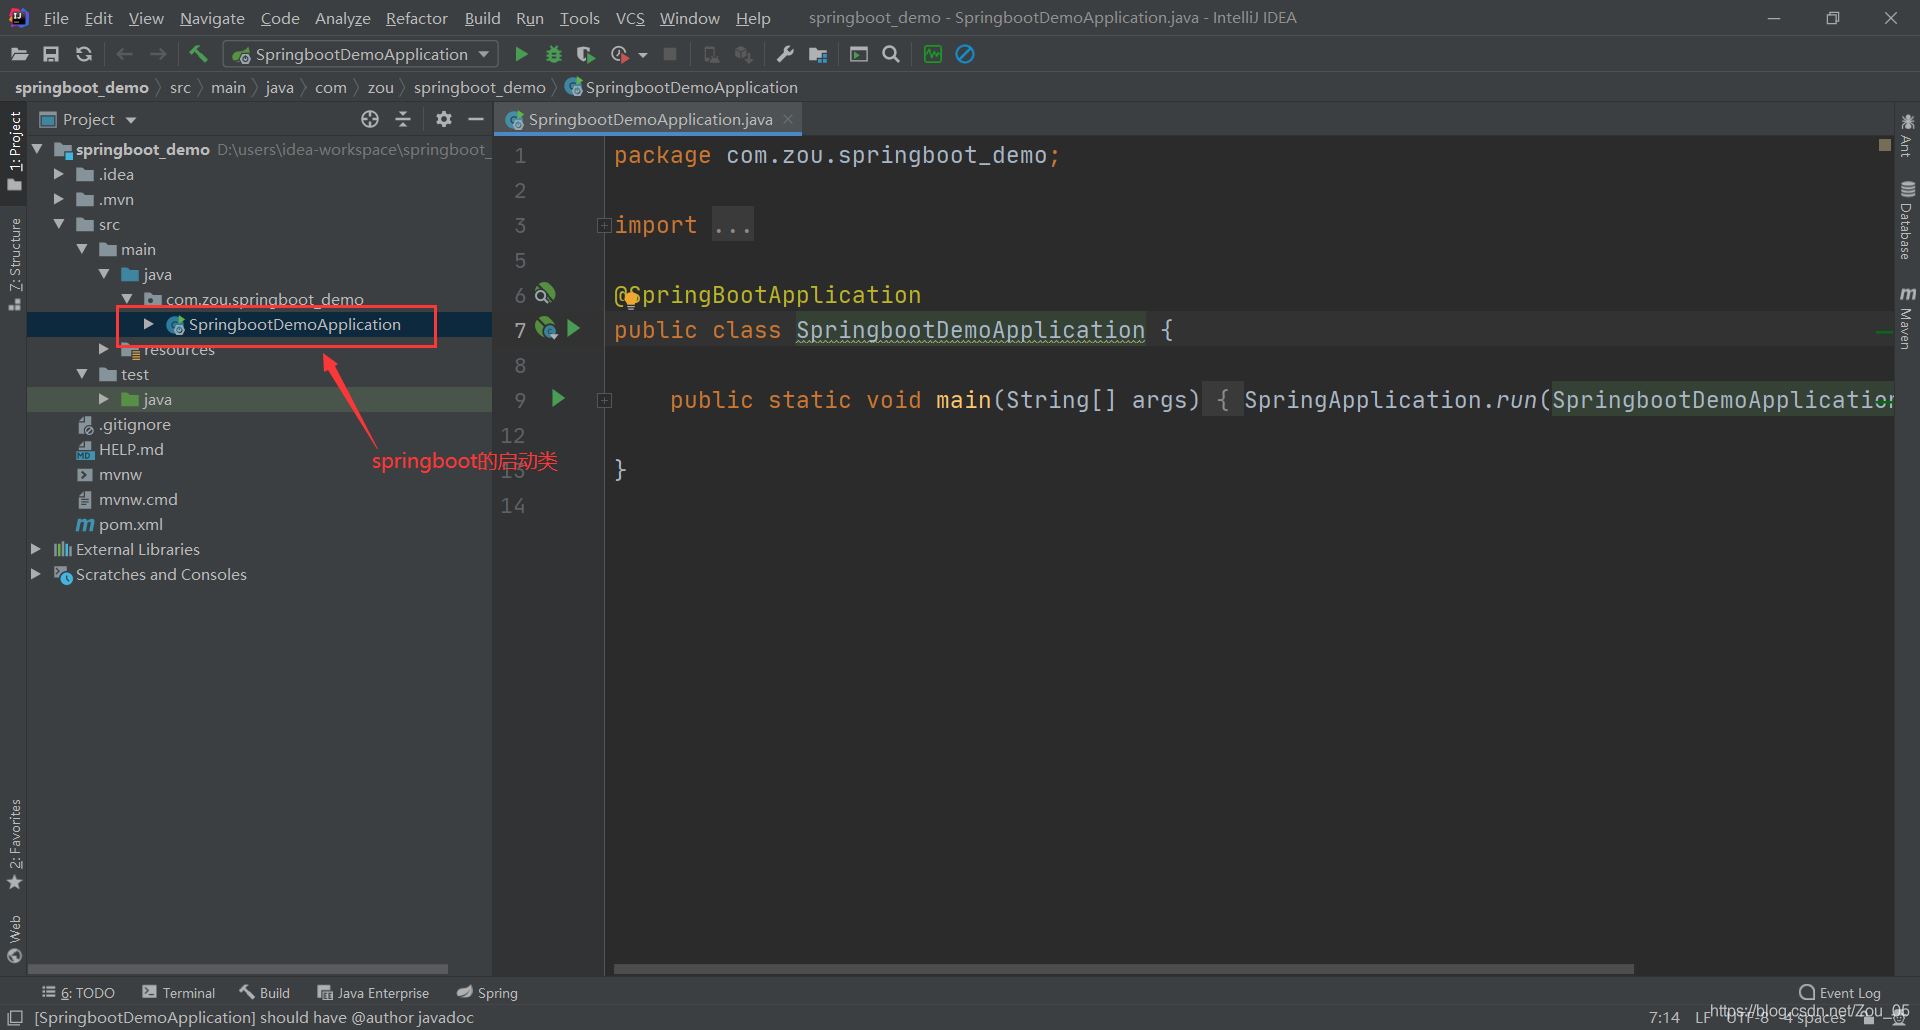
4.再点击Next,再Finish 默认的项目结构如下图
(1)修改pom.xml文件
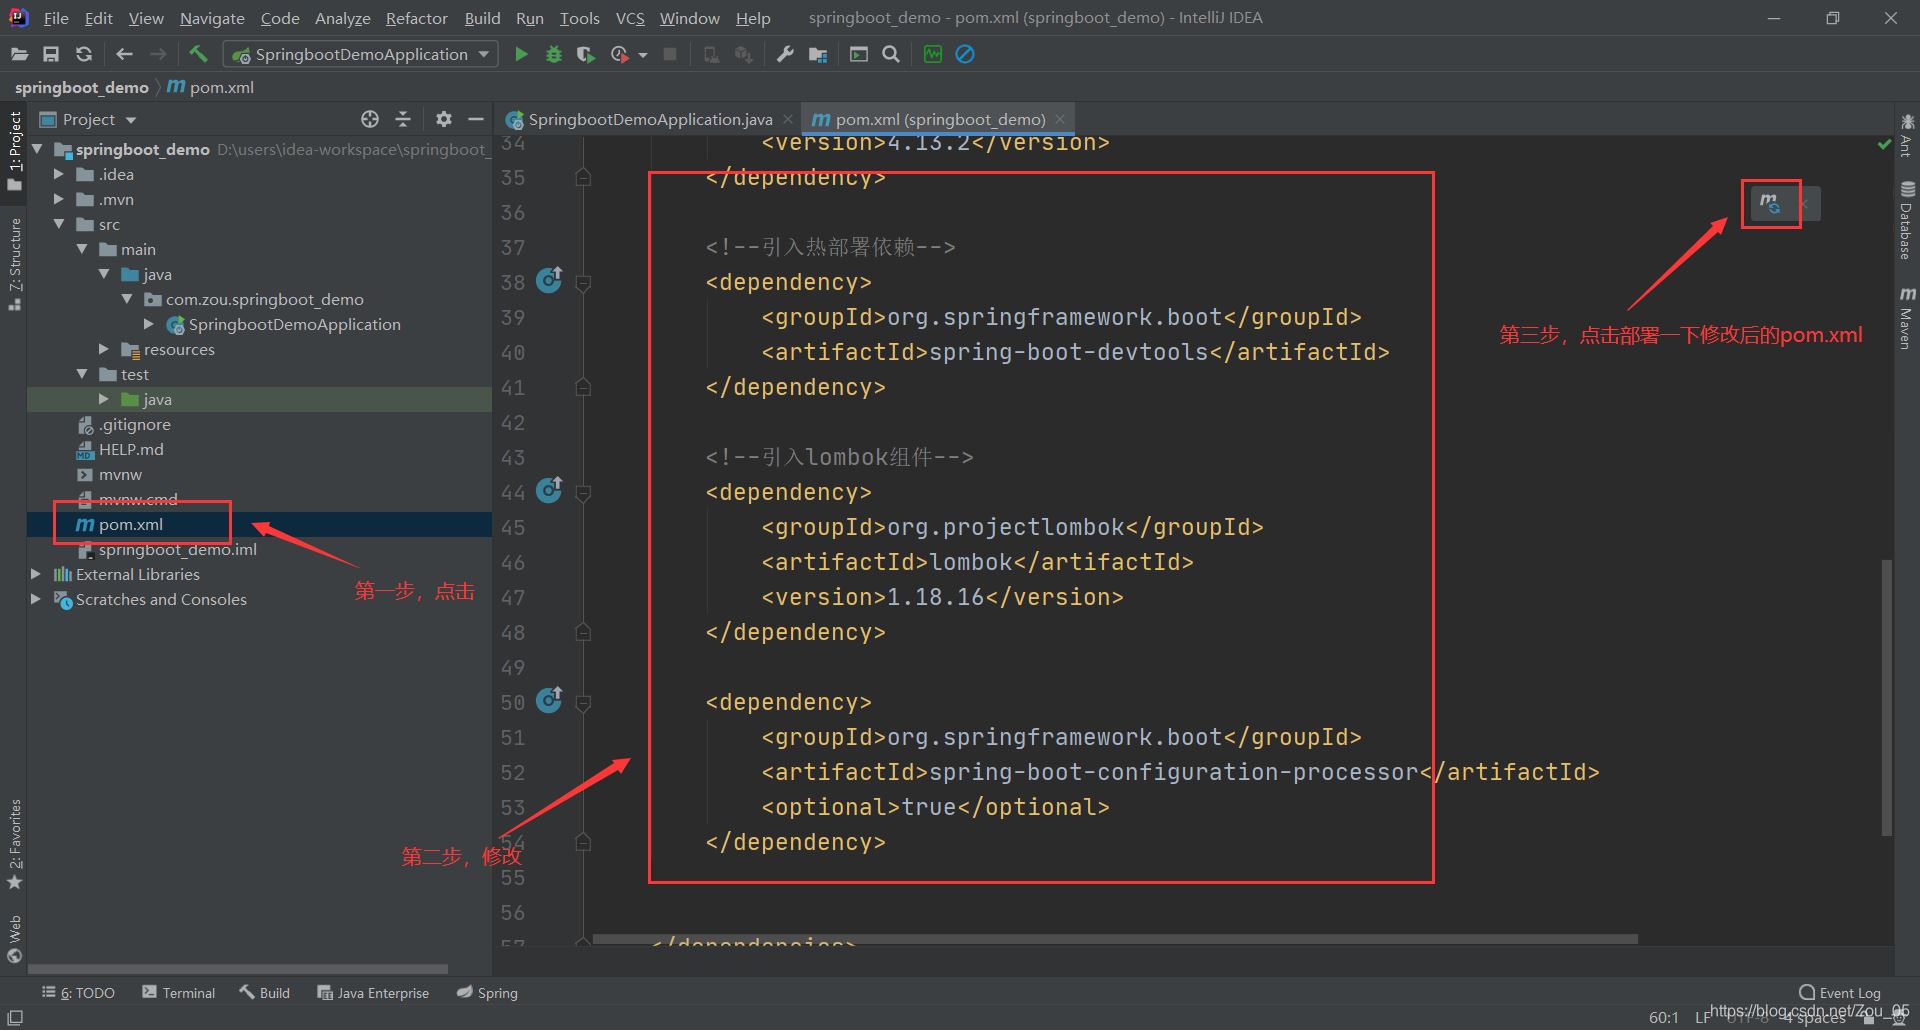
完整的pom.xml为:
<&#63;xml version="1.0" encoding="UTF-8"&#63;>4.0.0 org.springframework.boot spring-boot-starter-parent 2.4.5 com.zou springboot_demo 0.0.1-SNAPSHOT springboot_demo Demo project for Spring Boot 1.8 org.springframework.boot spring-boot-starter-web org.springframework.boot spring-boot-starter-test test junit junit 4.13.2 org.springframework.boot spring-boot-devtools org.projectlombok lombok 1.18.16 org.springframework.boot spring-boot-configuration-processor true
(2)新建一个ControllerDemo类
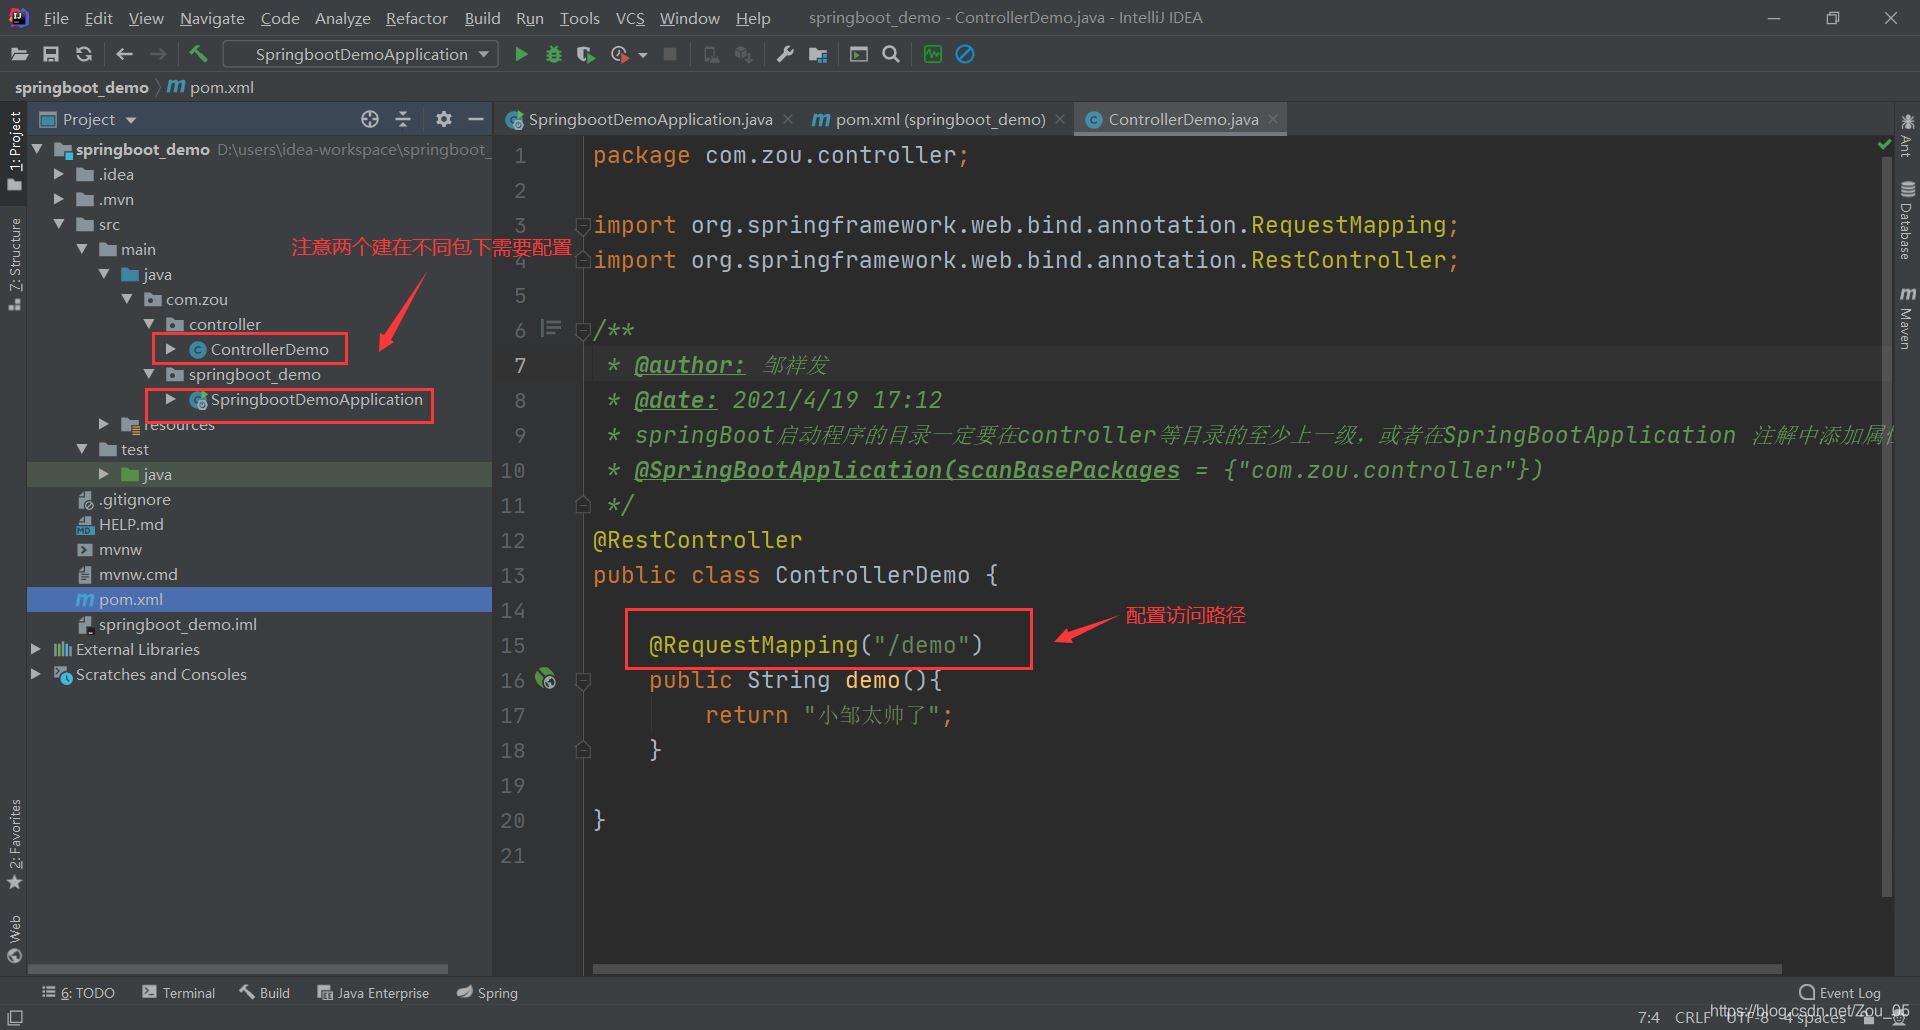
ControllerDemo的代码如下
package com.zou.controller;

import org.springframework.web.bind.annotation.RequestMapping;
import org.springframework.web.bind.annotation.RestController;

/**
 * @author: 邹祥发
 * @date: 2021/4/19 17:12
 * springBoot启动程序的目录一定要在controller等目录的至少上一级,或者在SpringBootApplication 注解中添加属性:
 * @SpringBootApplication(scanBasePackages = {"com.zou.controller"})
 */
@RestController
public class ControllerDemo {

    @RequestMapping("/demo")
    public String demo(){
        return "小邹太帅了";
    }

}
注:springBoot启动程序的目录一定要在controller等目录的至少上一级,或者在SpringBootApplication 注解中添加属性:
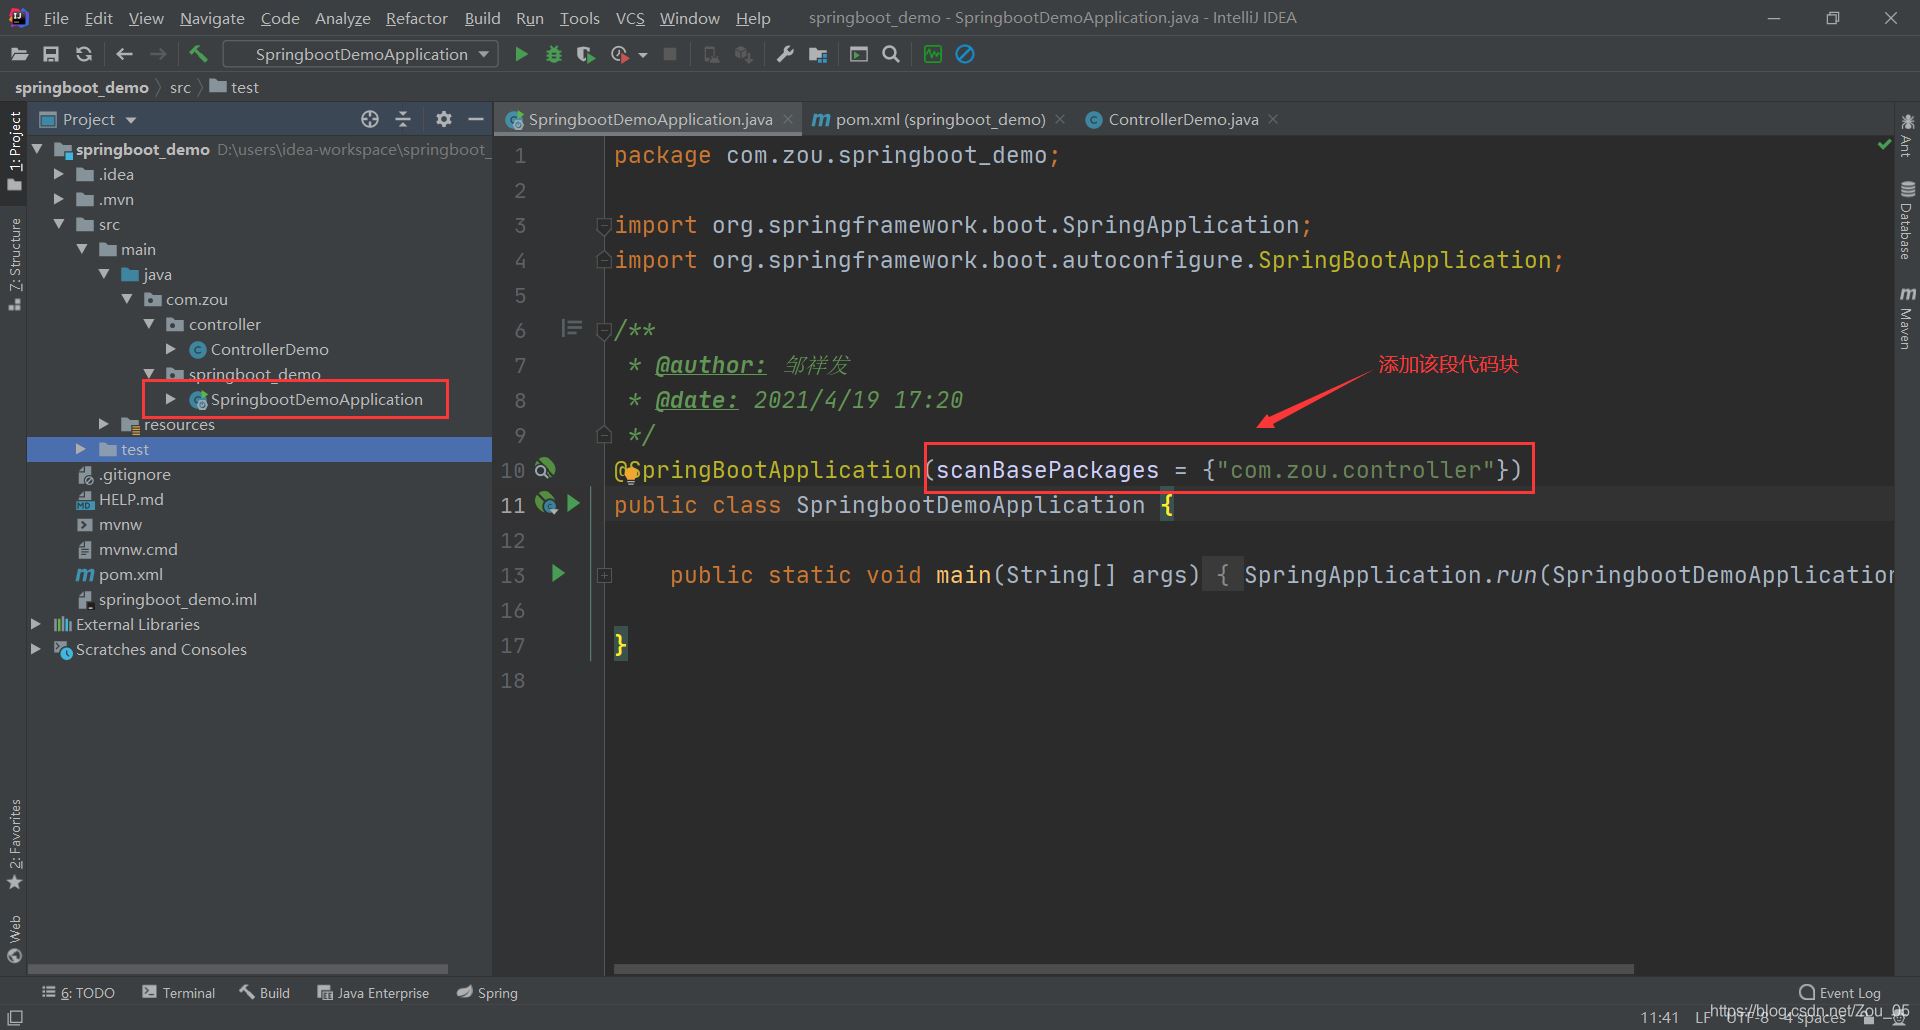
@SpringBootApplication(scanBasePackages = {"com.zou.controller"})
(3)在application.properties中修改端口号
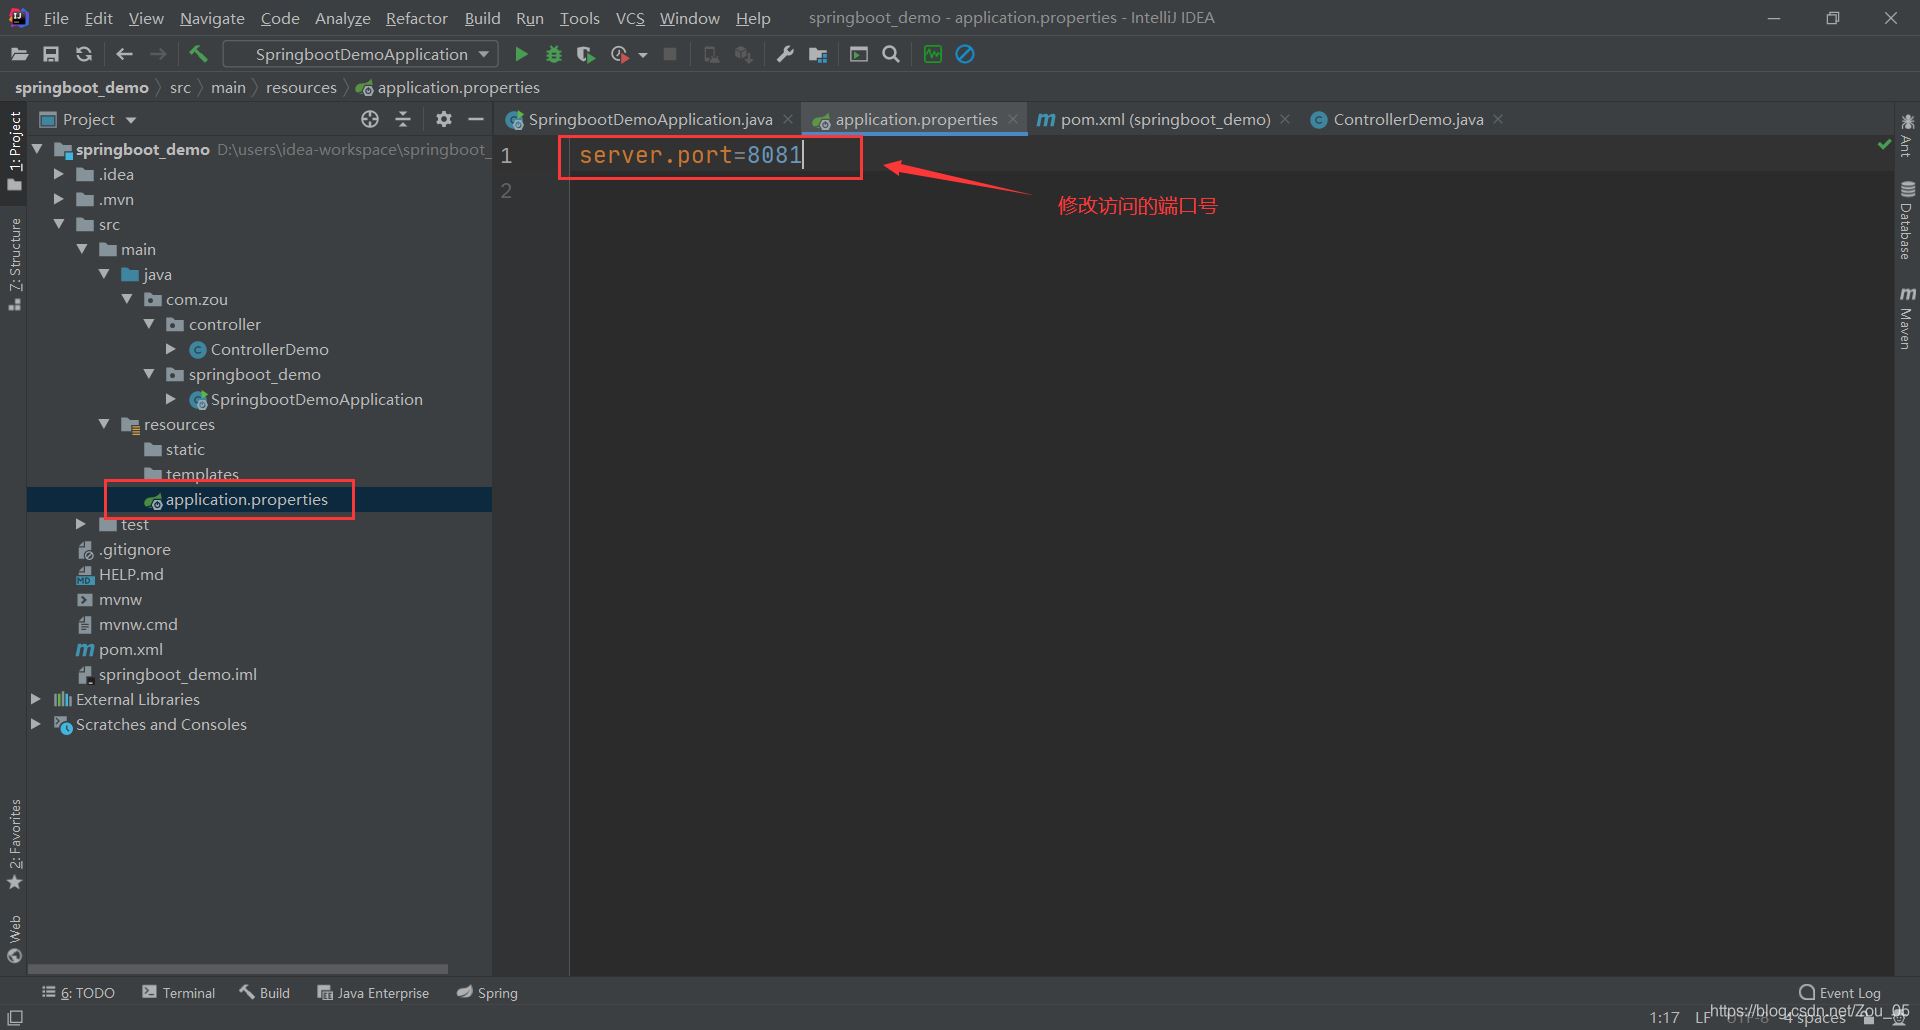
server.port=8081
(4)测试
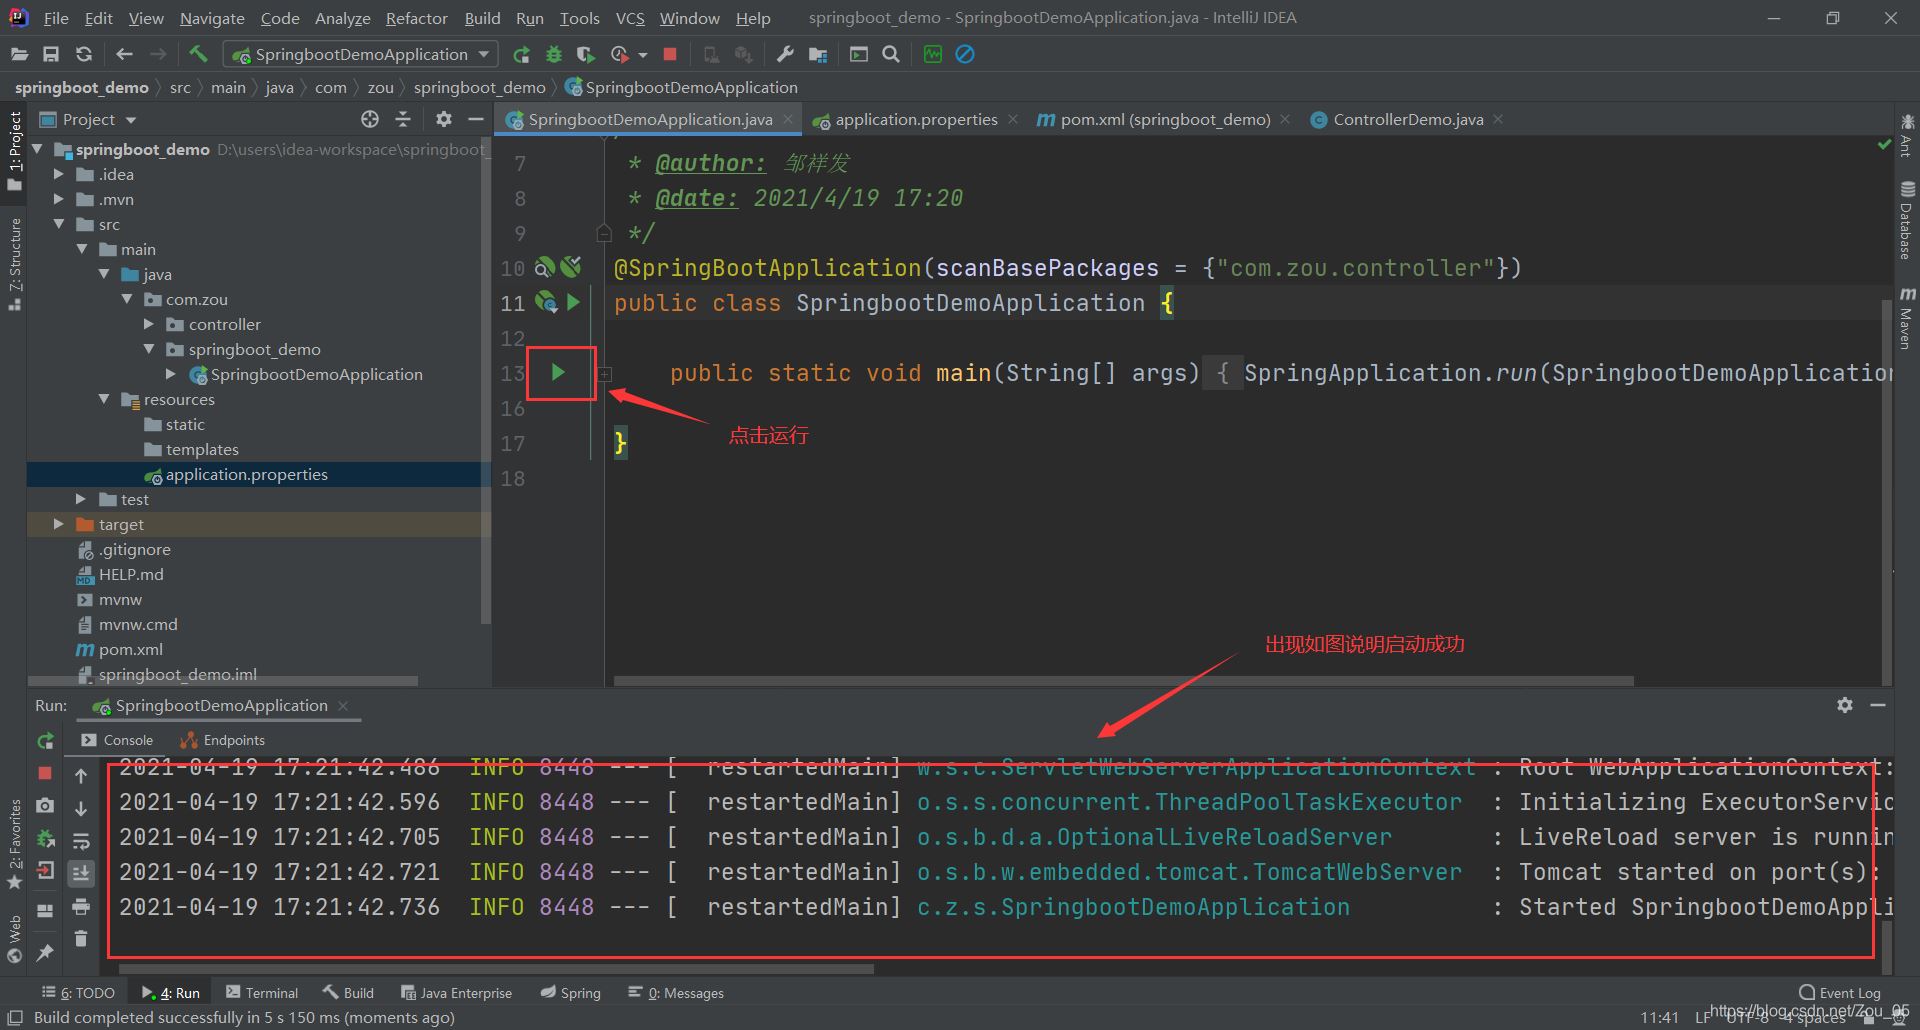
(5)打开浏览器,访问http://localhost:8081/demo,因为在之前的ControllerDemo里面配置的访问路径为/demo
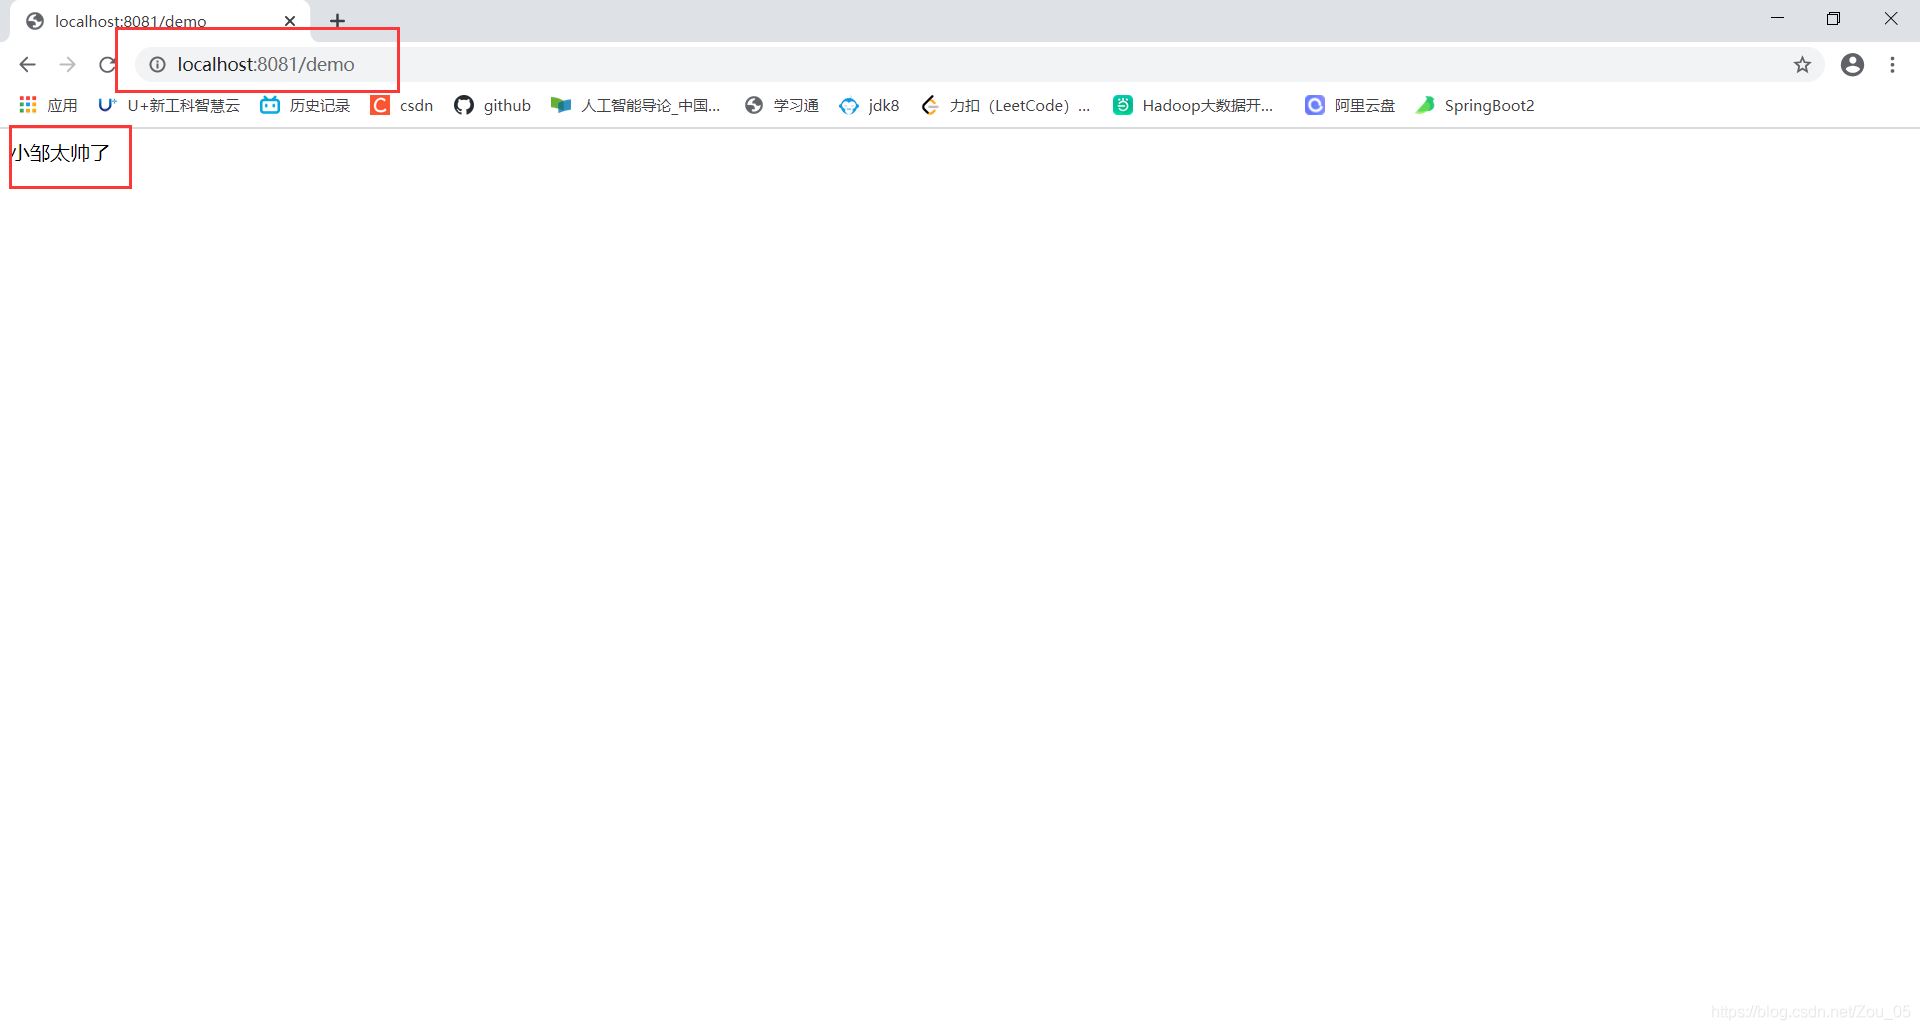
(6)到这里第一个springboot开发web的入门程序就完成了。
到此这篇关于使用springboot开发的第一个web入门程序的实现的文章就介绍到这了,更多相关springboot web入门 内容请搜索以前的文章或继续浏览下面的相关文章希望大家以后多多支持!

 京公网安备 11010802041100号 | 京ICP备19059560号-4 | PHP1.CN 第一PHP社区 版权所有