本篇介绍如何在各平台安装Elasticsearch。
注意,无论在什么平台安装使用Elasticsearch,都必须提前准备好JAVA环境,各平台安装Java环境点我
都要先下载:
es家的所有产品,都可以通过下面这个链接下载:
https://www.elastic.co/downloads/past-releases

这里提供几个快速链接:
https://artifacts.elastic.co/downloads/logstash/logstash-6.8.15.rpm
https://artifacts.elastic.co/downloads/beats/filebeat/filebeat-6.8.15-x86_64.rpm
https://artifacts.elastic.co/downloads/kibana/kibana-6.8.15-x86_64.rpm
https://artifacts.elastic.co/downloads/elasticsearch/elasticsearch-6.8.15.rpm
win10 + Elasticsearch
必须注意的是:安装路径不允许有中文及空格和非法字符,尤其是中文
elasticsearch官网。选择downloads。elasticsearch,并单击Download。past releases并单击。Download。WINDOWS,就会自动执行下载。elasticsearch的zip包。elasticsearch-6.5.4.zip解压到C:\Program Files目录(你也可以指定自己的目录)。现在,安装完毕!简单的无以复加,我们可以先来做个测试。
bin目录,双击elasticsearch.bat文件。cmd框中,打印了大量的日志信息。我们暂时不用管它。http://localhost:9200。页面返回了elasticsearch的相关信息。
至此,elasticsearch在Windows平台安装完毕。
首先检查防火墙是否关闭:
systemctl status firewalld.service  # 查看防火墙状态
systemctl stop firewalld.service    # 停止firewall
systemctl disable firewalld.service # 禁止开机启动
安装方式介绍:
| 安装方式 | 优点 | 缺点 |
|---|---|---|
| docker | 1. 部署方便 2. 开箱即用 3. 启动迅速 |
1. 需要有docker基础 2. 修改配置麻烦,需要重新生成镜像 3. 数据存储需要挂在目录 |
| tar | 1. 部署灵活 2. 对系统侵占性小 |
1. 需要自己写启动管理文件 2. 需要自己规划目录 |
| rmp/deb | 1. 部署方便 2. 安装即用 3. 存放目录标准化 |
1. 软件各个部分分散在不同的目录中 2. 卸载可能有残留 3. 默认配置需要修改 |
| ansible | 1. 管理极其灵活 2. 想要的功能都有 3. 批量部署速度快 |
1. 需要学习ansible语法和规则 2. 需要提前规划好所有的标准 3. 需要专人维护 |
再次强调,必须提前安装Java环境:
[root@cs ~]# yum install java-1.8.0-openjdk.x86_64 -y
[root@cs ~]# java -version
openjdk version "1.8.0_292"
OpenJDK Runtime Environment (build 1.8.0_292-b10)
OpenJDK 64-Bit Server VM (build 25.292-b10, mixed mode)
centos7.9 + elasticsearch-6.8.15
install
# 下载
wget https://artifacts.elastic.co/downloads/elasticsearch/elasticsearch-6.8.15.rpm

# 安装,使用yum安装和rpm命令安装都行
# yum install elasticsearch-6.8.15.rpm -y
rpm -ivh elasticsearch-6.8.15.rpm
其实在安装过程中,es创建并使用elasticsearch用户来运行es服务,这点需要注意。
配置启动相关
systemctl daemon-reload
systemctl enable elasticsearch.service    # 加入开机启动
systemctl start/stop/restart/status elasticsearch.service
systemctl is-active elasticsearch.service  # 确认es服务是否还活着
检查是否启动成功
ps -ef|grep elastic
lsof -i:9200
curl http://localhost:9200
配置文件位置查看
# rpm -ql elasticsearch
[root@cs tmp]# rpm -qc elasticsearch
/etc/elasticsearch/elasticsearch.yml             # es配置文件
/etc/elasticsearch/jvm.options                   # java虚拟机的配置文件
/etc/elasticsearch/log4j2.properties             # es的日志使用的log4j的框架,所以有log4j的配置
/etc/elasticsearch/role_mapping.yml
/etc/elasticsearch/roles.yml
/etc/elasticsearch/users
/etc/elasticsearch/users_roles
/etc/init.d/elasticsearch                        # init.d启动脚本
/etc/sysconfig/elasticsearch                     # 一些环境变量,一般不用更改
/usr/lib/sysctl.d/elasticsearch.conf             # 环境变量相关
/usr/lib/systemd/system/elasticsearch.service    # systemd启动脚本
修改配置文件:
# 手动创建个es的数据目录
[root@cs tmp]# mkdir -p /data/elasticsearch_data
[root@cs tmp]# chown -R elasticsearch:elasticsearch /data/elasticsearch_data/
[root@cs tmp]# vim /etc/elasticsearch/elasticsearch.yml

# 更改后的配置文件内容如下
[root@cs tmp]# grep "^[a-Z]" /etc/elasticsearch/elasticsearch.yml
node.name: node-1
path.data: /data/elasticsearch_data
path.logs: /var/log/elasticsearch
bootstrap.memory_lock: true
network.host: 10.0.0.200,127.0.0.1

# 完事重启服务
[root@cs tmp]# systemctl restart elasticsearch
# 然后观察日志,你会发现,有报错:
[root@cs tmp]# tail -f /var/log/elasticsearch/elasticsearch.log
[2021-04-25T16:49:23,857][INFO ][o.e.n.Node               ] [node-1] starting ...
[2021-04-25T16:49:24,016][INFO ][o.e.t.TransportService   ] [node-1] publish_address {10.0.0.200:9300}, bound_addresses {127.0.0.1:9300}, {10.0.0.200:9300}
[2021-04-25T16:49:24,030][INFO ][o.e.b.BootstrapChecks    ] [node-1] bound or publishing to a non-loopback address, enforcing bootstrap checks
[2021-04-25T16:49:24,032][ERROR][o.e.b.Bootstrap          ] [node-1] node validation exception
[1] bootstrap checks failed
[1]: memory locking requested for elasticsearch process but memory is not locked
[2021-04-25T16:49:24,035][INFO ][o.e.n.Node               ] [node-1] stopping ...
[2021-04-25T16:49:24,058][INFO ][o.e.n.Node               ] [node-1] stopped
[2021-04-25T16:49:24,059][INFO ][o.e.n.Node               ] [node-1] closing ...
[2021-04-25T16:49:24,074][INFO ][o.e.n.Node               ] [node-1] closed
报错意思是锁定内存失败,参考官网的解决办法:
[root@cs tmp]# sudo systemctl edit elasticsearch


[Service]
LimitMEMLOCK=infinity

[root@cs tmp]# sudo systemctl daemon-reload
[root@cs tmp]# systemctl restart elasticsearch
稍等等,浏览器访问就可以了:

完事了。
补充,elasticsearch的安装目录:
[root@cs tmp]# ll /usr/share/elasticsearch/
total 460
drwxr-xr-x.  3 root root   4096 Apr 25 16:16 bin
drwxr-xr-x.  3 root root   4096 Apr 25 16:16 lib
-rw-r--r--.  1 root root  13675 Mar 18 14:30 LICENSE.txt
drwxr-xr-x. 31 root root   4096 Apr 25 16:16 modules
-rw-r--r--.  1 root root 427502 Mar 18 14:37 NOTICE.txt
drwxr-xr-x.  2 root root      6 Mar 18 14:46 plugins
-rw-r--r--.  1 root root   8534 Mar 18 14:30 README.textile
在elastic官网的elasticsearch下载页面,复制tar包链接:

然后,使用wget命令下载即可:
[root@cs home]# wget https://artifacts.elastic.co/downloads/elasticsearch/elasticsearch-6.7.0.tar.gz

下载完毕后,我们解压tar包:
[root@cs home]# tar -zxvf elasticsearch-6.7.0.tar.gz
当解压完毕,我们对elasticsearch做一些配置,elasticsearch.yml 配置文件里面有很多常用的配置,我们根据业务需求可以来这里修改它们:
[root@cs home]# vim /home/elasticsearch-6.7.0/config/elasticsearch.yml
暂时我们只需要对host做一些修改,方便后面我们通过浏览器访问它:
network.host: 10.0.0.200
host对应你的主机ip地址。
由于elasticsearch的默认jvm堆大小是1G(在es的6.7.0和6.5.4版本中,该值都是默认1G),为了启动不报错Cannot allocate memory,所以还需要修改一处配置,就是调整堆值的大小,并且这个值应该根据你的系统物理内存大小而定,比如我本机的物力内存是1G,所以我将这个值调整为512M:
[root@r home]# vim /home/elasticsearch-6.7.0/config/jvm.options
-Xms512m      # 原值为-Xms1g
-Xmx512m     # 原值为-Xmx1g
没完!我们还需要修改两处配置(非常重要的两个步骤,配置不好就导致后面的报错):
[root@cs home]# vim /etc/sysctl.conf
编辑追加一行:
vm.max_map_count=262144
完事执行如下命令,使配置生效:
[root@cs home]# sysctl -p
vm.max_map_count = 262144
而我碰到命令执行失败的问题:
[root@cs home]# sysctl -p
sysctl: cannot stat /proc/sys/vm/max_map_conut: 没有那个文件或目录
怎么办呢?我们使用另一个办法:
[root@cs ~]# cat /proc/sys/vm/max_map_count     # 之前,我们查看参数并没有修改
65530
[root@cs ~]# echo 262144 > /proc/sys/vm/max_map_count   # 通过这样手动修改参数
[root@cs ~]# cat /proc/sys/vm/max_map_count    # 就好了
262144
简要说下sysctl -p命令,sysctl命令用于运行时配置内核参数,这些参数位于/proc/sys目录下。sysctl配置与显示在/proc/sys目录中的内核参数.可以用sysctl来设置或重新设置联网功能,如IP转发、IP碎片去除以及源路由检查等。用户只需要编辑/etc/sysctl.conf文件,即可手工或自动执行由sysctl控制的功能。而 参数-p的意思是从指定的文件加载系统参数,如不指定即从/etc/sysctl.conf中加载。
再来修改另一处配置:
[root@cs home]# vim /etc/security/limits.conf
追加如下内容,Python为登录服务器的用户名:
* soft nofile 65536
* soft nofile 65536
* hard nofile 65536
* soft nproc 5000
* hard nproc 5000
当修改完后,我们可以使用reboot重新启动使之生效。
现在,我们去启动es:
[root@cs home]# ./elasticsearch-6.7.0/bin/elasticsearch # 启动其bin目录中的elasticsearch即可
但发现了一个问题导致启动失败,原因是elasticsearch不能以root用户启动。

我们这里手动创建一个普通用户:
[root@cs home]# adduser zhangkai
[root@cs home]# passwd zhangkai
更改用户 zhangkai 的密码 。
新的 密码:
重新输入新的 密码:
passwd:所有的身份验证令牌已经成功更新。
注意,输入密码是不会提示的!
然后,我们(此时还是root用户)为这个普通用户给elasticsearch目录权限:
[root@cs home]# chown -R zhangkai /home/elasticsearch-6.7.0
完事后,我们以普通的用户身份去启动elasticsearch:
[root@cs home]# su zhangkai
[zhangkai@cs home]$ ./elasticsearch-6.7.0/bin/elasticsearch
当然,要停止的话,Ctrl + C比较简单粗暴!
现在,让我们打开浏览器访问吧:
http://10.0.0.200:9200/

Cannot allocate memory,无法分配内存:[root@r myelk]# ./elasticsearch-6.7.0/bin/elasticsearch
OpenJDK 64-Bit Server VM warning: If the number of processors is expected to increase from one, then you should configure the number of parallel GC threads appropriately using -XX:ParallelGCThreads=N
OpenJDK 64-Bit Server VM warning: INFO: os::commit_memory(0x00000000c5330000, 986513408, 0) failed; error='Cannot allocate memory' (errno=12)
#
# There is insufficient memory for the Java Runtime Environment to continue.
# Native memory allocation (mmap) failed to map 986513408 bytes for committing reserved memory.
# An error report file with more information is saved as:
# logs/hs_err_pid2834.log
这是elasticsearch默认的jvm堆大小,如果你的Linux系统的内存较小,我们可以调整这个值,我们去elasticsearch安装目录下的elasticsearch\conf\jvm.options文件修改这个值。
[root@r home]# vim /home/elasticsearch-6.7.0/config/jvm.options
-Xms512m      # 原值为-Xms1g
-Xmx512m     # 原值为-Xmx1g

在es的6.7.0和6.5.4版本中,该值都是默认1G,而我的系统才1G,所以报错了,我们把它降低一些,而最大和最小值应该是一致的,并且根据物力内存设置一个合理的值,我这里修改为512m。
There is insufficient memory for the Java Runtime Environment to continue.
由于我使用的是虚拟机,所以分配的内存太小了,手动调大一些就好了。
max virtual memory areas vm.max_map_count [65530] is too low, increase to at least [262144]
这里需要修改etc/sysctl.conf文件设置,前文已经提到了。
max file descriptors [4096] for elasticsearch process is too low, increase to at least [65535]
4096是之前设置的太少了。这里需要修改/etc/security/limits.conf文件。前文已经提到了。
牢记,这几个报错,在修改完文件后,需要重新启动。
除此之外,我们还可以通过rpm包的方式安装,当然,具体就不多表了。
# yum install -y java-openjdk
yum install java-1.8.0-openjdk -y
wget https://artifacts.elastic.co/downloads/elasticsearch/elasticsearch-7.0.0-x86_64.rpm
yum install elasticsearch-7.0.0-x86_64.rpm
systemctl start elasticsearch
systemctl stop elasticsearch
至此,elasticsearch在Linux环境配置基本完事。
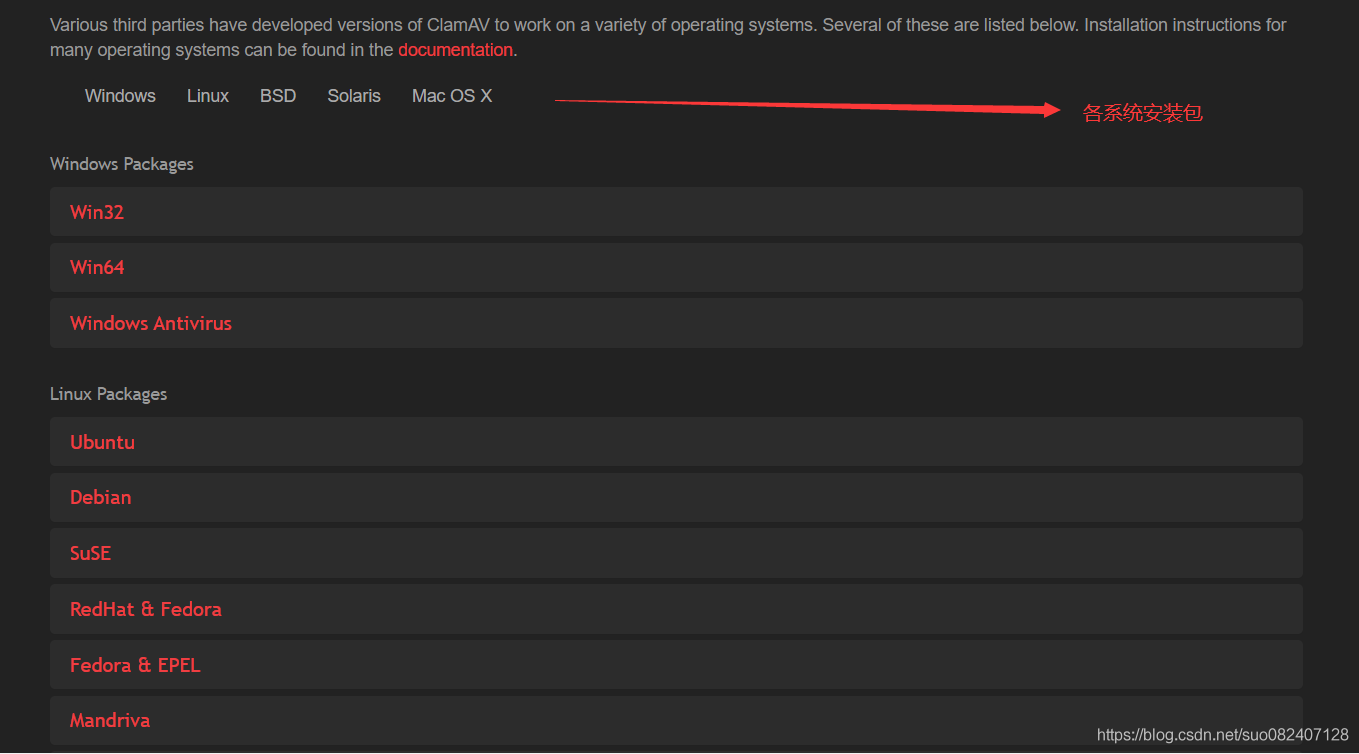
downloads进入下载页。
elasticsaerch下载。

elasticsearch和版本,然后点击下载。
MACOS/LINUX,下载就完了。
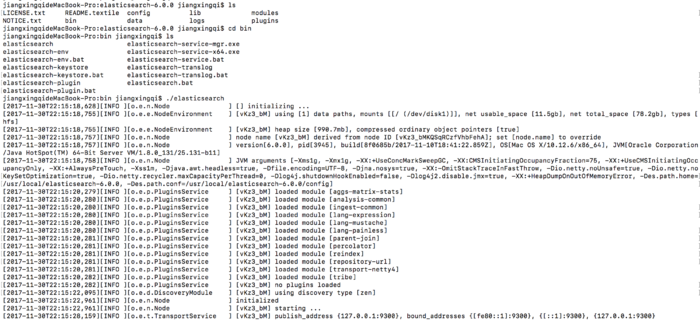
tar包解压就好了。
./Downloads/elasticsearch-6.5.4./bin/elasticsearch

localhost:9200,返回相关信息即安装成功。


 京公网安备 11010802041100号 | 京ICP备19059560号-4 | PHP1.CN 第一PHP社区 版权所有