一、前台服务
service基本都是在后台进行运行的,一直都是在默默地工作,不爱表现自己(没有界面),可是这样一个基层的工作人员(service)在android系统的待遇(优先级)还是比较差的,在系统内存不足的情况下,就有可能回收掉正在后台运行的service,因此service就会停止运行。如果希望service一直保持运行,不因系统内存不足而回收,该怎么做呢?可以先考虑使用前台service,前台service和普通service的区别在于,前台service一直有一个正在运行的图标在系统的状态栏中显示。但有一点要注意的是使用前台service不代表service不能被杀死,在应用程序管理那里可以停止前台service,状态栏通知被删除了也能解除service!
那前台service有什么可以用来干什么呢?通常来说,一个音乐的播放器可以设置前台service,在状态栏中可以显示播放的歌曲相关的信息并可以作为启动按钮,打开音乐播放器,而且用户也是明确知道音乐播放器在运行的。还有天气相关的app也可以用前台service,在状态栏中实时同步更新的天气信息。
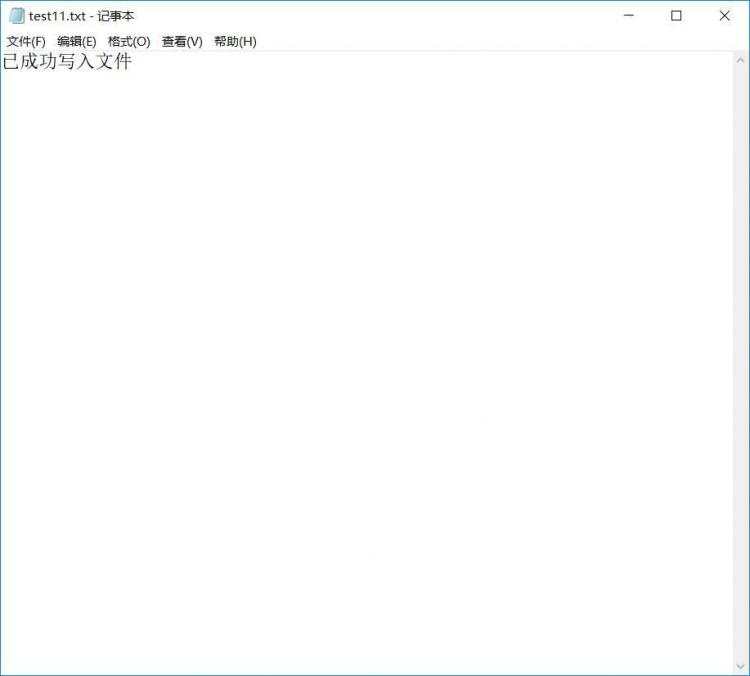
那么我们先来看看前台service的效果吧:
效果图可以看到前台service的界面,基本和一个通知信息界面差不多,然后点击停止前台service,状态栏的图标就消失了!此时前台service也就关闭了!当然用户想要停止前台service,也跟普通service一样,可以在程序管理器那里进行停止,具体看下面的效果图!
看完效果图,我们来看下代码的实现,其实基本跟普通的service差不多,就是多了需要调用startForeground()方法,这个方法需要两个参数:一个唯一标识通知的整数和给状态栏的通知!如果需要删除前台service需要调用stopForeground()方法!
主界面的代码:
package com.liangdianshui.service2;Service类的代码:
import com.example.service2.R;
import android.app.Activity;
import android.content.Intent;
import android.os.Bundle;
import android.view.View;
import android.view.View.OnClickListener;
import android.widget.Button;
public class MainActivity extends Activity implements OnClickListener {
private Button mBtStartFrontService;
private Button mBtStopFrontService;
@Override
protected void onCreate(Bundle savedInstanceState) {
super.onCreate(savedInstanceState);
setContentView(R.layout.activity_main);
initView();
}
private void initView() {
mBtStartFrOntService= (Button) findViewById(R.id.bt_start_front_server);
mBtStopFrOntService= (Button) findViewById(R.id.bt_stop_front_server);
mBtStartFrontService.setOnClickListener(this);
mBtStopFrontService.setOnClickListener(this);
}
@Override
public void onClick(View v) {
// TODO Auto-generated method stub
Intent intent2 = new Intent(MainActivity.this, MyService2.class);
switch (v.getId()) {
case R.id.bt_start_front_server:
startService(intent2);
break;
case R.id.bt_stop_front_server:
stopService(intent2);
break;
}
}
}
package com.liangdianshui.service2;最后记得跟普通service一样,在配置文件中声明!
import com.example.service2.R;
import android.app.Notification;
import android.app.PendingIntent;
import android.app.Service;
import android.content.Intent;
import android.os.Binder;
import android.os.IBinder;
import android.util.Log;
public class MyService2 extends Service {
private static final String TAG = MyService2.class.getSimpleName();
private MyBinder mBinder = new MyBinder();
@Override
public IBinder onBind(Intent intent) {
// TODO Auto-generated method stub
return mBinder;
}
@Override
public void onCreate() {
// TODO Auto-generated method stub
super.onCreate();
Log.i(TAG, "onCreate");
frontService();
}
@Override
public void onDestroy() {
// TODO Auto-generated method stub
super.onDestroy();
Log.i(TAG, "onDestroy");
}
@Override
public int onStartCommand(Intent intent, int flags, int startId) {
// TODO Auto-generated method stub
Log.i(TAG, "onStartCommand");
return super.onStartCommand(intent, flags, startId);
}
class MyBinder extends Binder {
public void toDo() {
Log.i(TAG, "toDo");
}
}
/**
* 前台服务
*/
private void frontService() {
Notification notification = new Notification(R.drawable.ic_launcher,
"Notification", System.currentTimeMillis());
Intent notificatiOnIntent= new Intent(this, MainActivity.class);
PendingIntent pendingIntent = PendingIntent.getActivity(this, 0,
notificationIntent, 0);
notification
.setLatestEventInfo(this, "Title", "Content", pendingIntent);
startForeground(1, notification);
Log.d(TAG, "onCreate() executed");
}
}
Demo的下载地址:http://download.csdn.net/detail/two_water/9591717
因为电脑有加密系统,所以只要把上面的类复制到对应的java文件就可以运行了。
二、远程服务
说到远程服务(remote service),我们怎么创建远程servie呢?
其实在普通的service基础上,我们只要在配置文件中注册Service的时候将它的android:process属性指定成:remote就可以了!
注意:remote前面是有个冒号的!如下图:
package com.liangdianshui.service3;在服务类中,通过MyAIDL.Stub来实现MyAIDL.aidl中的两个方法,然后在onBind()方法中将MyAIDLService.Stub的实现返回,其他的跟普通service差不多!因为Stub其实就是Binder的子类,所以在onBind()方法中可以直接返回Stub的实现。
interface MyAIDL {
String combineString(String str1,String str2);
int countChar(String str);
}
package com.liangdianshui.service3;在MainActivity中,ServiceConnection中的代码。可以看到,这里首先使用了MyAIDLService.Stub.asInterface()方法将传入的IBinder对象传换成了MyAIDLService对象,接下来就可以调用在MyAIDLService.aidl文件中定义的所有接口!
import com.liangdianshui.service3.MyAIDL.Stub;
import android.app.Service;
import android.content.Intent;
import android.os.Binder;
import android.os.IBinder;
import android.os.Process;
import android.os.RemoteException;
import android.util.Log;
public class MyService3 extends Service {
private static final String TAG = MyService3.class.getSimpleName();
MyAIDL.Stub mBinder = new Stub() {
@Override
public String combineString(String str1, String str2)
throws RemoteException {
// TODO Auto-generated method stub
return str1 + str2;
}
@Override
public int countChar(String str) throws RemoteException {
// TODO Auto-generated method stub
return str.length();
}
};
@Override
public IBinder onBind(Intent intent) {
// TODO Auto-generated method stub
return mBinder;
}
@Override
public void onCreate() {
// TODO Auto-generated method stub
super.onCreate();
Log.i(TAG, "onCreate");
Log.i(TAG, "MyService3 process ID:" + Process.myPid());
}
@Override
public void onDestroy() {
// TODO Auto-generated method stub
super.onDestroy();
Log.i(TAG, "onDestroy");
}
@Override
public int onStartCommand(Intent intent, int flags, int startId) {
// TODO Auto-generated method stub
Log.i(TAG, "onStartCommand");
return super.onStartCommand(intent, flags, startId);
}
}
package com.liangdianshui.service3;运行我们的程序,并点击“开启远程Server”,看下打印出来的Log:
import android.app.Activity;
import android.content.ComponentName;
import android.content.Intent;
import android.content.ServiceConnection;
import android.os.Bundle;
import android.os.IBinder;
import android.os.Process;
import android.util.Log;
import android.view.View;
import android.view.View.OnClickListener;
import android.widget.Button;
public class MainActivity extends Activity implements OnClickListener {
private final static String TAG = MainActivity.class.getSimpleName();
private Button mBtStartRemoteService;
private Button mBtStopRemoteService;
private Button mBtBindRemoteService;
private Button mBtUnbindRemoteService;
private MyAIDL mAIDL;
private ServiceConnection mCOnnection= new ServiceConnection() {
@Override
public void onServiceConnected(ComponentName name, IBinder service) {
// TODO Auto-generated method stub
mAIDL = MyAIDL.Stub.asInterface(service);
try {
int result = mAIDL.countChar("liangdianshui");
String str = mAIDL.combineString("liangdianshui", "hello");
Log.d(TAG, "countChar: " + result);
Log.d(TAG, "combineString : " + str);
} catch (Exception e) {
e.printStackTrace();
}
}
@Override
public void onServiceDisconnected(ComponentName name) {
// TODO Auto-generated method stub
}
};
@Override
protected void onCreate(Bundle savedInstanceState) {
super.onCreate(savedInstanceState);
setContentView(R.layout.activity_main);
initView();
Log.i(TAG, "MainActivity process ID:" + Process.myPid());
}
private void initView() {
// TODO Auto-generated method stub
mBtStartRemoteService = (Button) findViewById(R.id.bt_start_remote_server);
mBtStopRemoteService = (Button) findViewById(R.id.bt_stop_remote_server);
mBtBindRemoteService = (Button) findViewById(R.id.bt_bind_remote_server);
mBtUnbindRemoteService = (Button) findViewById(R.id.bt_unbind_remote_server);
mBtStartRemoteService.setOnClickListener(this);
mBtStopRemoteService.setOnClickListener(this);
mBtBindRemoteService.setOnClickListener(this);
mBtUnbindRemoteService.setOnClickListener(this);
}
@Override
public void onClick(View v) {
// TODO Auto-generated method stub
Intent intent3 = new Intent(MainActivity.this, MyService3.class);
switch (v.getId()) {
case R.id.bt_start_remote_server:
startService(intent3);
break;
case R.id.bt_stop_remote_server:
//点击后会发现不能停止远程service,因为远程service和本程序不在同一个进程
stopService(intent3);
break;
case R.id.bt_bind_remote_server:
bindService(intent3, mConnection, BIND_AUTO_CREATE);
break;
case R.id.bt_unbind_remote_server:
unbindService(mConnection);
break;
}
}
}
其实远程service跟普通service开启和关闭基本是一样的,就是绑定服务那里不同,因为是建立在不同进程间的通信!那我们来看下绑定远程服务和解绑的效果图吧:
可以看出,打印出来的log信息,把远程服务的方法的结果打印出来了!
Demo的下载地址:http://download.csdn.net/detail/two_water/9592054
因为电脑有加密系统,所以只要把上面的类复制到对应的java文件就可以运行了。


 京公网安备 11010802041100号 | 京ICP备19059560号-4 | PHP1.CN 第一PHP社区 版权所有